Microsoft Word has an inbuilt feature that lets users draw arrows in words. Arrows are useful on various occasions – to explain as a flow chart, create your images, or play with text to make it more engaging. Here we explain how to draw arrows in word and how you can do it.
Draw an arrow in Word
Word has many arrow shapes. You can access them from the Insert tab of the Main menu.
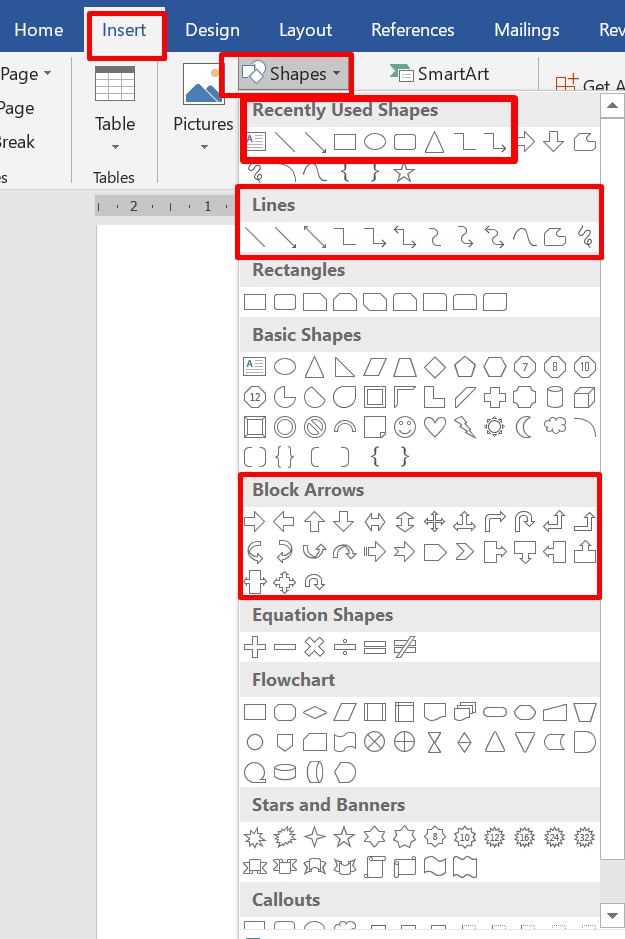
Go to Insert menu. Search for Shapes and Click it.
If you observe, there are many arrows in the library – single-sided arrows, double-sided arrows, block arrows, curved arrows, etc.
Here we give some examples of how to use the arrows in Word.
Example 1: Using Single-sided arrow
When to use: Use when the meaning has to be implied in one way.
Example:
- In a flow chart that is indicating a one-directional path.
- In a chemical reaction
- Just to indicate a simple path of what happens next.
How to use: Just click from the arrow options in the Insert.
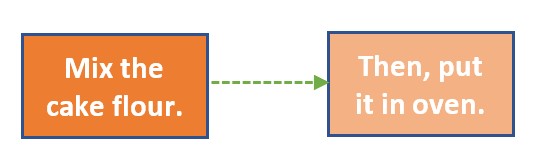
An example is shown here.
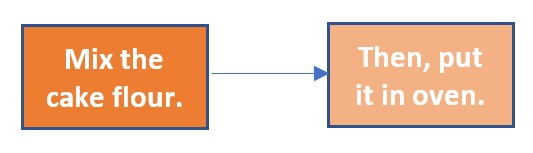
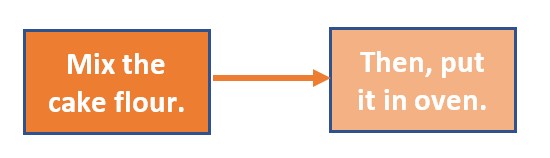
Start the arrow from box 1 and point it towards box 2. It’s done.
By default, the arrow will be thin and has its color. You can change the thickness (weight), style, and the color of the arrow as shown below:
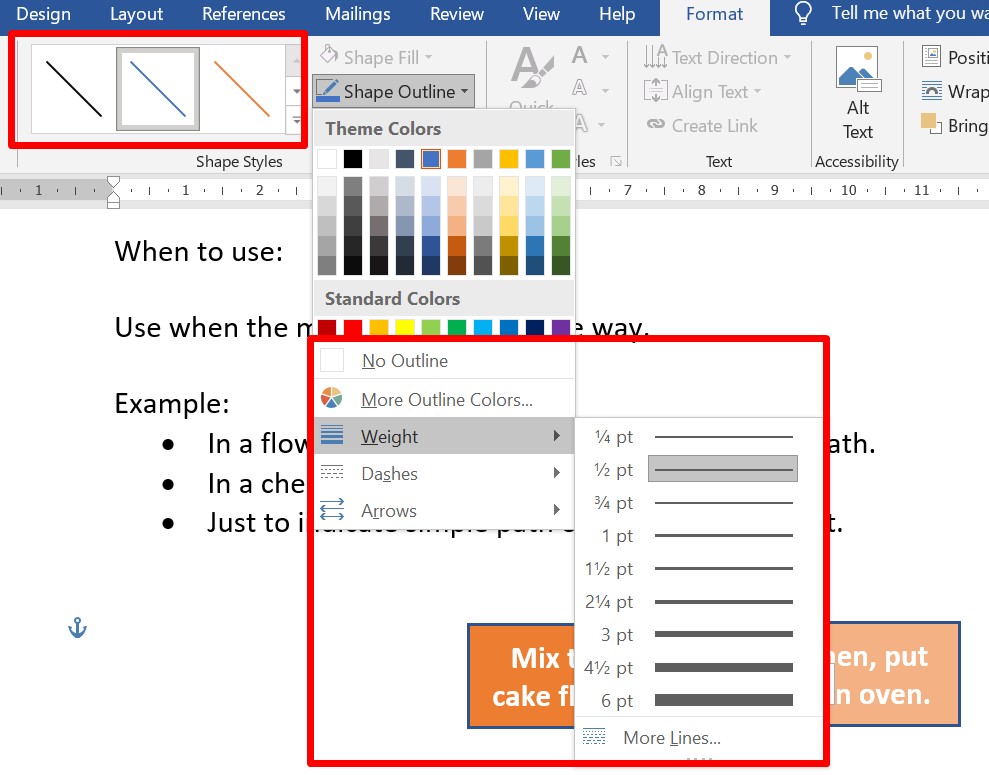
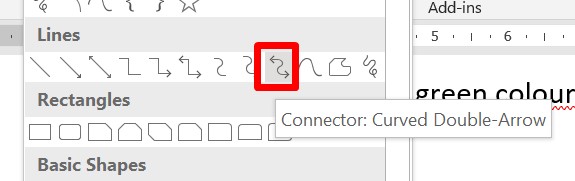
Double click the arrow you inserted. You can find the options for editing the arrow.
Arrow with Orange color and 2 ¼ weight.
Choose from the options and customize your arrow. You can see the options for arrow color, the weight (thickness) of the arrow, and the arrow style (dashes and arrow options).
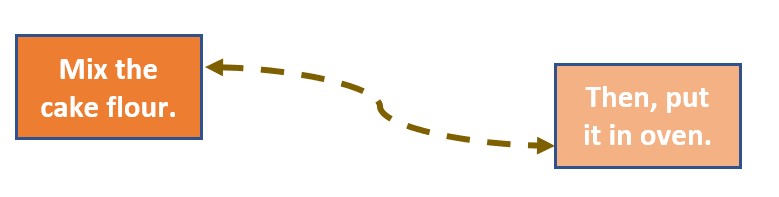
Arrow with square dot and green color.

Arrow with rounded heads on both sides and in black color.
Similarly, you can choose bent arrows too.
Use the arrow starting points to adjust the alignment of the arrow. Change the color, weight, and style as mentioned above. Formatting text makes it beautiful.
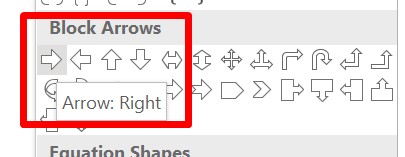
Example 2: Using block arrow
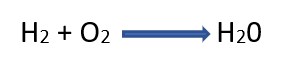
An example to use an arrow:
Hydrogen + Oxygen gives water.
H2 + O2 –> H20
Choose block arrow from the arrow options, click it.
Place the cursor where you want to insert the arrow and just drag it. Arrow is placed.
Now you can customize it as per your preferences. Here we want to highlight the reaction; so we increased the font size and accordingly increased the block arrow’s size and changed the color.
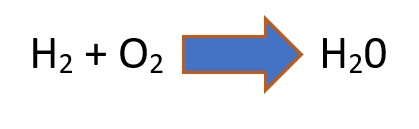
If the reaction is bidirectional, you can choose a two sided arrow.
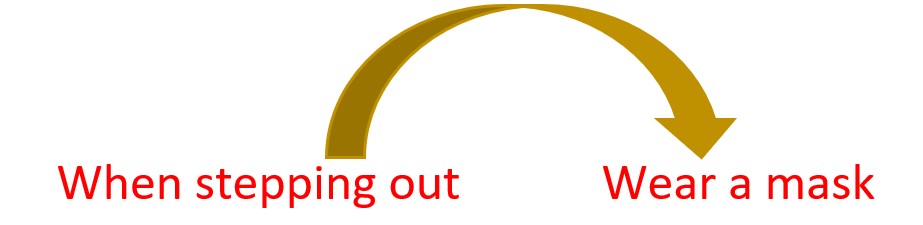
Example 3: Using curved arrow
Let’s see one more example for arrow usage.
When stepping out, wear a mask
We want to make this message an image.
Let’s see how we can use the arrow here. We chose a curved down arrow, you can pick any arrow of your choice.
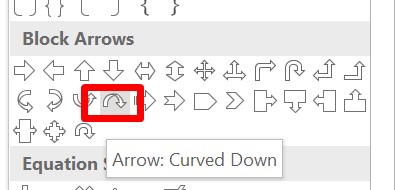
Click the curved down arrow. Bring your mouse to the top of the stepping-out text. Start from there and pull the mouse towards wear a mask. The arrow gets placed.
Now let us customize this and beautify it. We pulled the arrow from the top and gave it a golden color from the color section of an arrow.
So, which arrow are you using next?
