How to open RAR files is a struggle for non-techies. Mostly, users who receive large files in the .rar format find it difficult to extract the file using the extractor tool.
Extractor tools are used to unzip these large files without breaking them into parts.

The extractor tool is a utility that gets back the file into its original size.
Large files – Compression
Large graphic files created in Adobe Illustrator, Adobe Photoshop, and CorelDraw can be shared by zipping them. Now, let us understand what is zipping? If you want to share any large file, it can be compressed and sent to recipients over the Internet. Compressing a file is referred to as reducing the file size without breaking it into parts. This process is also called “zipping the file”. When you zip the file, it can be zipped in the formats such as . RAR, .ZIP, .7ZIP, and so on.
Usually, large files are shared over the internet – either via email or FTP or online transfer tools. The types of large files that can be shared are – executables (.EXE), audios (.MP3 / .MP4), videos (.MOV, .MPEG4, .MP4), images (.PNG), documents (.DOCX, .PDF), presentations (.PPTX) and so on.

Another reason for using zip files is to transfer large files quickly. Many times, the file size greater than 500MB does not get transferred due to the Internet bandwidth issue or interruption in the transfer. Compressed files usually get transferred faster than the original files.
Till now, we just spoke of files. What about folders? Can we zip folders also? The answer is, yes. You can zip folders as well. For example, your project has multiple folders, each folder containing HTML, CSS, image files and JavaScript files. You can zip this folder containing multiple folders and files. Share it with recipients.
Before we go to the steps on how to extract zip files, let us see how we zip the file or folder first.
Zip a file or folder in Windows and Mac [step-by-step guide]
- Windows 10:
- Go to https://www.win-rar.com/start.html?&L=0. Click the Download WinRAR button.
- For the 32bit Windows operating system, click the link located below the button.
- Once downloaded, go to your download folder and search for the WinRAR-x84-570.exe file.
- Double-click to install the WinRAR tool.
- Specify the path where you want to install.
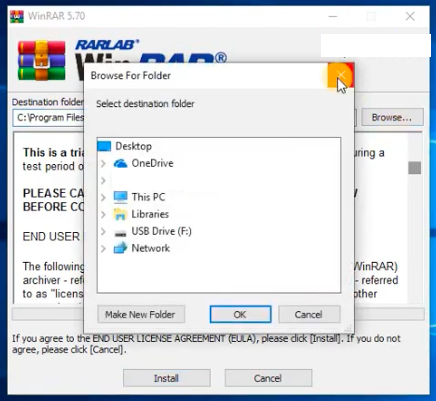
- Select the folder and click OK.
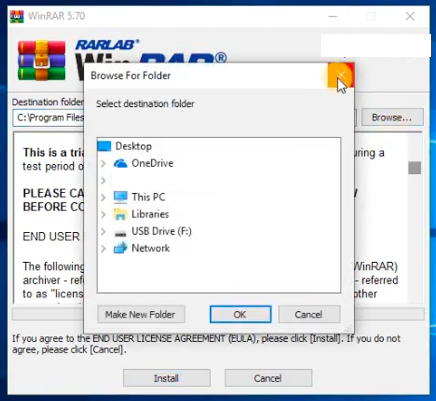
- Click Install. The installation starts.
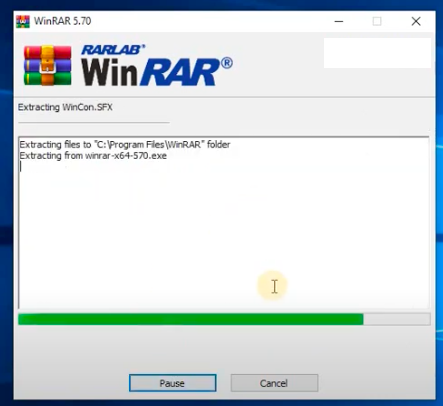
- Once installation is complete, select the file extension that you want to use for compressing your large files. Also, add the shortcut icon on the desktop by selecting the Add WinRAR to Desktop check box.
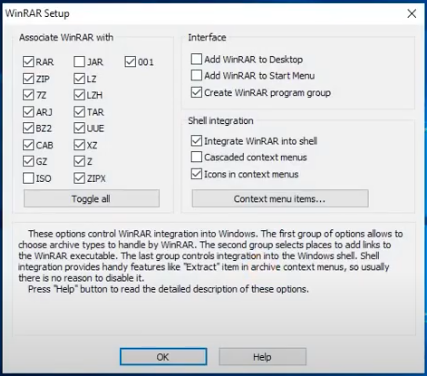
- Click OK. The success dialog appears as below.
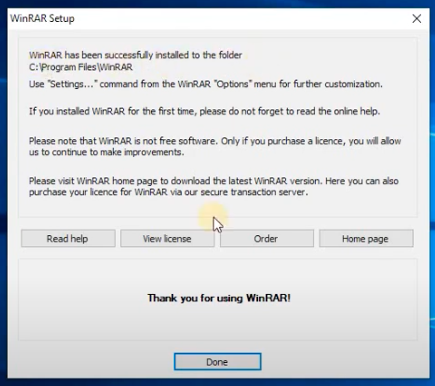
- Click the Done button. Now, you are ready to zip or compress your file.
- Open your desktop. You will see the WinRAR icon.
- Double-click the icon. The window will appear as shown.
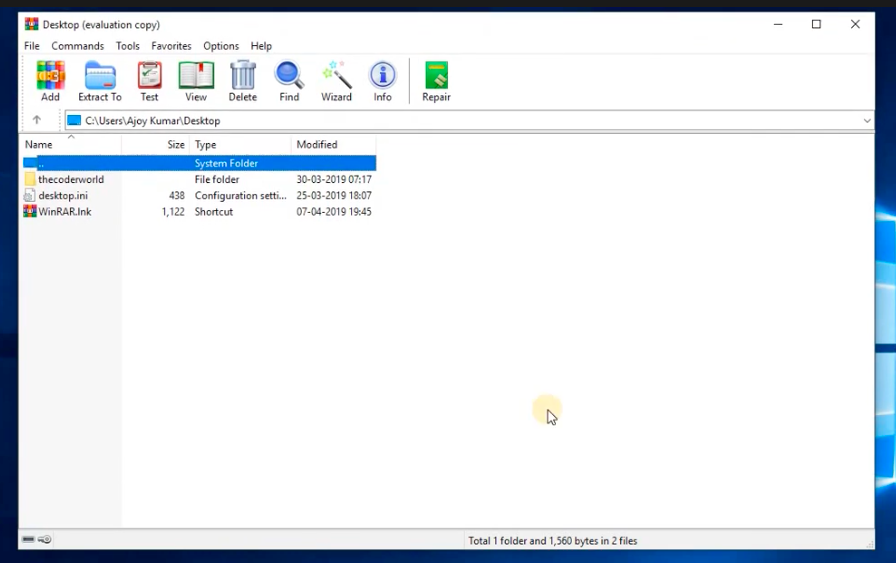
- Click the Add icon on the toolbar located above the directory path.
- Select the file you want to zip. The following dialog box appears.
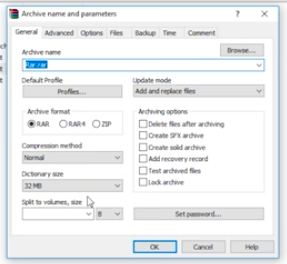
- Enter the filename and make sure the Archive format selected is RAR. Click OK.
- You have successfully zipped a file. You are ready to share the file with your recipients.
- Alternatively, you can follow these steps to create a RAR file. Select the file or folder you want to zip, right-click and select the Add to Archive option. Enter the name of the file you want and click OK. The rar file is created successfully. The right menu has other options as well. Compress and email option allows you to create the rar file with email attachment in your email client. You just need to add the recipient’s name and send it. Another option is to create the rar file with the same name of the file or folder you are zipping.
- If you select multiple files and right-click, the default rar file name will be Archive.rar. You can rename the the rar file and transfer or share with the recipient.
- Mac
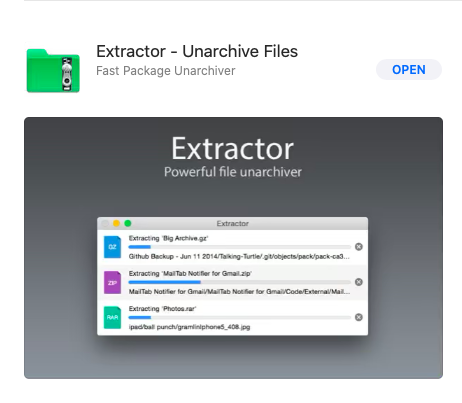
- Go to the app store. Select the Extractor tool and click the download.
- Once done, click the Open button.
- Go file or folder you want to compress.
- Right-click the folder and select the Compress “{filename}” option from the right-click menu.
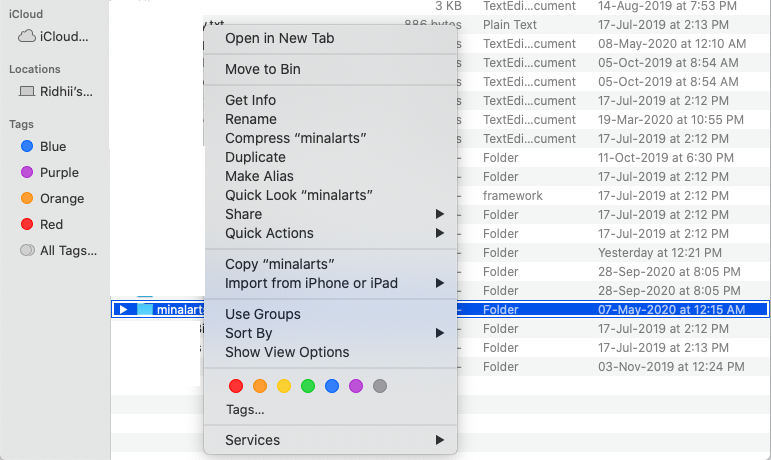
- The folder will be compressed and shown with the same name as the zip file extension.
Now, one interesting thing about the zip tools is – they are the same for creating the zip and extracting the zip. No need to search for separate tools for extracting the files you have received.
Another tip I would like to bring here is that – All the file extensions with. ZIP, RAR, and other zip formats right-click menu has extract options, whereas normal folders and files (images, videos, audios) have the right menu option as compressor add to the archive.
Extract / Open / Unzip folders and files [step-by-step guide]
- Windows 10:
- Go to the location of the folder or the file you want to extract. In the example, the file is located on the desktop.
- Select the zip file and right-click the same. You will see a list of options as below.
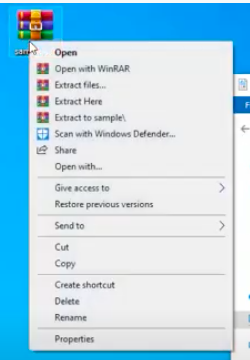
- Let’s understand the right menu options that can be used.
- Select the Extract files option. All the files will be extracted in the default path set.
- Select the Extract Here option. All the files will be extracted on the desktop.
- Select to the Extract to {filename} option. A new folder will be created with the filename and all the files will be extracted in that folder.
- You can choose any of the options to extract your rar or zip files.
- Mac
- Select the zip or rar file you want to extract.
- Right-click → Open With → Extractor.app.
- In some machines, you will get the pop-up granting permission to extract or open the zip file. Click the Grant Permissions button.
- Click the Open button to extract the file. Your file will be extracted in the folder named with the same name you had given to the zip file.
- You will see the notification on the top right corner with the message that “extraction has completed”.
- Click the Show button. The folder will be opened and you will see the extracted files. (To see the extracted files later, click the Close button.)
- An alternative way to extract the zip file is by opening the extractor tool first and then extracting the file.
- Double-click to open the extractor tool. The small square window appears as below.
- Click the + icon and select the file you want to extract.

- Click the Open button. All the files inside zip will be extracted. NOTE: In this case, the extractor tool has not created the folder. The files are extracted on the desktop.
Now, let us take another interesting scenario where your zip file contains a zip file and other individual files. What happens in this case? Extracting this zip file will extract these individual files and the zip file will remain zip only. You will need to perform the extraction again to extract that zip file. Let us see how we perform extraction steps in this case.
- Right-click the zip file and extract it in any one of the ways mentioned above.
- You will see the folder with extracted files. In this, you will see one more zip file.

- In the Archive 2 folder, images and the Archive.zip are extracted.
- Right-click the Archive.zip file. Select the Open option. The file will be extracted in the folder Archive (shown below).

Zip extractor tools are free. Whenever you install the tool in Windows, it will ask for the prompt to buy for an extended period. But, still you can use it for free for lifetime. All you need to do is just skip the prompt of buy and it will allow you to continue zip and extract actions.
Concluding Remarks
Zip and RAR are the most used file extensions for file compression and extraction. The zip file compression rate is lower than . the RAR file. You can make zip files password protected. The. RAR extension does not offer password protection. Zip compression uses a 2.0 encryption methodology which is weaker than the methodology AES-128 encryption used in RAR file compression. Based on your requirement, you can choose the file format, either ZIP or RAR.
Read: How to Empty Recycle Bin in Windows 10 – Clear Recycle Bin

