You might be having an idea about what is a server, even if you are a newbie in the technical field. In this article, we are going to learn “How to install XAMPP server in Windows 10” with the help of simple steps.
Before fleeing to the steps of installing the XAMPP server, let’s get the idea about what truly a XAMPP server is?
XAMPP is an all-in-one server package that supports PHP and Perl server-side programming. It also involves an email and FTP server as well as a self-signed certificate to use the apache web server in the HTTP model.
This package is available for various platforms such as Linux, Windows, Mac, and Solaris. Among all the packages the XAMPP packages are most prevalently used. It was mainly developed by the Apache friends organization to hype the use of the Apache web server in the web development environment. However, in this article, we are installing it in Windows 10.
Now, let’s learn how to install the XAMPP server in windows 10, step by step.
STEP 1: Open your browser and go to www.apachefriends.org.
It is an official website of the Apache friends organization, where you can find various server packages specifically for various platforms and apps.

STEP 2: Go to download category
Now, search for the “Download” category in the menu or you can also click on the link for which Operating System you want to download the XAMPP server, here we are downloading for Windows 10.
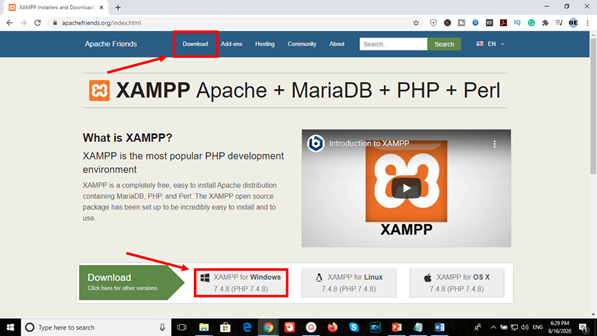
STEP 3: Download the file
In the “XAMPP for Windows” section, choose the PHP version you want to download and click on the download button.

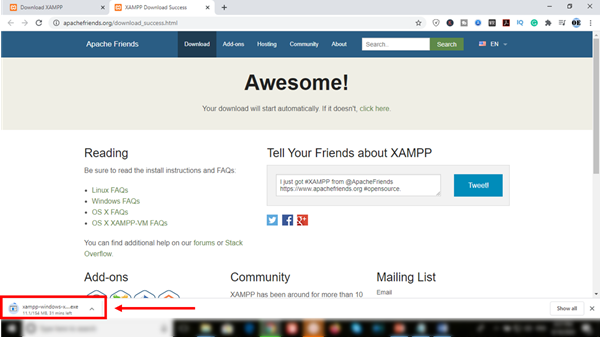
Once you click on the download button, it immediately pops a tab signifying that the automatic download will start soon but if it doesn’t work you can on the “click here” link.

In our case, it started downloading with one tap as shown in the image below.
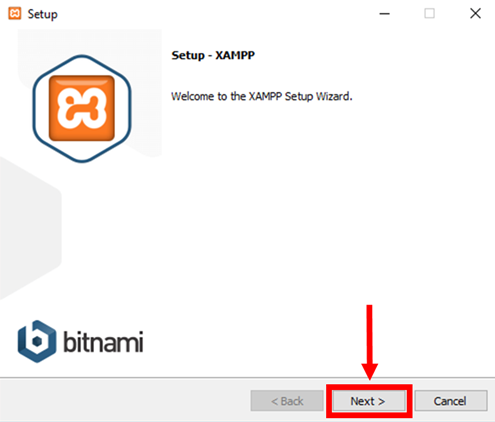
STEP 4: Run the installer
After the download finishes, run the downloaded file, this will start the XAMPP installation wizard. If you encounter any warning asking “Do you want this application to make changes to the system”, Ignore the warning and click Yes. Now, click on next in the XAMPP setup window.
STEP 5: Choose components
The “select components” windows enable you to select which components in XAMPP you want to be installed in your system. There is no compulsion of installing everything contained in the XAMPP package, but feel free to install the entire package and explore it on your own.

Click next to continue the installation process.
STEP 6: Select the installation folder
In this step, you are required to select the folder where you want to install XAMPP. The default location for windows is drive “C” and inside the “program files 84x” folder. However, if you have received any “warning” regarding UAC because of an activated UAC on your system, you would rather choose to install to a folder outside the “program files 84x” folder. The alternate method is to disable UAC (User Account Control) as an administrator through the control panel. It will open a User account settings form where you have to drag the slider to never notify.
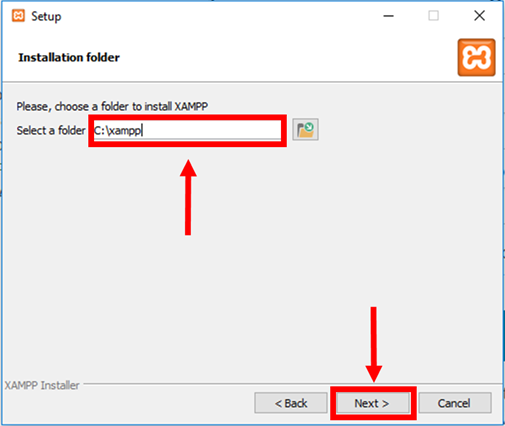
Select the folder and click on next.
STEP 7: Select the language
In the final step, once you complete the installation process, you have to select the language between English and German. The user can select the language in which S/he is comfortable and click on save.

STEP 8: Bitnami for XAMPP
In this window, it will show you Bitnami’s pre-packaged web applications specifically for use in XAMPP such as Joomla, WordPress, and Drupal. Apache friends organization has collaborated with Bitnami for providing these pre-packaged solutions.
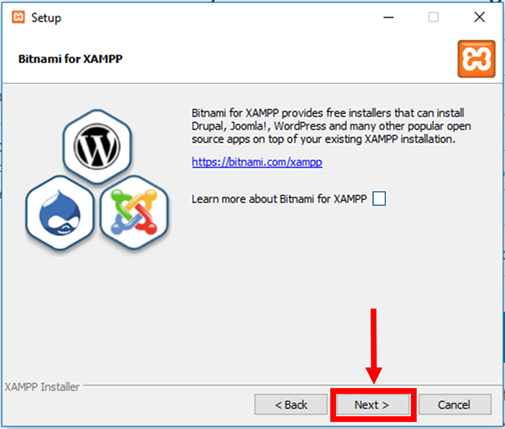
You can learn more about Bitnami by leaving the “learn more about Bitnami for XAMPP checkbox checked, or if you want to skip this step remove the checkmark from the checkbox, and click the Next button to continue.
STEP 9: Ready to install
Now, this is the last step for starting the installation process. Click on next.

STEP 10: Welcome to XAMPP wizard
Here the progress bar will show the status of the installation wait until the installation is finished.

STEP 11: Installation complete
As soon as the installation process accomplishes, pops up a window asking the user whether he or she wants to start the control panel at the current instance. Check the box “Do you want to start the Control Panel now?”, if you wish to start it and uncheck the box if you don’t want to start it at that moment and tap finish.

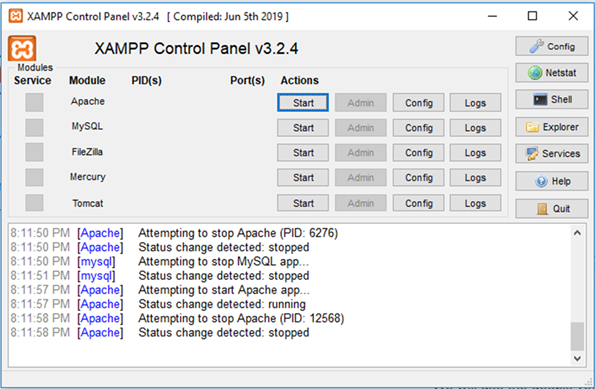
STEP 12: Running the XAMPP
If the user follows the whole process in a proper manner, the XAMPP will be successfully installed and the control panel will start with ease. Now, tap on the start button corresponding to Apache and MySQL.
So, this is how you can install and run XAMPP successfully on windows 10.
Read: How To Choose The Best WordPress Theme For Business.
