I have come across this common issue with the users who have bought an SSD for their computer system not detecting or not showing up in the disk management.
You do not have to worry about this issue. It is quite common. The issue can be fixed. Before I take you to the resolution, you need to figure out the symptoms of this.
Possible Causes – New SSD Not Showing Up
Below are the possibilities that you may experience with your new SSD.
SSD Driver issue
The SSD driver that is installed in the system may not be compatible with the SSD you have installed. This is the first troubleshooting step that can be taken to figure out the issue.
Nowadays, you can easily find driver installation files on the Internet of the SSD model you have bought. Updating the driver in the operating system may resolve this issue.
Resolution to SSD Driver Issue
Perform the following steps to update the latest driver compatible with the new SSD.
- Open Device Manager from System Tools under the Manage section of “This PC”.
- The Device Manager options shall appear in the second pane on the window.
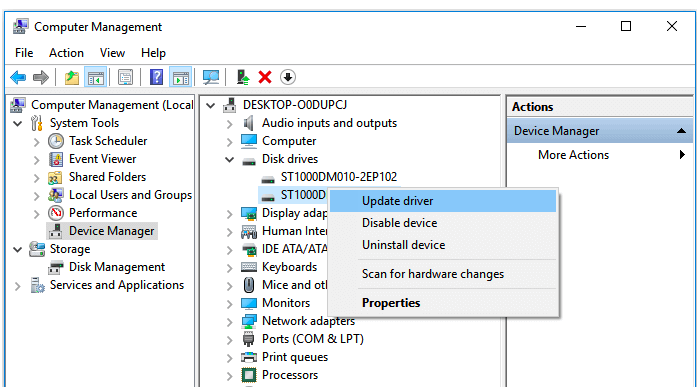
- Expand Disk drives as shown above. A list of storage drives shall show up.
- Choose the SSD drive and right-click to view the menu.
- Choose the Uninstall device option.
- Remove the SSD from the system and restart.
- Post system restart, connect the SSD.
- Check if it is shown up. If not, update the driver and see if it is detected.
Unsupported file format error
File system may have been corrupted if this error is occurring. This issue is related to the operating system. To recover the file system, the hard disk needs to be formatted. There are chances of data loss while you are troubleshooting this error.
Resolution to corrupted file format
- Install a data recovery tool from the Internet. In this, EaseUs tool is taken as an example. (Reference link – https://www.easeus.com/datarecoverywizard/free-data-recovery-software.htm)
- Open the EaseUs data recovery wizard. You shall see an SSD as a drive.
- Choose SSD and click Scan.
- Once the scanning process is finished, you shall view lost data in the list.
- Recover the SSD files using the Recover button on EaseUs tool.
Missing drive letter
If the system has more than one partition and the drive letter of the SSD is conflicting with the existing partition, this issue may occur. The SSD cannot be detected due to this conflicting drive letter. This can be easily fixed using the Disk Management component in Windows OS.
Resolution is to assign a drive letter to SSD
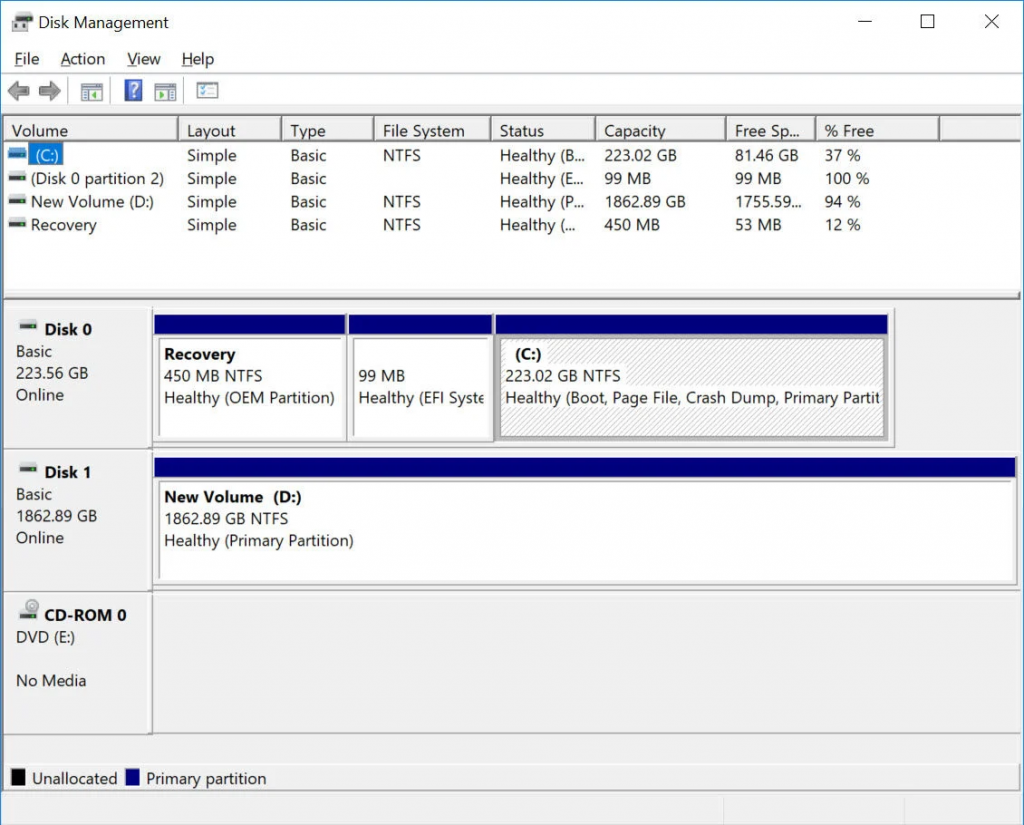
- Go to Disk Management from your computer settings.
- Right-click the SSD and select the Change Drive letter and Paths option.
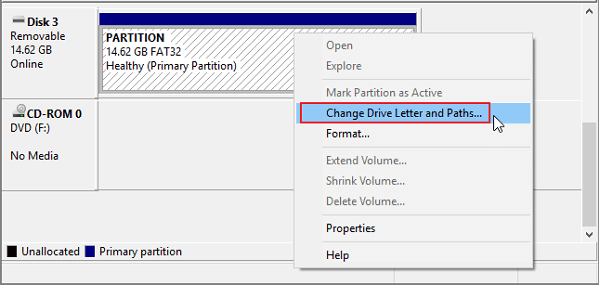
- Click the Change button and choose the drive letter from the list that is available on the screen.
- Click OK to submit the changes.
- The drive letter conflict will be resolved.
- Restart the system and see if the SSD is detected.
Takeaway
In assembled Windows computers, there are chances of version/model conflicts with storage devices and drives. There are ample solutions available for the SSD issue that occur. All you need is to find the symptom or error that is shown on the screen and based on that you can try any one of the solutions provided above. You may also search on the Internet with the exact keyword text of the error that is shown up. It is suggested if you cannot find the resolution, please contact the computer solution provider to avoid damage or data loss.
