Introduction
Microsoft is a very well-known Information Technology company located in the United States of America. It was founded in 1975 by Bill Gates and Paul Allen. The company had launched some fantastic software products. Windows Operating System and MS Office products are some of them. Microsoft (MS) Excel is the one that is irreplaceable. Gradually, it made its own PCs and tablets, Xbox, and so on.
Let us see the range of Microsoft products in the following categories.
Software
People know Microsoft with its software products as mentioned above. Operating System, MS Office suite that contains applications such as MS-Word, MS-Excel, MS-PowerPoint, MS-Outlook, MS-Access, MS-OneNote, and so on. These are the desktop applications used in the daily activities of all.
After Google introduced the concept of Google Apps and a one-stop solution for all applications used in one account, Microsoft came up with the same ideology and packaged all its desktop applications, and started providing the same on the Web.
Microsoft Teams and Skype are the most used solutions in these COVID-19 days for professionals working from home. They get connected via these apps for group meetings and discussions.
Office365 is a very useful email solution for small and large-scale businesses that provides email services with easy to use interface and online office products to work on. OneDrive is available for storing documents and files that can be quickly attached in the email and sent out to the recipients.
Hardware
Microsoft has also launched PCs, Laptops, and Tablets for all types of users. For the digital game players, it has launched Xbox which is the most used device. All the accessories are available from Microsoft for gaming.
Development
For building desktop and Web applications, Microsoft already has introduced the .Net platform for the developers. Visual Studio, Windows server and other development solutions for machine learning (ML), game development, app development, and microservices development are also part of Microsoft products.
Cloud Computing Platform
Azure is a cloud computing platform that is offered by Microsoft. It was launched in 2010 and gradually, it has started giving better solutions. The platform provides virtual instances to create a development environment on Linux, CentOS, Ubuntu, and Windows platforms. In addition to that, it provides services to set up cache servers, configuration servers, and many more. It facilitates a customized Azure console based on your application needs.
MS Azure also provides high-end configuration environments. Based on your industry, you can:
- Setup Azure for Machine Learning
- Setup Azure for Blockchain
- Setup Azure for Gaming Development
- Setup Azure for Security Solutions
- Setup Azure for Analytics Solutions
- Setup Azure for Quantum Solutions
- Setup Azure for Hybrid Cloud Solutions
Azure Console Features
Before we get into the details steps of setting up Azure, let us see some of the best features of Azure Console.
- Azure Console has an easy-to-use interface where the new user can get easily acquainted with the features.
- Azure Console dashboard gives an overview of services installed and the setup of all the services at one glance.
- Azure Console supports open source technology platforms such as Linux. This widens the scope of users getting onto the Azure platform.
- Azure Console also provides easy scaling options of resources based on the usage of services.
- Azure Console is a unified portal on which you can build, manage and monitor all the products.
- Azure Console also supports Role-Based Access Control (RBAC) where one can have admin rights to manage all the services whereas the other user can be restricted to only deploy the service.
Setup Azure
It is easy to set up the Azure console. Let us see the steps to create an instance in Microsoft Azure’s free tier service.
- Open your browser and go to https://azure.microsoft.com/en-in/overview/. The Microsoft Azure home page appears.

- Click the Free account link on the top right corner.

- Click the Start free button. The Sign-in page appears.
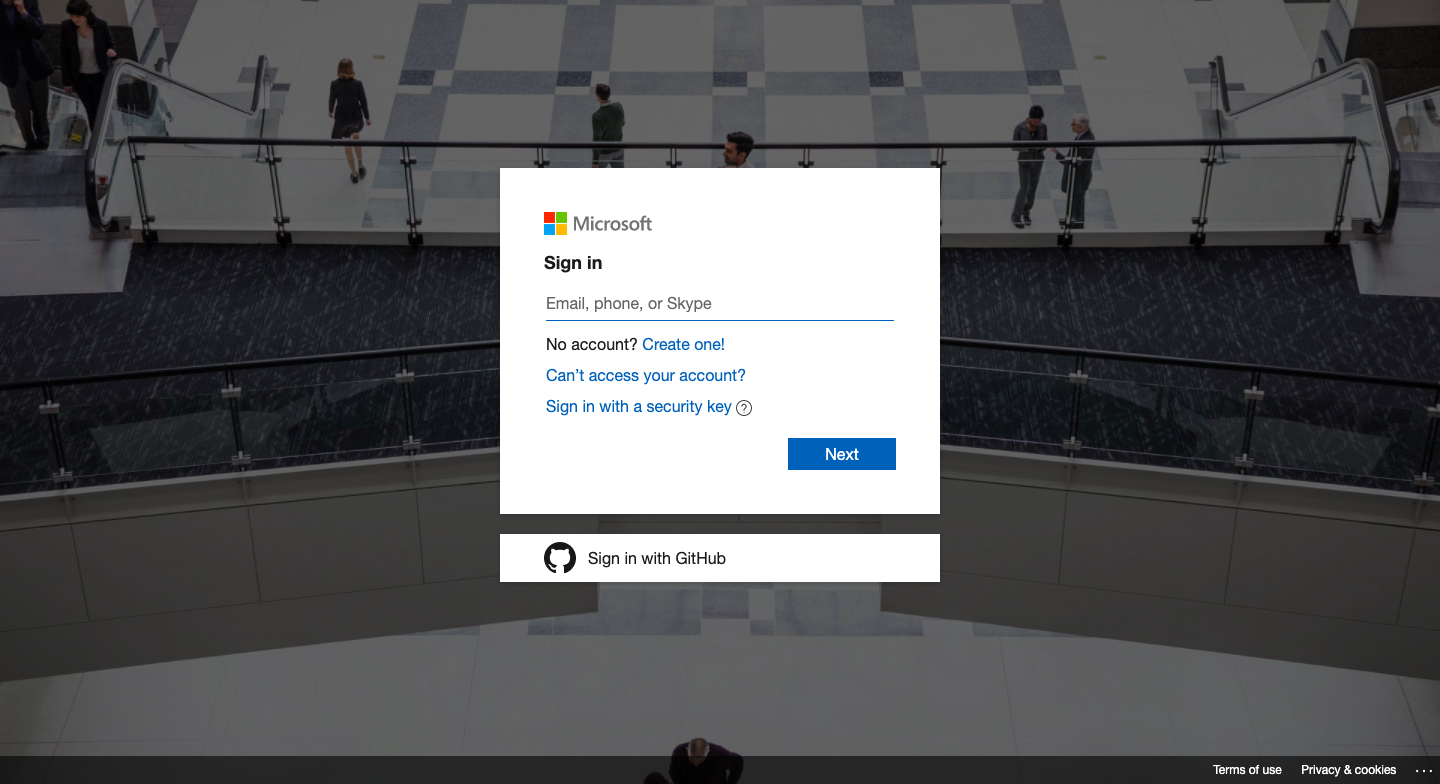
- Enter the outlook email address in the text box with the Email, phone, or Skype placeholder.
- If your GitHub account is linked with an Outlook account, you can use the Sign in with GitHub option to proceed.

- Click the Next button after you enter the email address. Enter the password in the Password box. Click Next. The Try Azure for the free page appears as below.

- The first step is to enter your company details. Fill in all the details below.
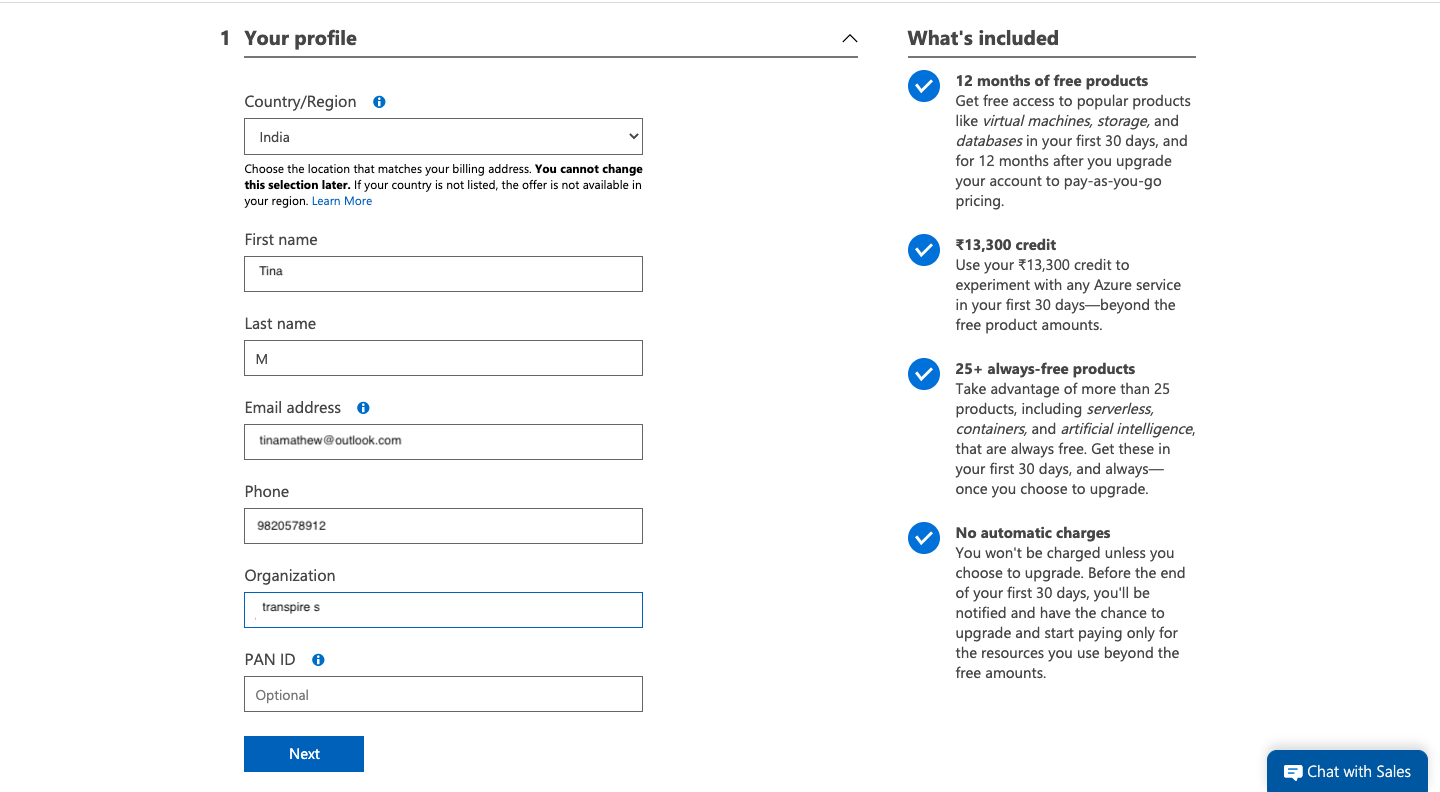
- Enter your first name, last name, email address, phone number, and name of the company. Click the Next button.
- The Identity verification by phone section appears. Enter the phone number you wish to link with your Azure account.
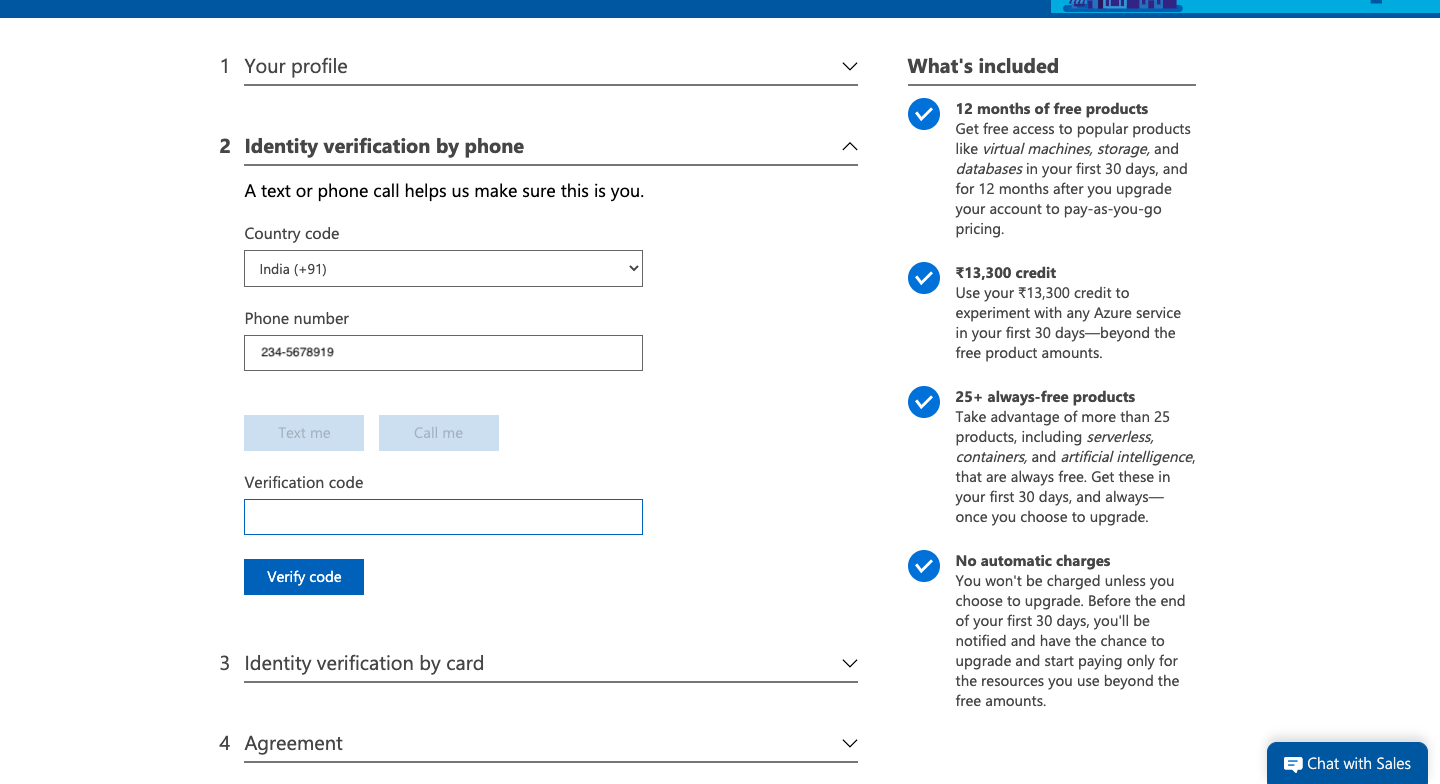
- Once you enter the number, the Text me and the Call me buttons are enabled.
- If you wish to receive OTP (One Time Password) by SMS, click the Text me button.
- If you wish to receive OTP (One Time Password) by getting a call, click the Call me button.
- Enter the OTP in the Verification code box.

- Click the Verify code button to verify OTP. Upon successful verification, you will get to step 3.
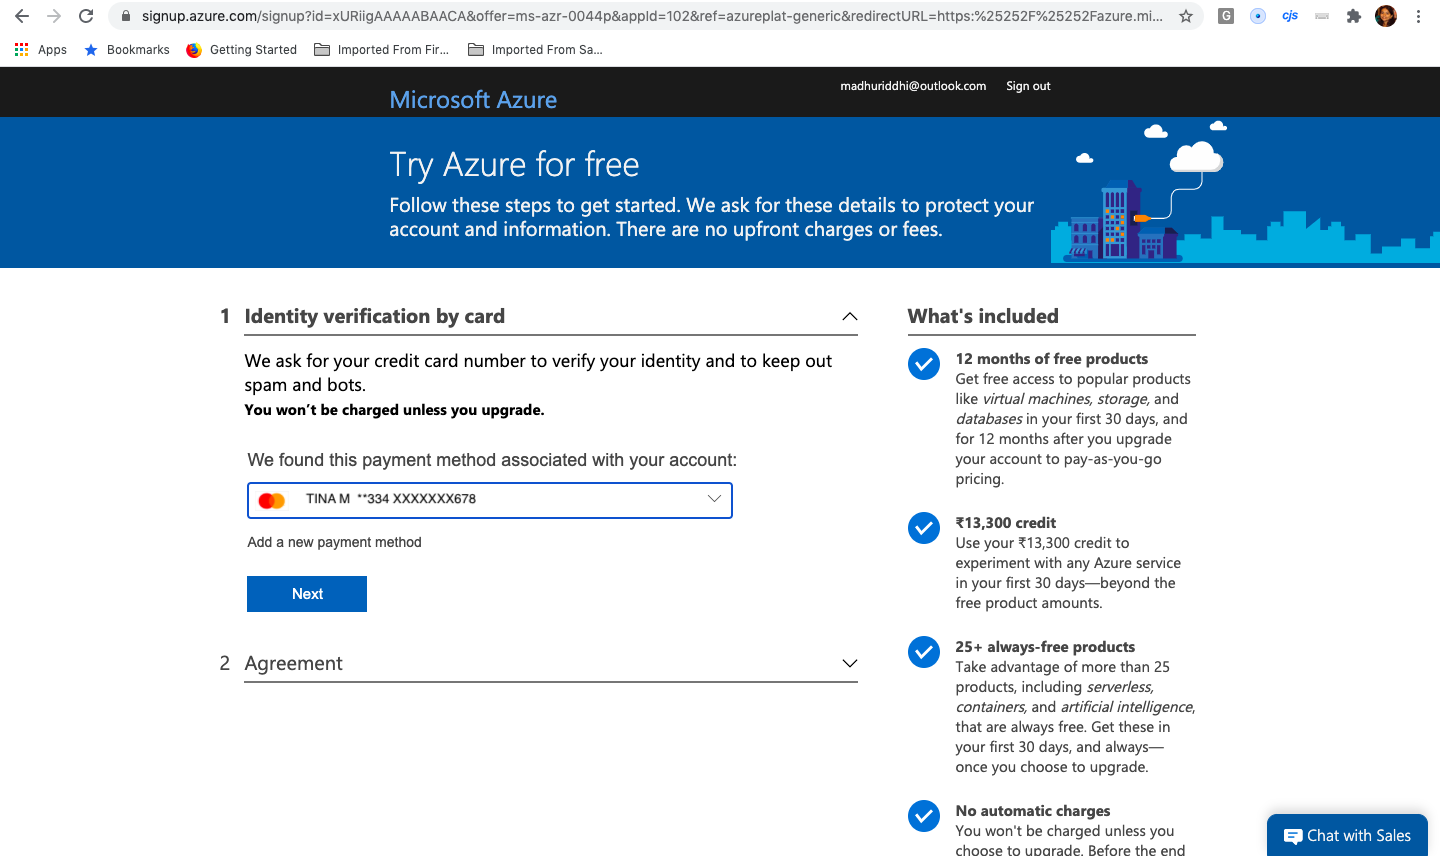
- The Identity verification by card form appears as below.

- Enter your credit card information in this form.
- Enter your name in the Cardholder name box.
- Select the month and the year of your card expiry in the Expires section. (Note this information is available on your physical card.)
- Enter the CVV number in the CVV box. (This information is available on the back of your card in 3 digits.)
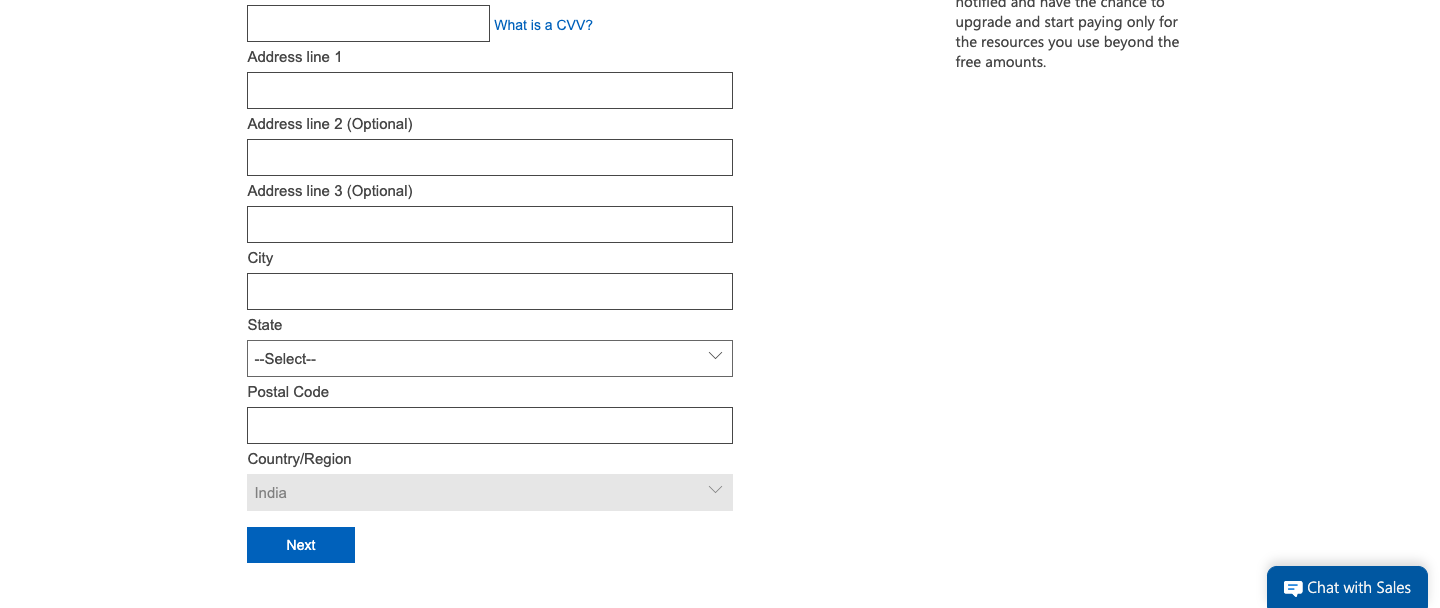
- Enter the address information including City, State, and Postal Code information.
- Click the Next button. You will receive OTP (One Time Password) on your mobile number linked to the card.
- Enter the OTP on the page that appears below.

- In the OTP box, enter the code you have received.
- Click the Submit button. The credit card information is saved successfully and shown below.
- Click the Next button. The agreement section appears.

- Select the I agree.. check box. The Signup button is enabled.
- Click the Signup button. The welcome screen appears.
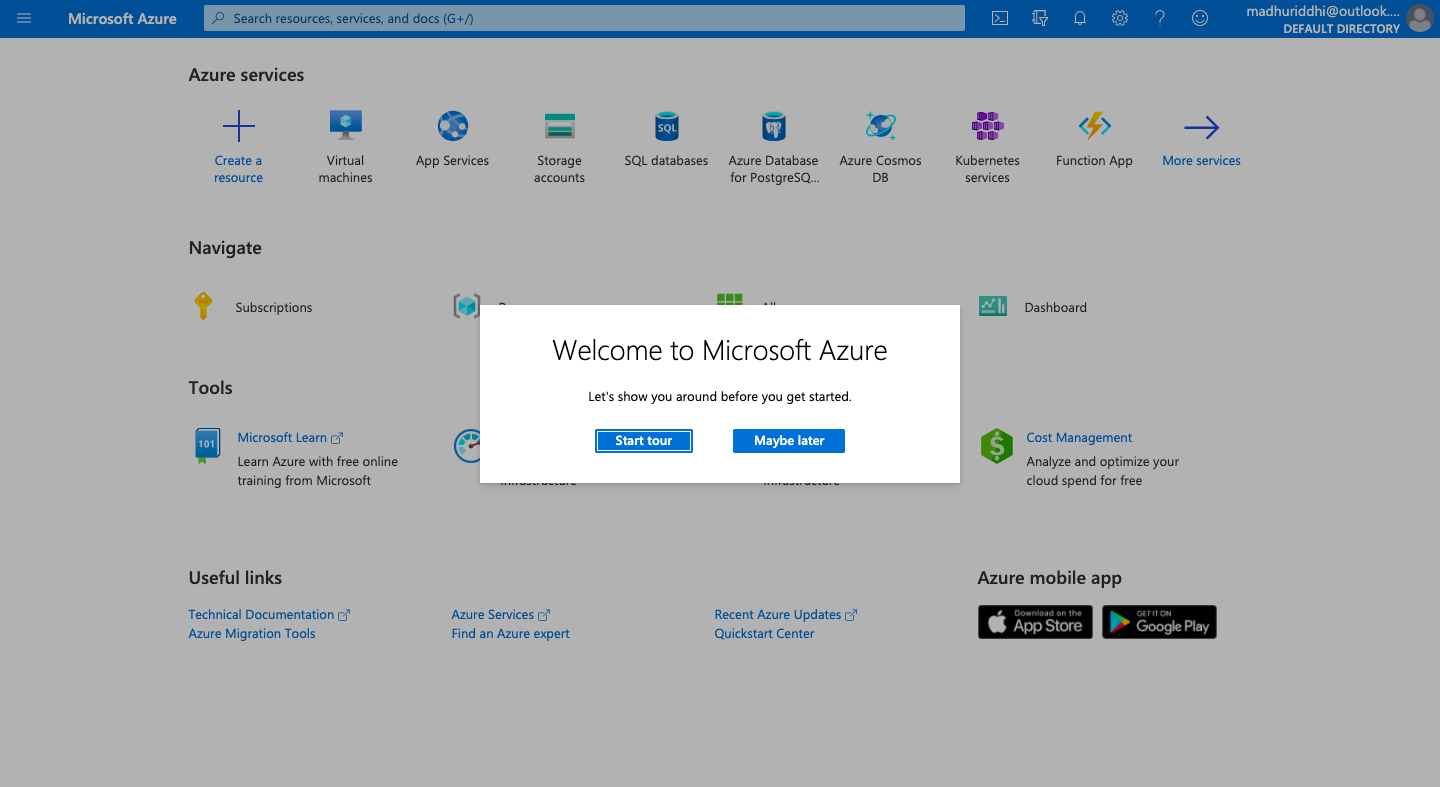
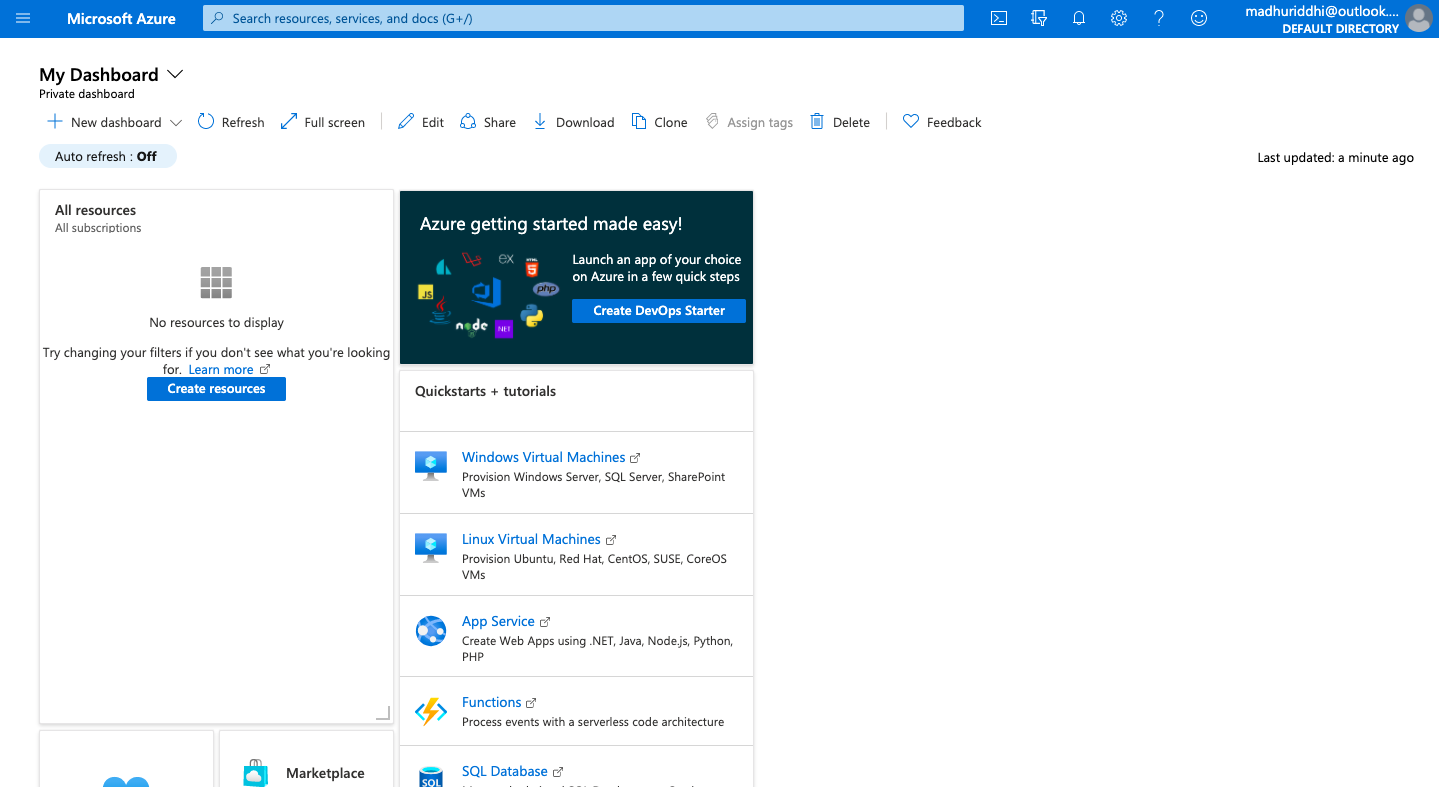
- Click the Maybe later button to skip the tour. The dashboard screen appears. Click the icon on the top left corner. The panel on the left with all the services is shown.

- Click Create a resource option and select Web app. The steps to create an instance for the Web app resource appears.
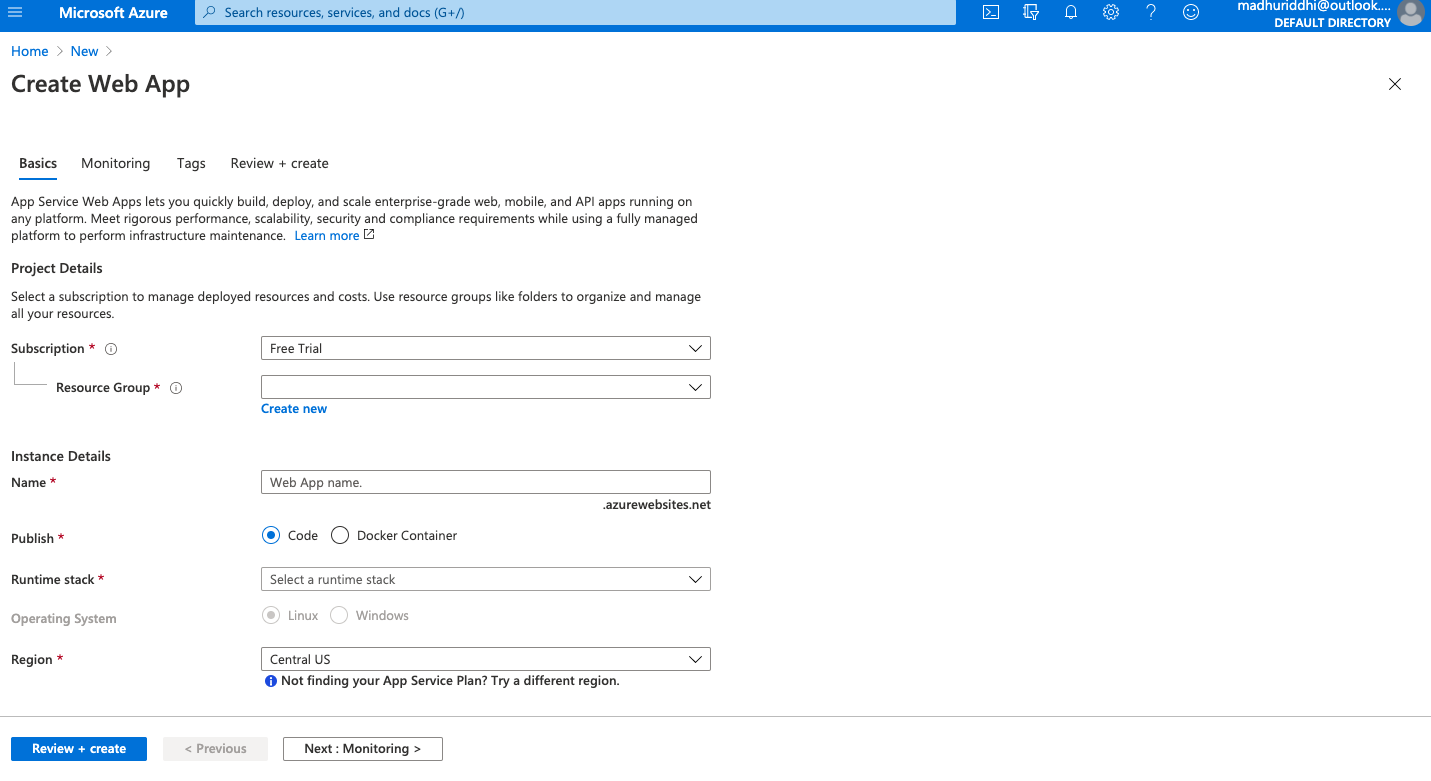
- Enter the name of the resource group. If not created before, click the Create new link. The pop-up with the text box appears. Enter the name you wish to give.
- In the Instance Details section, enter the name of your Web application. Select the Docker Container option if you wish to deploy your application with docker.
- Select the runtime stack from the drop-down. If your application is created on NodeJS, select the same. Based on the selected stack, the operating system will be automatically selected. If you have selected the NodeJS stack, the operating system would be Linux.
- Click the Review+create button. The Monitoring tab appears.

- Keep the default option and click the Review+create button. The Tags tab appears.
- Leave details blank and click the Review+create button. The Review+create tab appears. All the details of your instance appear on this page.
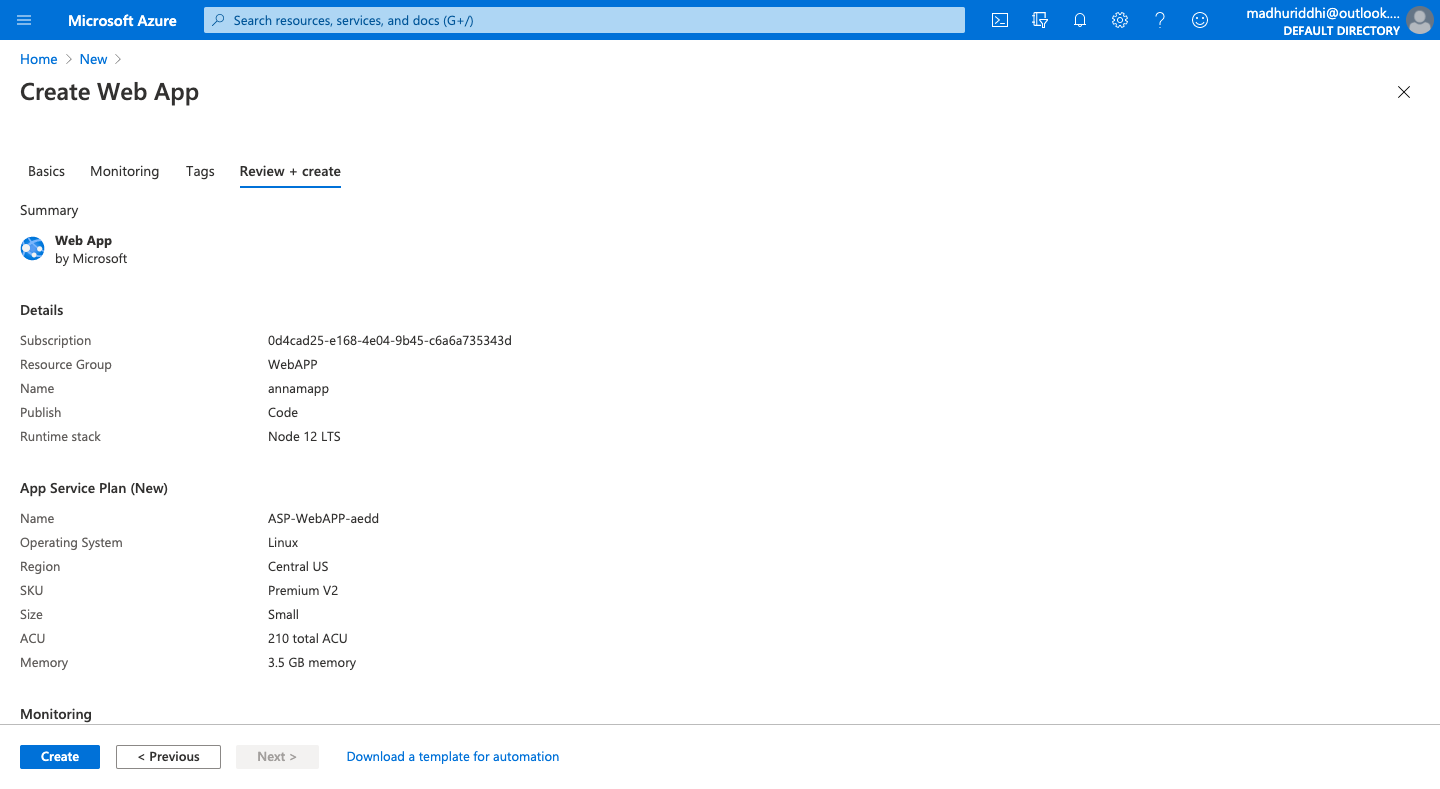
- Click the Create button. The instance/console is created successfully.
- You can manage the newly created instance from the dashboard.
Conclusion
Microsoft Azure is cheaper in terms of pricing than Amazon Web Service (AWS). For the Microsoft developers and DevOps team, it is convenient to set up Azure because the user interface (UI) is similar to other portals of Microsoft.
Again, the decision-making of choosing the right platform for system deployments, maintenance, and enhancements is in hands of the organization and its DevOps team.
Read: How to Setup AWS EC2 Server
