Introduction
We all are familiar with the word BIOS. We see this every day when we switch on PC/laptop, and it will say, press F2 for BIOS settings. We skip that information, and the computer boots successfully. BIOS is a technical term known as Basic Input/Output System (BIOS).

Let us understand this term and its importance in a very simple language. A computer is fully operational with all its hardware assembled properly and software installed.
What connects the hardware components and the software that are being installed in computers? The motherboard is one of the hardware components, or you can call it the computer’s core part. The motherboard has a program written that connects all the ports of the keyboard, mouse, monitor display, other USB ports, hard disk drive, Read Access Memory (RAM), CD drive, and so on. This program is written in the Read-Only (ROM) memory of the central processing unit (CPU). The program is called firmware or BIOS. The program is made up of code, memory, and data. The program is initiated while booting or starting/switching on the computer/laptop. When the computer starts, your operating system (OS) needs to get a signal for it to function. BIOS gives this signal to the operating system, and the operating system starts with all the software components installed, including hardware drivers of the keyboard, mouse, monitor, CD Player, hard disk, and so on.

Need to update BIOS
In general, you do not need to see your BIOS setup when your computer is working smoothly. Whenever there is a change in hardware component or any malfunctioning of hardware is detected, or your computer’s RAM has stopped working, you may want to check the version of your BIOS and see if any update is required for firmware upgrade.
It is recommended not to use your BIOS setting if your computer operations are smooth without any issues. Sometimes, it creates an issue if you upgrade your BIOS software. The working system may stop functioning due to an incompatible version of BIOS with hardware installed in the system.
BIOS for Windows
Before getting into your PC/Laptop’s BIOS settings, you need to check the BIOS version in your system.
If your system is booting as expected and the operating system loads properly, you can check the BIOS version from the Control Panel of the system.
- Go to Control Panel → Administrative Tools. The administrative tools window appears.
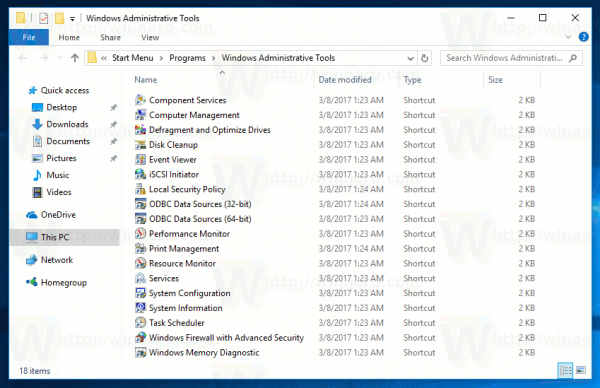
- Click System Information. The system information window appears.

- You will be able to see the BIOS version.
Update BIOS Software – Windows
Once you have checked the version of your BIOS, you can update the BIOS in case the computer is not functioning properly. Please refer to the Need to Update BIOS section above for more information.
The BIOS can be accessed by pressing F2, F12, F1, DEL, or F10 keys based on the manufacturer. When you are switching on your PC/laptop, the information prompt appears with one of the above keys mentioned to access your BIOS settings.
Please find the list below to access BIOS settings based on your computer/laptop model for Windows 10.
| Manufacturer | Computer Type | BIOS Key |
| Lenovo | Laptop | F1 or F2 or Nano button |
| Lenovo | Notebook | F2 |
| Lenovo | Desktop | F1 or F2 |
| Dell | Laptop / Desktop | F2 |
| Asus | Laptop | F2 or DEL |
| Asus | Notebook | F2 or DEL |
| Asus | Desktop | F9 |
| Acer | Notebook | F2 |
| Samsung | Notebook/Ultrabook | F2 |
| Toshiba | Laptop | F2 |
| Compaq | Presario | F10 |
| HP | Desktop | F10 or ESC |
| HP | Laptop | F10 |
| HP | Notebook | F10 or ESC |
| HP | Tower | F1 |
To open BIOS:
- Switch on your desktop/laptop.
- Press F2 to access the BIOS setup. (This step needs to be performed before the operating system is loaded.)
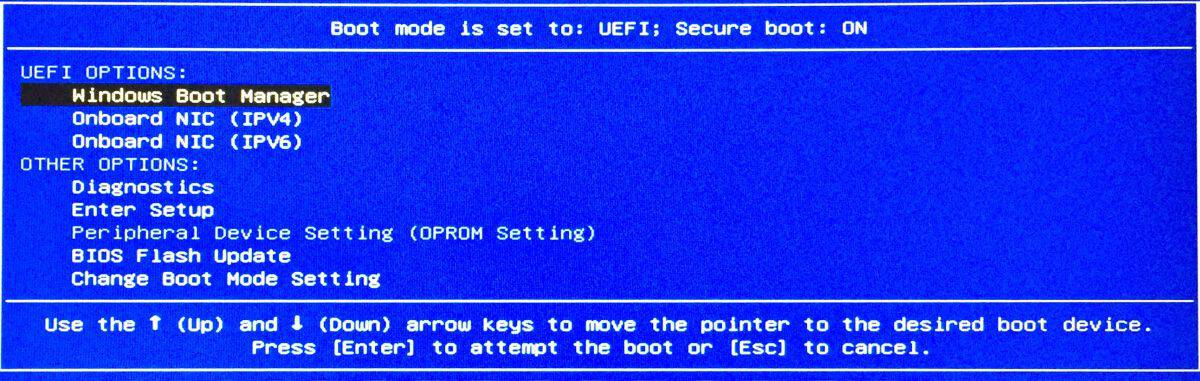
- Use keyboard / keypad’s UP and DOWN arrow keys to enter BIOS setup.
- Use the DOWN arrow key to go to the BIOS Flash Update option. The update information screen appears.
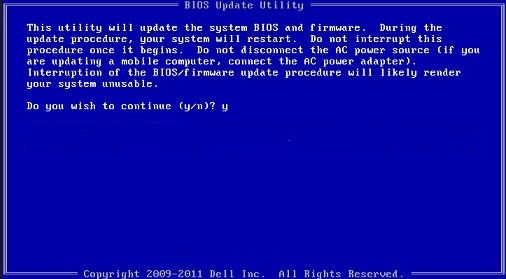
- Type y to continue BIOS Update.
- Once updated, the computer restarts.
- Please check the updated version from the System Information window of the Control Panel.
BIOS for Linux
If your desktop/laptop has Linux operating system installed, you need to know the commands to enter BIOS setup.
dmidecode is the command to enter and view BIOS-related information such as serial number and version.
Follow the steps below to enter BIOS in Linux.
- Open the terminal. To open it, press CTRL + ALT + T keys.
| ridz@hostname:~pwd /home/ridz |
- Type sudo.
| ridz@hostname:~pwd /home/ridz sudo -i |
- Press ENTER. Enter the password of your computer profile.
| ridz@hostname:~pwd /home/ridz sudo -i Password: |
- Press ENTER. Now, you are in the root folder.
| ridz@hostname:~pwd /home/ridz sudo -i Password: root# |
- Enter the command dmidecode -t baseboard.
| ridz@hostname:~pwd /home/ridz sudo -i Password: root# dmidecode -t baseboard |
- You will see BIOS information on the screen.

Update BIOS Software – Linux
Use the below command line from your Linux system. This will install the ISO file.
| ridz@hostname:~pwd /home/ridz sudo -i Password: root# yaourt -S geteltorito |
Next, you will need to extract this ISO file and copy it into a USB/Flash drive. After entering the command below, press ENTER.
{filename} = replace with the actual filename.
| ridz@hostname:tmp$ ls.{filename}.iso |
The next command to extract the file is –
{filename} = replace with the actual filename.
| ridz@hostname:tmp$ geteltorito -o x230.img {filename}.iso |
Write the extracted file to USB/Flash drive.
{flashdrivename} = replace with the actual device name
| ridz@hostname:tmp$ sudo dd if=x230.img of=/dev/{flashdrivename} bs=64k |
Enter the following command to mount the flashdrive.
| ridz@hostname:tmp$ sudo mount/dev/{flashdrivename1} /media/ridz/ ridz@hostname: cs /media/ridz $ |
Nex, unmount the flashdrive.
| ridz@hostname:tmp$ sudo mount/dev/{flashdrivename1} /media/ridz/ ridz@hostname:~$ sudo unmount/media/ridz |
Reboot the system.
| ridz@hostname:~$ Sudo reboot |
Update the BIOS.
- Press F12 to select your flash drive.
- Select the flash drive and press ENTER. The menu appears.
- Select the Update system program option from the menu—press ENTER.
- Press y to continue BIOS update.
- It will take about 10 minutes to update BIOS. Please do not turn off the computer.
- You will get the message BIOS Updated successfully on the command line window.
- The system will reboot. Once rebooted, please check the computer is functioning as expected.
BIOS for MacOS
It is very easy to enter BIOS using your MacBook. When you start the MacBook, press the following keys simultaneously.
Command + option + 0 + F
Update BIOS Software – MacOS
You cannot manually update MacOS BIOS. macOS updates are released periodically. Whenever there is a new update, and the BIOS update is required for your MacBook, you go to the Apple menu → System Preferences → Software Update.
It is as simple as clicking one button, and your BIOS is updated.
Conclusion
BIOS is a very sensitive component of the computer system. It should be touched upon only if you are confident about how to update BIOS. If you are unsure and are not comfortable with troubleshooting, please take the help of such articles for step-by-step instructions and make sure you follow the exact steps without skipping any.
Good luck troubleshooting with BIOS!
Read: Why Home Automation is needed in the 21st Century
