Word documents allow users to comment on them. It is a viable option to keep everyone updated and discuss the required edits. Besides, it also enables users to maintain notes on the file they are working on.
The comment section on a document file appears on the right-side column with the name displayed on the comment box itself. Herein, you get to know who commented.
While it is an excellent platform for maintaining records and discussions with the team, they come with a few cons. Apart from taking too much space, it also appears on the final printout of the file.
Do you get distracted by the comments section when working on the document?
Are you searching for ways to hide the comments section?
Well, then this read will surely be of your assistance. Users would be acquainted with a precise method of removing/ concealing MS word comments in the below sections.
Methods for Hiding Comments in MS Word
This article presents three methods for hiding the comment in the MS Word section viz:
- Show Markup Option
- No Markup and Original Option
- Simple Markup Option
So, let us look at each in detail:
1. Hiding Comments in MS Word by Markup Option
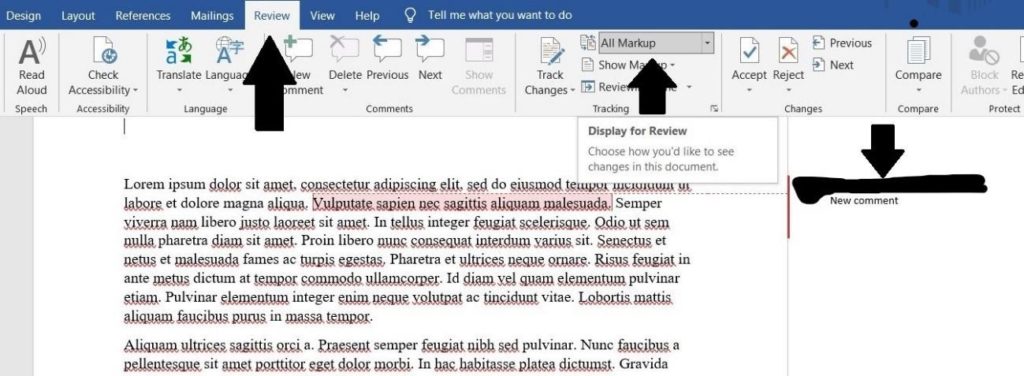
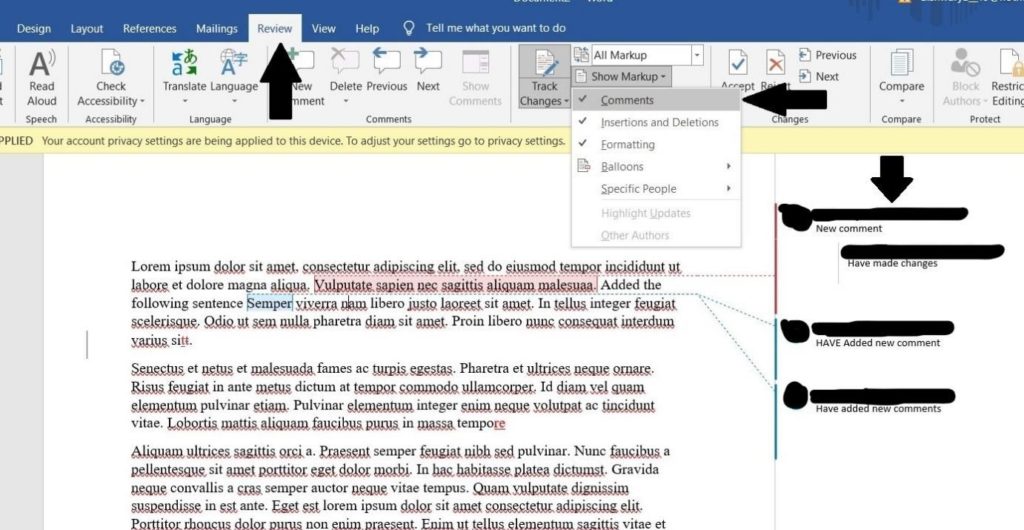
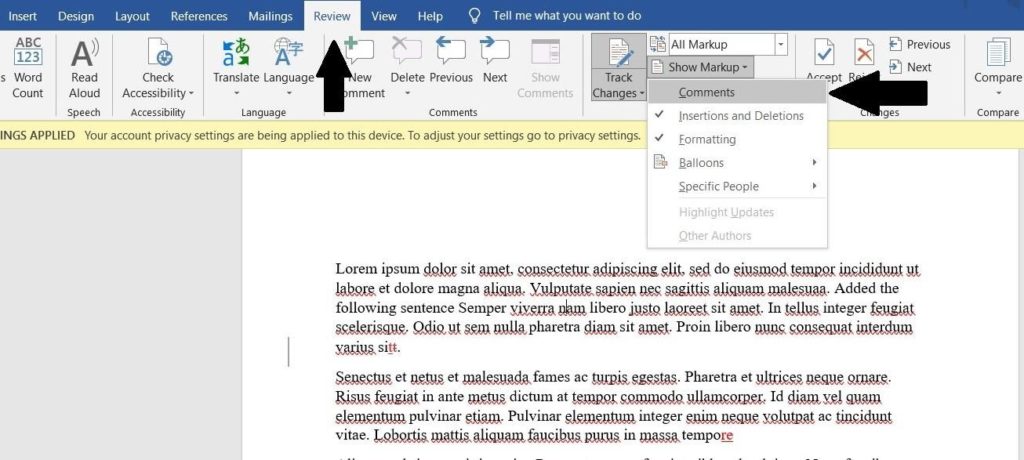
Follow the below-mentioned steps for concealing comments using the Markup Option.
- On the Review tab, select the Show Markup dropdown
- Choose from the dropdown Show Markup
- Click on All Tracks tab and choose Original
- Untick the comments
How do the options work?
The option hides comments without concealing the changes by choosing comments and unticking the option. Besides, it does not affect the markups in the MS word document or the tracked edits. Users can continue editing the word file without having the comment’s section visible
Note: Ensure turning on the comments from the display view after editing the word document.
On the display view tab, click on the show markup option. Your comments shall be visible once again.
2. Hiding Comments in MS Word by No Markup & Original Option
Are you searching for methods to disable comments apart from the changes and markups? The option allows users to hide the changes in the word file. Users can herein also review the file and understand how the document looks after completing the edits. It reverts the word file to its original form, the same as before making updates. Users can hide and track comments in the following two ways:
Below listed are steps for hiding comments and changes:
Hiding comments with No Markup
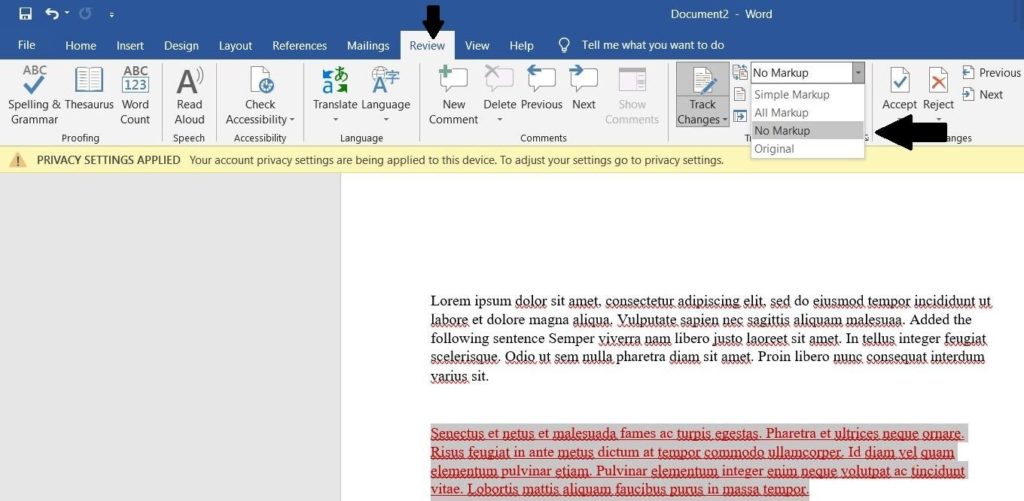
- On the Review Tab, go to the dropdown menu with the All Markup option
- Select No Markup option
Using Original View Option
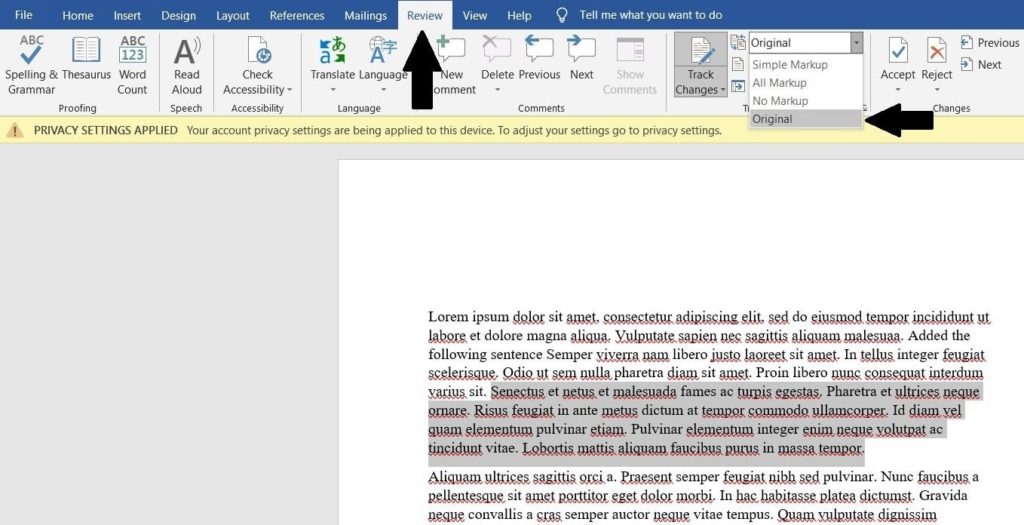
- On the Review tab, find the All Markup option
- Select Original option
How does it work?
Opting for “Original” from the display dropdown helps users disable comments and the changes edited in the word document. The file is reversed to its original form, looking the same as the file before the user added edits and user comments to the file.
Note: Do not forget to unhide the changes made and user comments once you have updated the file. This is an essential step as other team members would not know how to unhide the comment section and find themselves confused.
Do you want the comments visible to be once again? Mentioned below are the steps for reversing them:
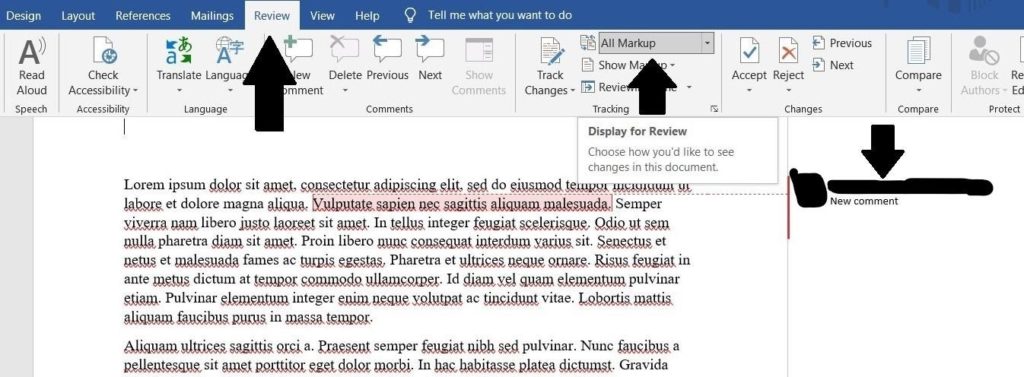
- On the Review Tab
- Click on the dropdown
- Tick the All Markup
How does it work?
All Markup tab once again allows users to view the comments and display edits done by the user. It is also necessary to know that the file will open again in default format after the word file is closed.
3. Hiding Comments in MS Word by Simple Markup
Now coming to another step on how to turn comments invisible yet be aware of the feedback made. Often while hiding comments, they turn invisible to other members of the team. This option allows users to disable comments by selecting Simple Markup. Herein it will enable users to review the edits and choose between the normal and collapsed views.
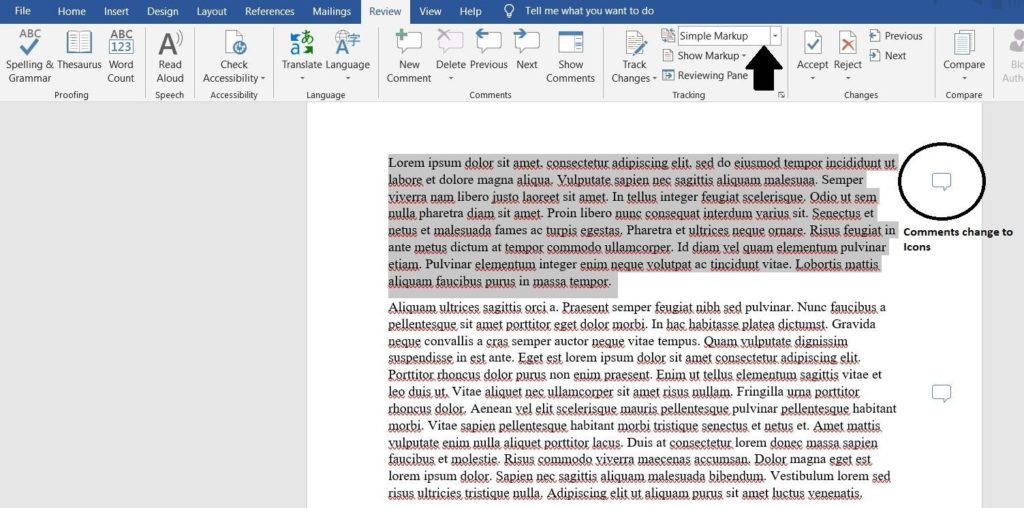
- On the Review tab, go to the dropdown
- Now select the Simple Markup
- Comments will turn into an icon.
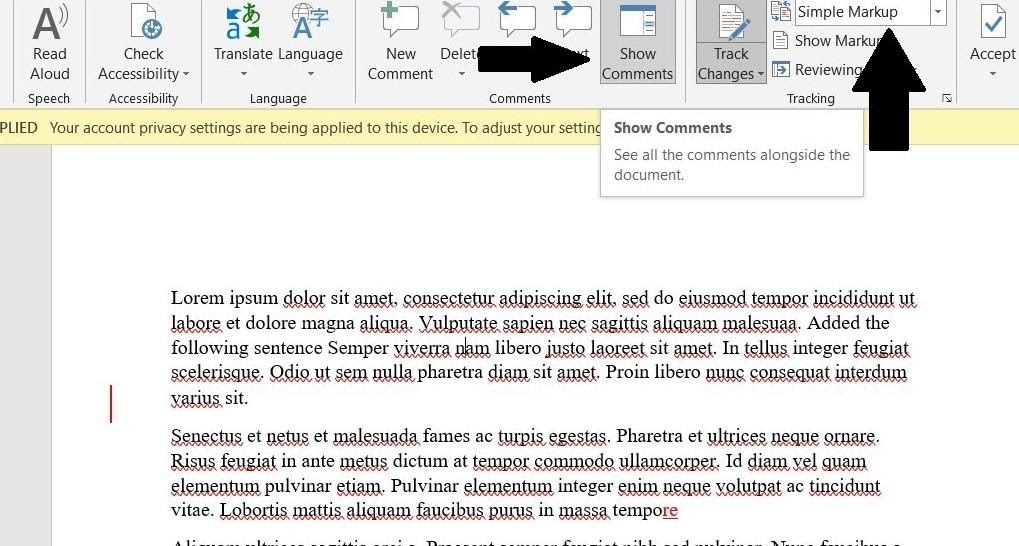
- For displaying the comments again
- On the Review tab, select Show Comments
How does it work?
The “Simple Markup” option collapses comments. However, it does not turn completely invisible. Instead, it is displayed in the form of an icon. Thus, users can still see the comments added and show them in the form of an icon. Users can still view comments by merely clicking the icon.
Another method for turning on comments is by reselecting the Show Comments option on the review tab.
Difference between collapsed and normal view comment
- In normal view displays the name and comment on the right side.
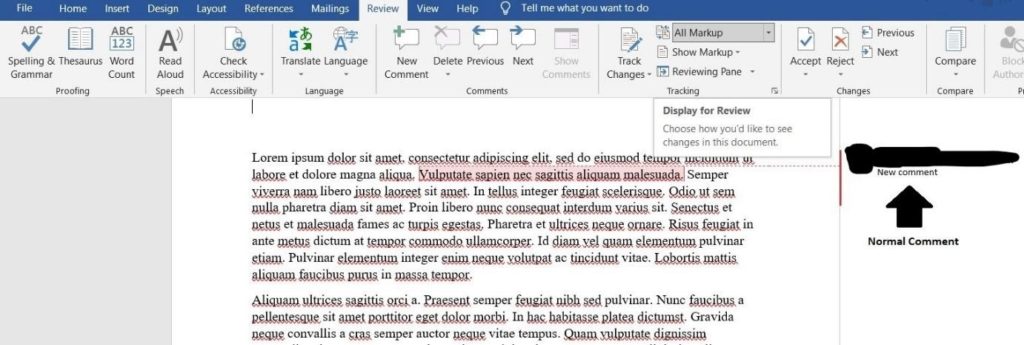
- In collapsed view, comments are visible as an icon displayed yet not completely visible on the right side.
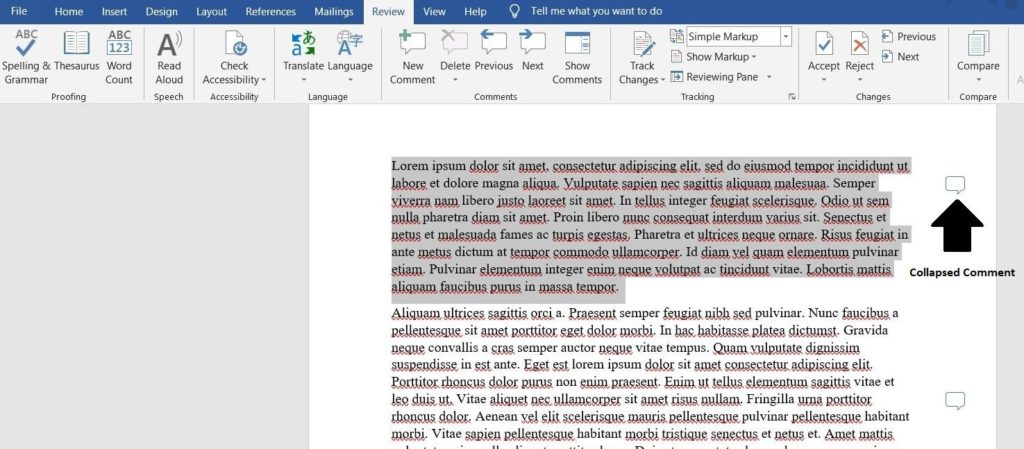
Note: The word file will reopen back in the same format with comments disabled. Hence it is vital to turn back the comments display by reselecting the All Markup. Thereby the comments will be visible to the user once again. Consequently, before saving and closing the file, do not forget to click on the All Markup option.
Conclusion
Edits in the form of comments offer assistance in reviewing a document and updating it further. However, turning the comments invisible presents an excellent medium to update and make edits on the file, take a printout without having the comments section visible, and review how the document appears without markups.
The above-listed methods thus allow users to conceal comments. Besides, users have the option to choose from the varied modes based on their requirement for updating the word file.
Points to note:
Comments that are hidden by any user also turns them invisible to other members of the team. It will be permanently hidden from the view and needs to be turned on again. It may lead to more confusion for members who are unaware of the hidden comments. Hence, we suggest to turn on the comment visibility after finishing the work of editing.
Hence, we have enlisted how to turn on the comments sections and track changes after every method. Follow the points and turn off comments!
You may also like:
- How to Center an Image in Word
- How to Make One Page Landscape in Word
- How to Install Multiple Fonts at Once

