The Create shareable post task on Facebook is referred to as pressing the Share button to publish a piece of content on Facebook to your community. Your community includes friends, groups, the pages you follow and the public.

When published, the one’s friends would be shown the shared material while browsing the Facebook home page and visiting the one’s profile page.
When a customer shares material with their inner circle, this is a genuine endorsement of a brand that is much more powerful than a like or a comment. That’s the ultimate word-of-mouth, and it ensures the advertising hits a far broader audience. In reality, Facebook’s internal algorithms, which prioritize what users see on their news feeds, offer more emphasis than ‘likes (thumbs up).’
Why share the posts?
Here are a few reasons why Facebook users share posts:
Information Sharing
It makes life simpler for an individual. Information is the world’s need. People seek information in all areas that may include what’s healthy to eat or what animals are going to eat you. It’s about giving tips and tricks, suggestions, or directions to find something new for a company or any new quick recipe or how you maintain or use your utensils in different ways.
Building Relationships
Facebook is a platform for B2B, and B2C channels to build clientele by sharing stories. Finding common ground, building the mutual sense of culture that we’ve all built through storytelling. For companies, this involves engaging fans, making them chuckle, smile or weep. It’s about finding ways to get target buyers to relate emotionally to your products and services.
Help Others
It’s about trying to make things better. If a person has some interesting or valuable information to share that will make someone else’s life easier, they’ll certainly want to share it.
Building your Identity
It’s just about image management. Identities are typically formed by conversations people have, and tales people share. This offers followers a chance to create their identity by sharing their stories, granting them special access to fans, or remembering their super fans.
Sharing from cross-platform apps to Facebook
Posting on Facebook from other apps such as Instagram and WhatsApp business is a terrific way to communicate with audiences. However, coming up with individual content concepts on a daily basis for each channel can feel like a never-ending war.
Make Facebook posts shareable
There are different ways to make a post shareable on Facebook is what you will see in the following sections.
- Share posts from Page(s)
Pages on Facebook accounts are mostly used by the institution or business entities or donation groups or the groups like flatmates. The page posts are public and can be viewed by anybody.
Steps to share posts from page(s):
- To go to pages, see the Pages option on the left. OR you can view it on the right side as highlighted below.
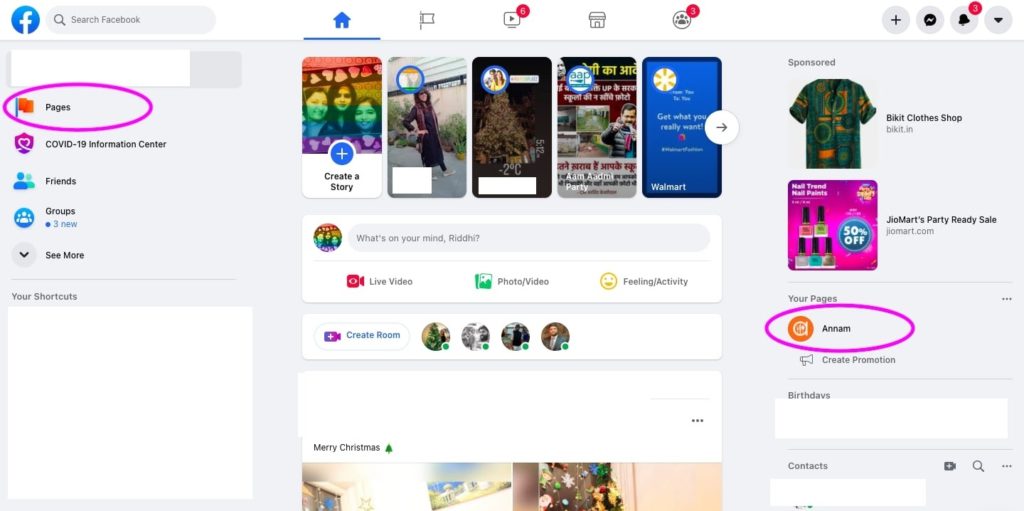
- You will see the list of pages. In the screen below you see 4 pages available.
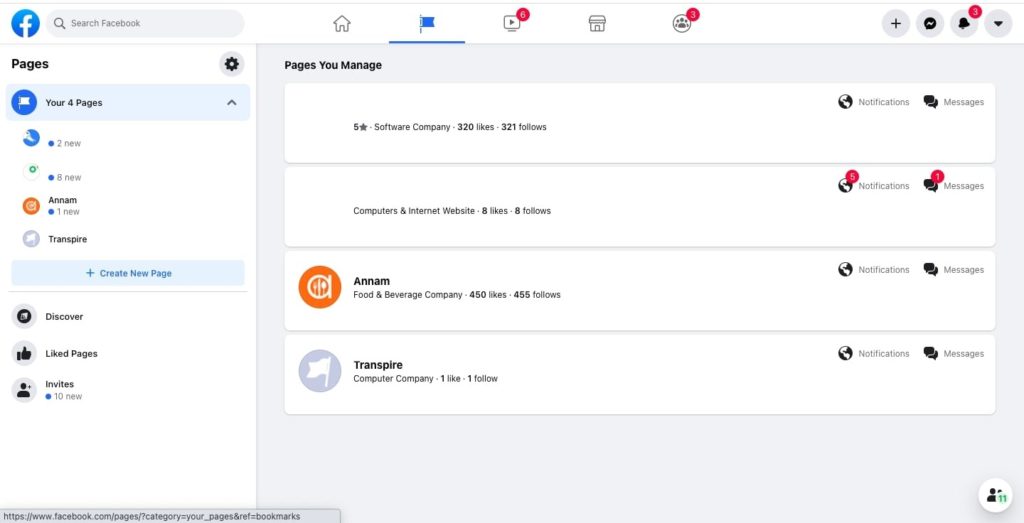
- Open the page you want to share the post from.
- You will see the horizontal-3-dots icon on the right below the page’s profile picture.
- Clicking on the icon opens up a block with a list of options. You will see the share option highlighted with the pink border.
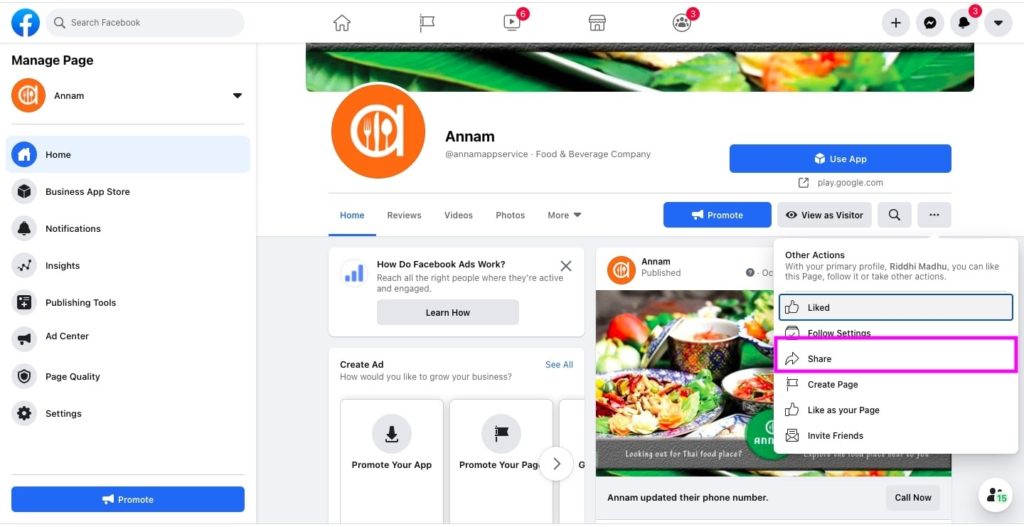
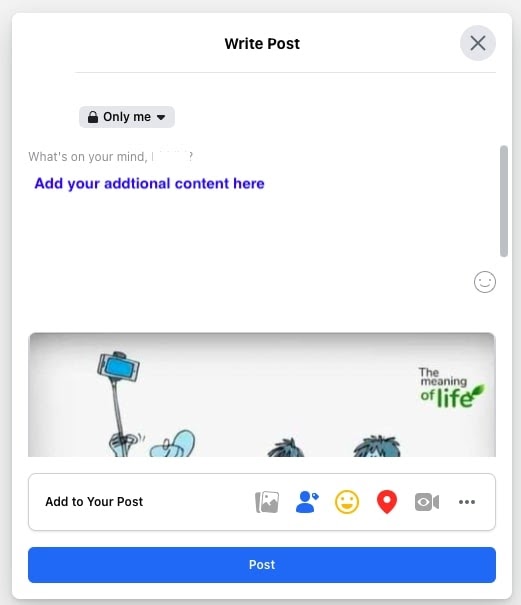
- Press Share. You will see the modal popup below.
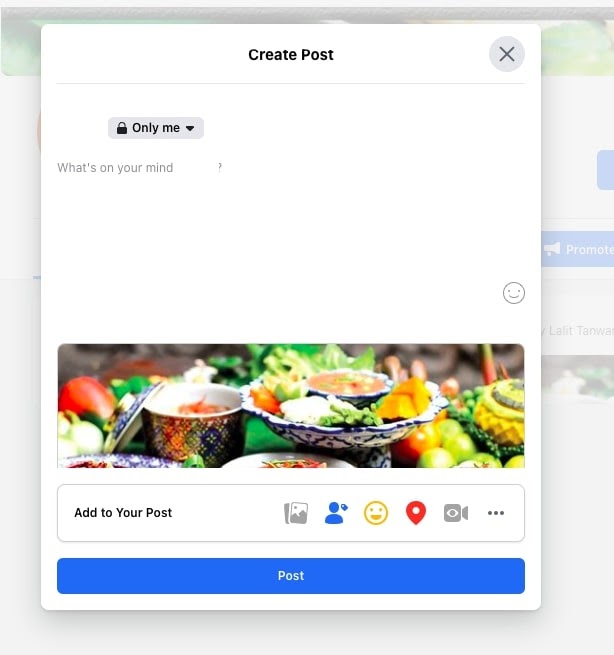
- Add content to the plain white editable text area.
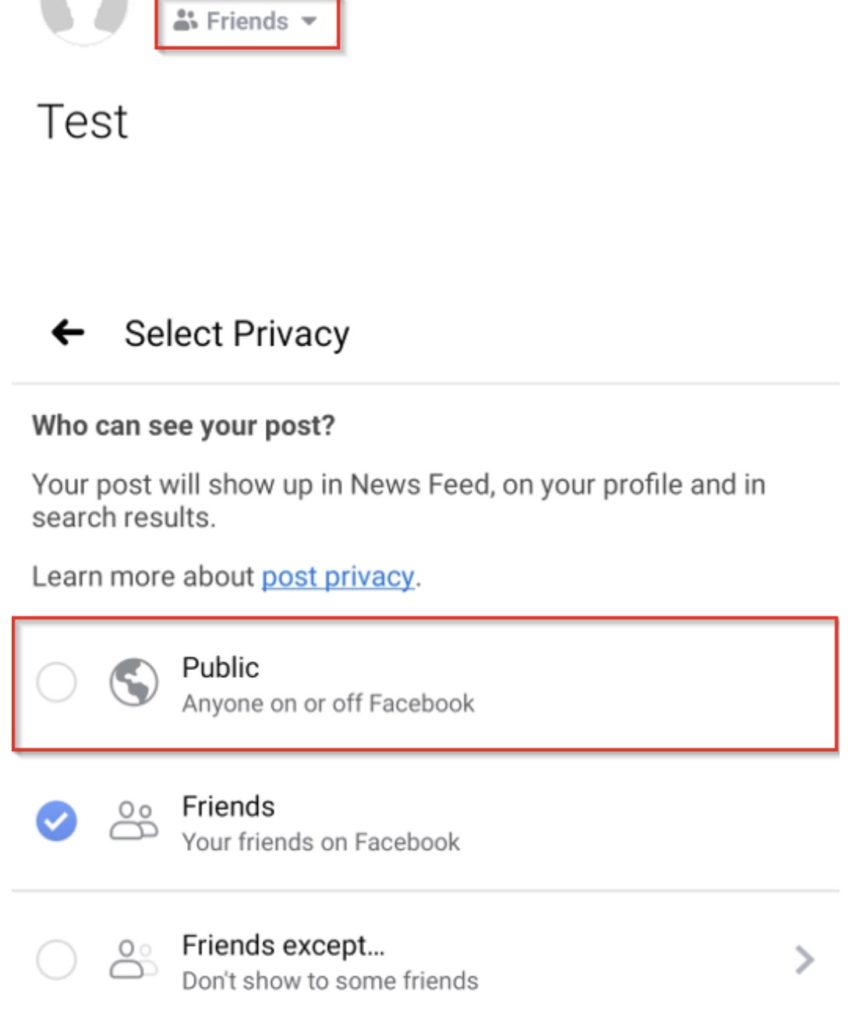
- You will also see “share with whom” options where the “Only me” drop-down is shown. Click that down-arrow icon.
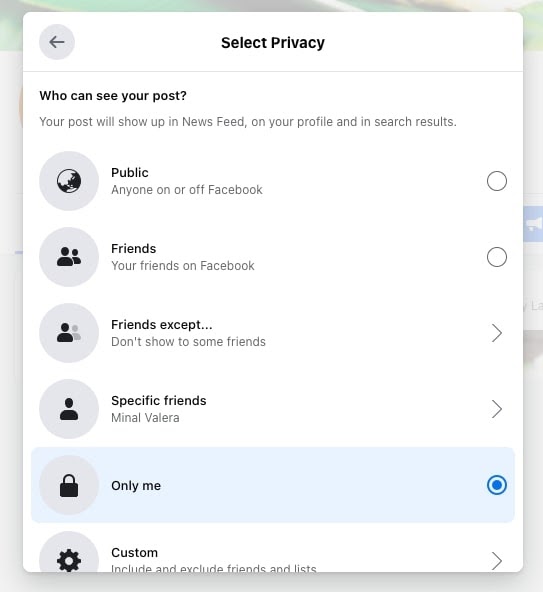
- “Share with whom” options are listed below.
- Public – you choose this option to share with the public available on the Facebook platform.
- Friends – you choose this option to share the post with your contacts available on Facebook.
- Friends except – you choose this option to eliminate some of the friends from your contacts from sharing.
- Specific friends – you choose this option to share with specific contact in your circle of friends.
- Only me – you choose this option to share only to your profile’s wall. This post will not be visible to anyone except you.
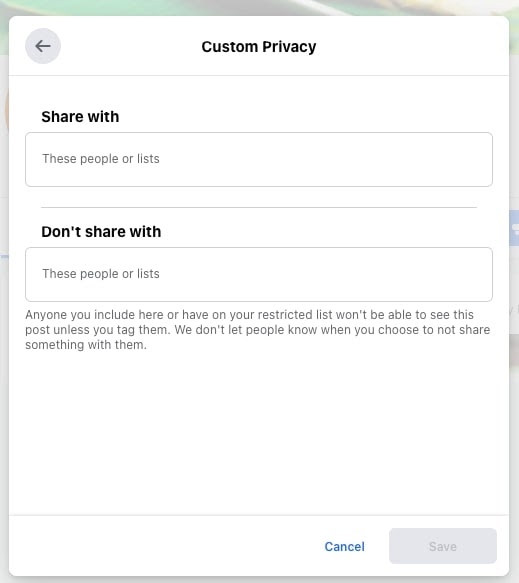
- Custom – you choose this option to customize the “share with” and the “don’t share with” options. Make your selections and save.
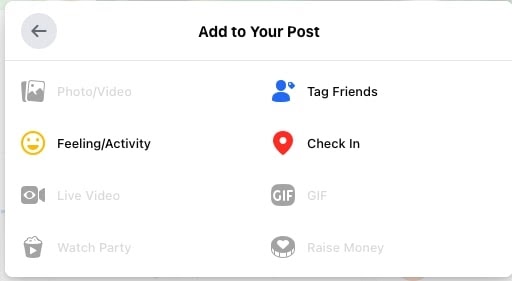
- You can also use the “Add to your Post” option listed in the form of icons. These icons are photos, videos, tag friends, and so on.
- Now, you have created your post specifics and are ready to rock.
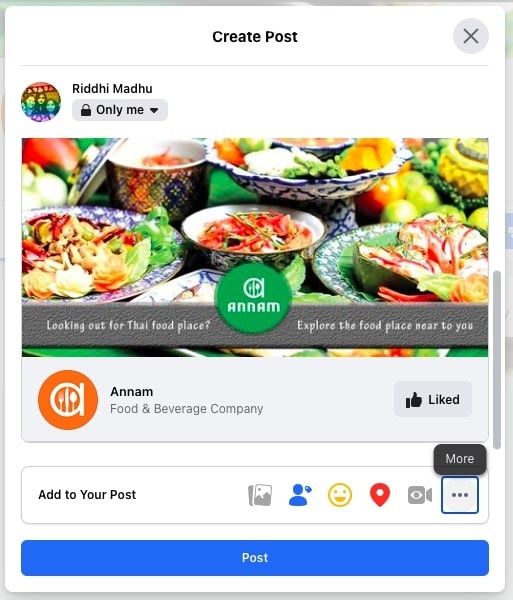
- Click the blue button with the label, Post.
- You have successfully made your post shareable from your Facebook page.
- Share a post from the friend post you have received
You receive hundreds of posts daily on your wall. Out of them, you want to share some interesting posts to forward to other groups or friends who are not mutual friends with the friends you have received the post from. Here, you can see how to share the post:
- Locate the post while scrolling on your Facebook wall.
- You will see the Share button on the post you have received from the friend.
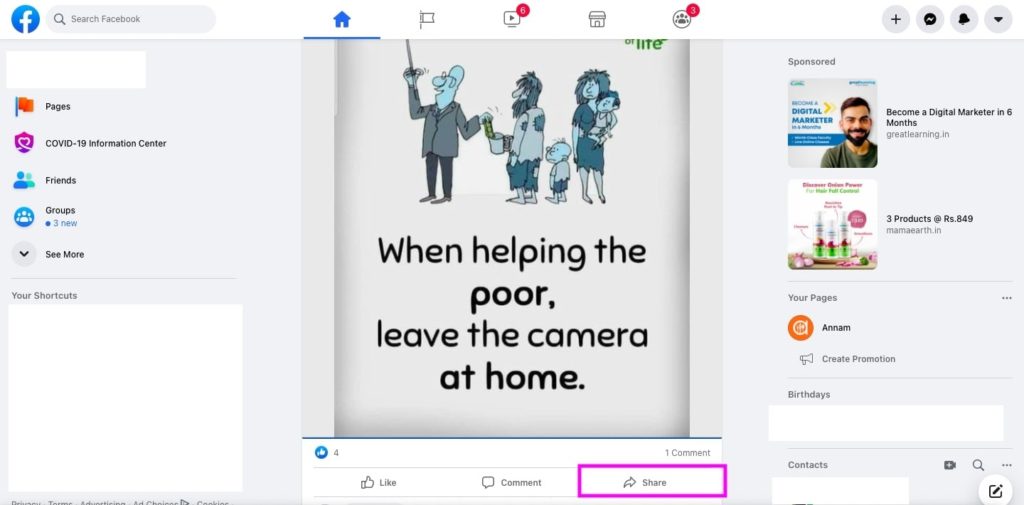
- You will see the list of options for sharing. The list opens up as shown below.
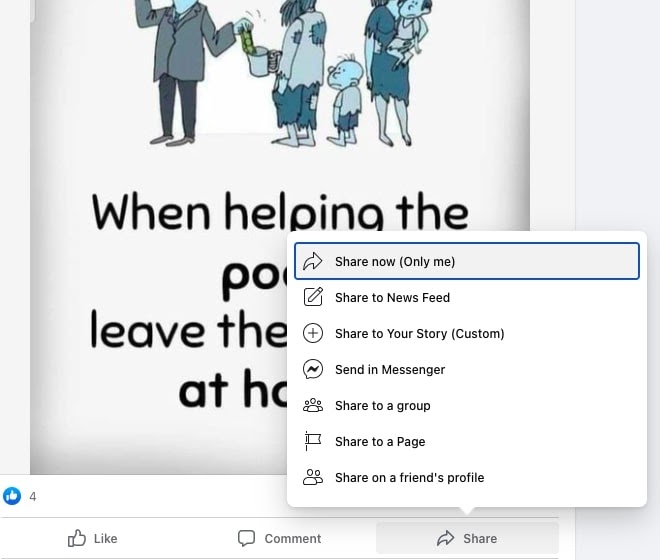
- Share Now – Publishes the post to the “share with whom” option selected as a default. In this example, it is “Share now (Only me)”. This will share it on your timeline.
- Share to News Feed – This provides you an option to add your notes and change your “share with whom” option to publish the post. Change the “Only me” option to select the “friends” option(s) available to share your friend’s post.
NOTE: Usually, you share the post with non-mutual friends to avoid duplicate posts and make your friends “Not Annoyed by your sharing”.
- Share the post as a Story
This option allows you to make a post shareable as a story.
- From the post, clicking on the Share button shows a list of options in a block.
- Choose the + circular icon – Share to Your Story (Custom).
- Choose the + circular icon – Share to Your Story (Custom).
- You have successfully shared the post as your Story.
- Share the post to a group
Mostly, Facebook users have subscribed to group(s) of their interest. The post(s) with similar interest has been received on your post from a friend or from a page or from another group, you just can simply share with the group.
- Locate the post.
- Use the Share option available on the right side below the post content.
- From the list of options, choose Share to a group.
- You will see all the groups you are a member of. See the group list as shown below.
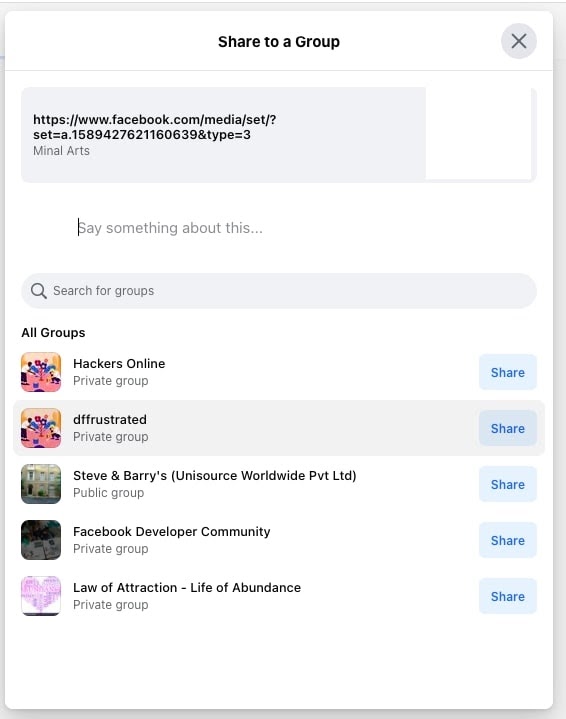
- Choose the group you want to share the post with.
- Press the blue Share button located as right-aligned. You are done with the post made shareable.
NOTE: If you have many more groups and the group is not visible in the list, you can search for groups by entering the group name. It will show up in the search and you can share the post.
- Share post to a page
Facebook users are followers of the pages they like. The pages are usually of a business entity or a marketing page from where they promote their products and services. If you have received a post that is similar to the product or service, you can share the post to a page you are following.
- Locate the post you want to share to a page.
- Click Share at the bottom of the post. You will see “share with whom” options.
- Choose the flag icon – Share to a Page.
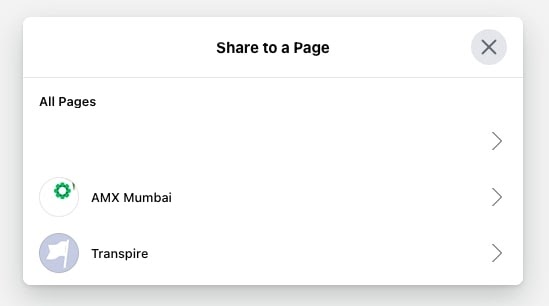
- Select the page and click the arrow icon. You will see the posting page with editing options.
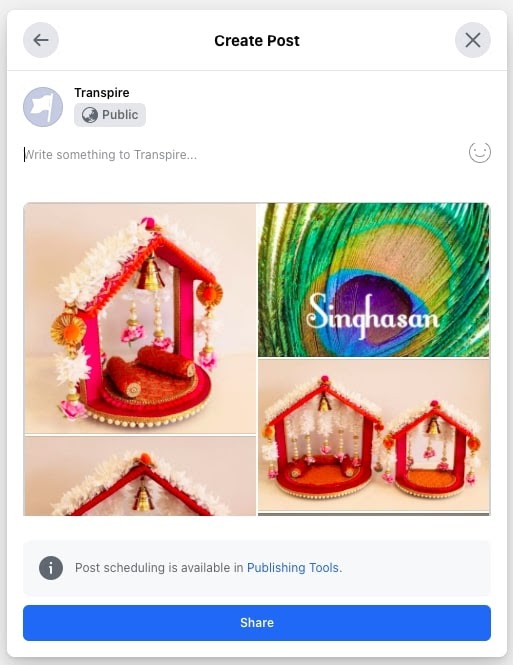
- Write your additional information in the white text area.
- Click the Share icon.
- The post is made shareable on the page you have posted.
- Share the post on your friend’s timeline
Sometimes, you work as an intermediary to exchange information between friends. Your friend shares a post with you and he/she needs you to share the post with another friend. This use case is also possible on Facebook.
- Locate the post you want to share on a page.
- Click Share at the bottom of the post. You will see “share with whom” options.
- Choose the last icon from the top – Share on a friend’s profile.
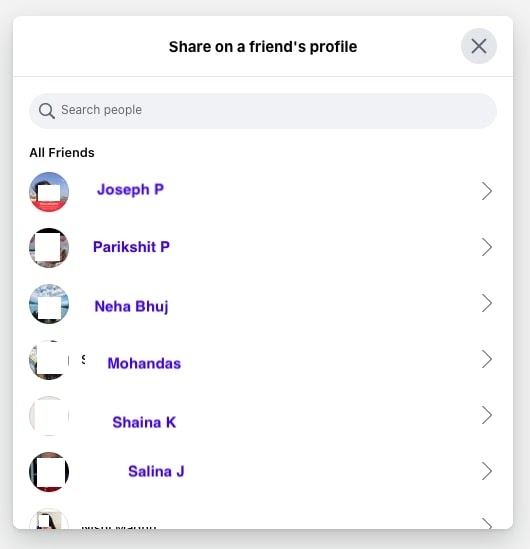
- Choose the friend by clicking the right-arrow icon.
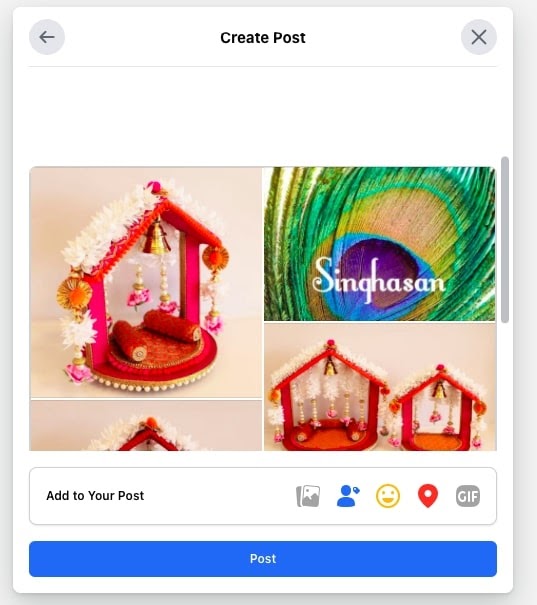
- Enter the shareable content on the text area which is non-mandatory.
- Click Post. You have published the post to your friend’s timeline.
- Share your post by creating it from your wall
This is the most basic sharing feature from your profile wall. You create your own post and share as different sharing options we have seen above. The only difference is you are creating your own piece of content to share with others.
- The first block you will see below your profile picture. You will see the textbox with the placeholder text, “what’s in your mind, {username}?”
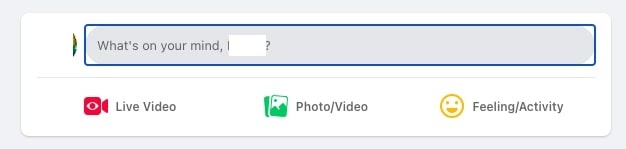
- The moment you click inside the box. You will see the pop up below.
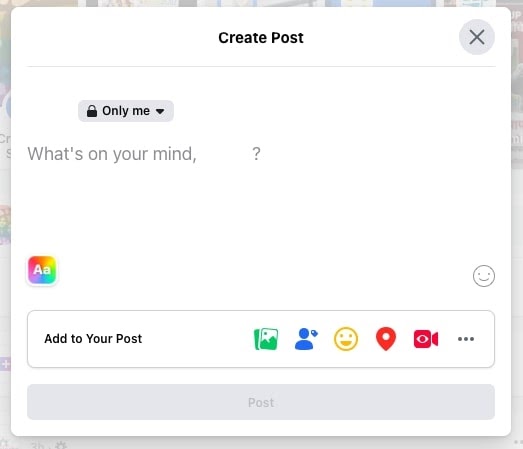
- Build your post by adding a video or a picture, tagging friends, adding location, and many more.
NOTE: You will notice the Post button is not enabled till you put content. Once you are ready with the piece of information, the post is ready to be shared.
- Click the Post. You have shared your Facebook post with your specifics.
- Share posts in Messenger
Another way to make posts shareable is to send it to your messenger contacts. The contact with whom you are chatting on a regular basis.
- Locate the post you want to share to a page.
- Click Share at the bottom of the post. You will see “share with whom” options.
- Choose the 4th icon from the top – Send in Messenger.
- You will see the pop-up to choose your contacts or custom group(s) with whom you need to share the post.
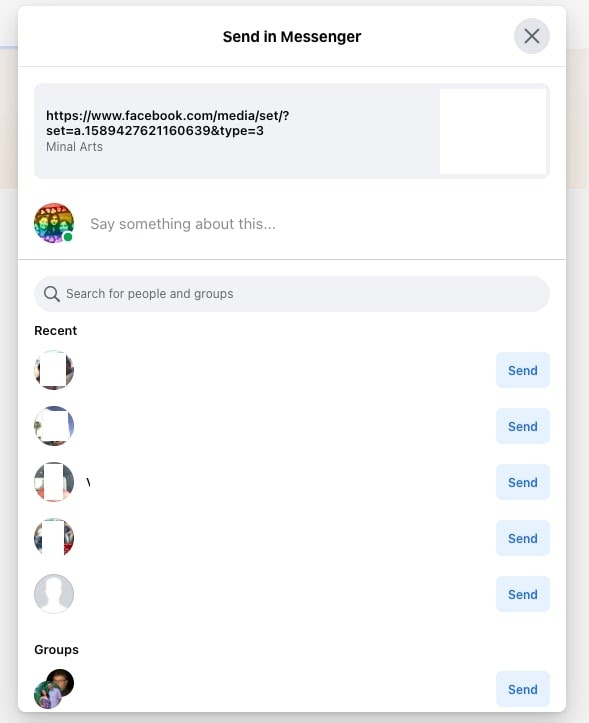
- Use the Send button to make the post shareable.
- You are done.
Make Facebook Post Shareable using the Facebook Mobile app:
- Launch the Facebook app or Facebook page and select the message those who want to share.
- Press the 3-dots at the top right corner of the post and select Edit Post.
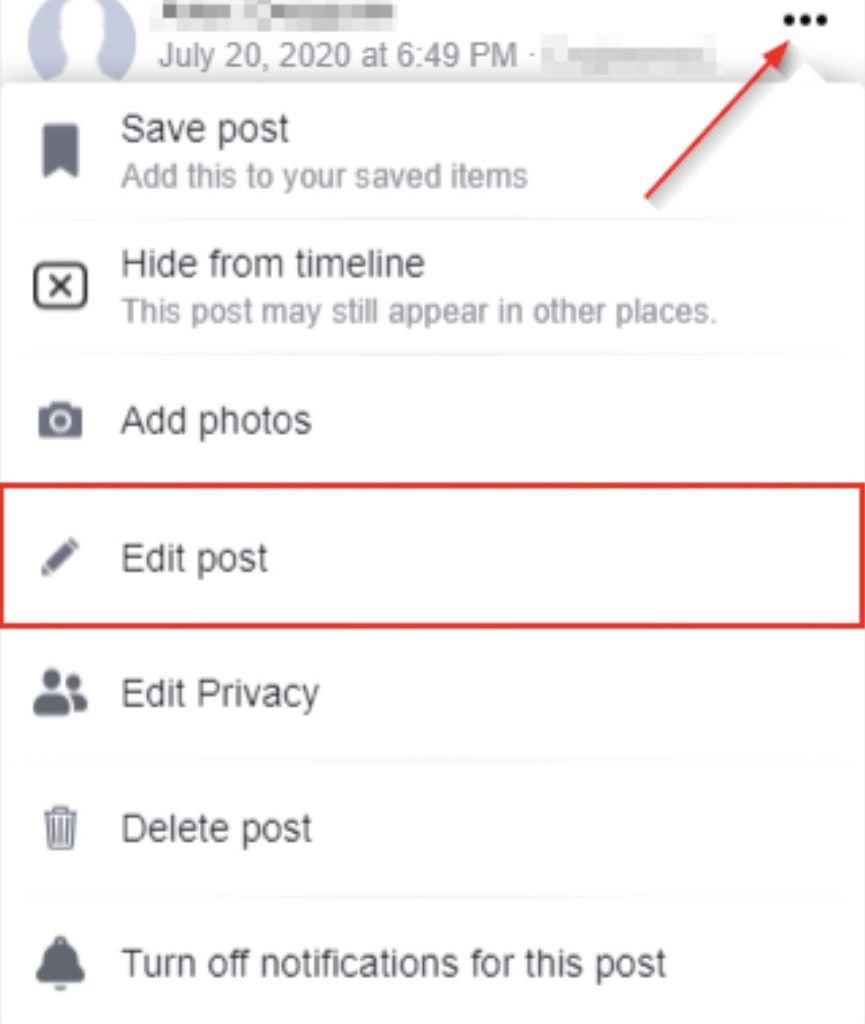
- Hit the “share with whom” button, adjust it to your desired audience, and afterward press the Save icon at the bottom right corner.
- Acquaintances and other Facebook members will also be able to upload their messages.
You have made a post(s) shareable, then you realize you want to undo it
To avoid or undo the sharing there are the following ways to do so:

- Unsharing a thing that you share:
- Users can quickly delete an object if they shared it by mistake, or if they’ve changed their mind about sharing it.
- When users push the “Like” icon, the button moves so that they can click the “x” button to change the object.
- It will delete it from the timeline. If anyone exchanges an article, they can delete it from their profile directly.
- Go to the profile and press the down button in the top right. From the object, press the “Delete.” option.
- Erasing the Shared Object from Other Users :
- One updates are not the only one that users will see on their Timeline; if someone tags them in a shared message, it will appear on their profile.
- To delete these updates or posts from one’s Timeline, they may either remove the tag or mask it from their Timeline. The method is the same as if someone were removing their own message.
- Next, mouse over it to show the down arrow at the top right corner. Click the arrow, then pick either “Remove Tag” or “Hide from Timeline.”
- Use the activity log to remove or erase posts:
- If one is unaware of what they’ve posted and how visible it is, visit one’s Activity File.
- The button for this is available at the top of one’s profile, at the bottom right corner of their cover photo.
NOTE: This helps users to see more of their activities on Facebook.
- From the left sidebar, one can filter down to posts that they posted, posts that others shared or tagged on personal Timelines, and even unique categories of posts.
Last but not the Least
Sharing posts on Facebook has its own set of pros and cons

Pros
- It saves time, especially if one is a small business owner, something that saves time is worth the weight of gold. Sharing posts ensures that the author just needs to craft a flawless post, giving the businessman more time to manage the company.
- Keeps the account running, there’s nothing quite like searching out the Facebook profile of a company to discover tumbleweed. Holding social media accounts involved is crucial to attracting more followers and rising web visibility.
- Provides more exposure, most people have a preference for Facebook, especially older people which makes sharing content easier with a larger audience.
- Helps maintain consistency in sharing of posts for instance a particular company makes the brand image and messages uniform.
Cons
- Social networking sites do not encourage consumers to customize content to the specifics of each site. What works on one may look weird on the other. For eg, hashtags are perfect on Instagram, but they’re a huge no-no on Facebook.
- Facebook attracts an older audience, as known, so the content should be posted accordingly. Each social media platform has a different time span to gain minimum exposure and also engagement.
