In the event that you need to take a snapshot of anything on your computer screen, Windows 10 provides a number of options for doing this task.
Whether you want to preserve the full screen or just a portion of it, we’ve compiled a list of the most frequent methods for capturing a screenshot in Windows 10.
Screenshot using PrtScn Keys
Follow these instructions to take a screenshot on Windows 10 by pressing the PrtScn key on your keyboard.
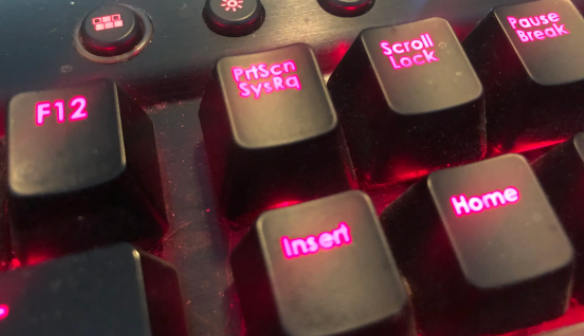
By pressing the “Print Screen” key on your keyboard, you may save a duplicate of whatever is now shown on your computer screen in the shortest amount of time and with the least amount of effort.
PrtScn (or something very similar) is the most common name for this key, which may be located in the top row, among or near the Function keys.
The Print Screen option may not be available on certain keyboards (particularly laptop keyboards), and you may need to use the Function key to access it (in other words, hold the Function key and then press PrtScn).
Although the PrtScn key has a default behavior, there are a variety of modifier keys that may be used to customize its behavior. The PrtScn key copies the whole screen to the clipboard, allowing you to paste it anywhere you want on your computer.
- Press the PrtScn key. The contents of the complete screen will be copied to the clipboard as a result of this action. Simply copy and paste the screen capture into any programme that allows you to see images, such as Paint or Microsoft Word, and then save the document.
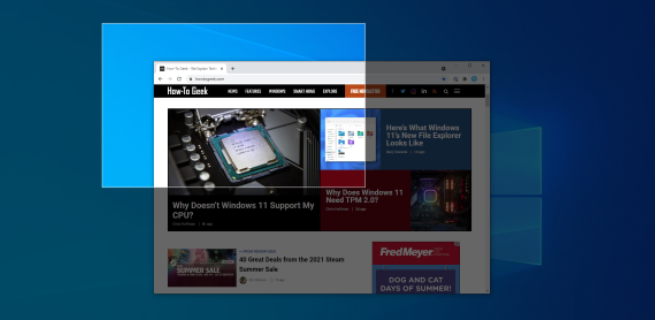
- Press the shortcut keys Alt + PrtScn. Using this method, the currently active window will be copied to the clipboard, which you may subsequently paste into another programme of your choosing.
- Press the Windows key, followed by the Shift key and the letter S. This will result in the screen becoming darker and the mouse pointer shifting as a consequence.
You may choose an area of the screen to record by dragging it around the screen using the dragging tool. The screenshot may be copied to the clipboard and then pasted into another application after it has been transferred to the clipboard.
Screenshot using Snipping Tool
Using the Snipping Tool in Windows 10, you may take a snapshot of your screen. With Windows 10, Microsoft provides Snipping Tool, which is a screenshot program that is significantly more flexible than the one that was previously available.
A screenshot may be captured and saved as an image file using Snipping Tool, eliminating the need to copy and paste the screenshot into another program first.
1. From the Start menu, go to the Snipping Tool and double-click it.
2. Click on the “Mode” drop-down box and choose the snapshot shape you want – this may be anything from a full-screen image to a rectangle screenshot or even a free-form image.

3. Your screen will become unresponsive as soon as you click on the New button. It is therefore possible to take a screenshot by just moving the mouse cursor over it. When this occurs, a screenshot will be shown in the Snipping Tool window to indicate that it has happened.
4. In order to incorporate things like a tooltip that only appears after a mouse movement into a screenshot, you may utilize the Delay option to specify how long to wait before taking a screenshot.
5. If you want to annotate your screenshot after you’ve taken it, you may do so by utilizing the drawing tools that are included in your computer’s software.
6. Once you’ve completed the screenshot, go to “File” and then “Save As” to save the final image to your computer’s hard drive.
In addition, the Snipping Tool window has a copy button, which appears as two pages piled on top of one another, which you may use to copy the image to your clipboard as needed.
Screenshot using the Game Bar
In most Windows games, you may utilize the Game Bar, which is an overlay that allows you to snap screenshots and record video. Here’s how you can take advantage of it:
1. Select a game from the Start menu or the Xbox Console Companion software to begin playing it.
2. While playing the game, hold down the Windows key and the letter G. The Game Bar overlay should now be visible.
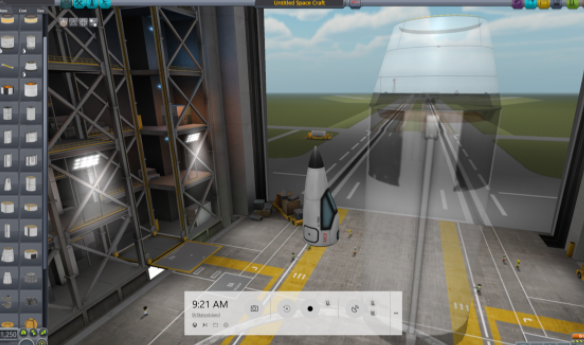
3. To take a screenshot, either click on the camera icon or use the Windows key + Alt + PrtScn keyboard shortcut.
4. It will be accessible for viewing at a later time since it will be automatically saved to the “Videos” folder in a subfolder titled “Captures.”
5. Using the F11 key while playing a game on Steam will allow you to take a snapshot of the game screen. After it has been downloaded, it will be added to your screenshots folder on Steam’s main menu.
Screenshots using Snip & Sketch
Snip & Sketch is a built-in tool in Microsoft Windows 10 that enables you to capture more powerful screenshots with less effort.
The program lets you take a rapid snapshot of a specific region of your screen, record another picture after a delay, or annotate the screenshots that you’ve previously taken. Besides having all of the same functions as the Snipping Tool, Snip & Sketch also includes a few additional ones.
- Make a photo of a section of your screen using your camera phone’s camera function.
- Using Snip & Sketch, you may quickly snap a screenshot by pressing the Windows key and the Shift key at the same time. When this happens, your screen will get greyed out, and your mouse will be changed into a crosshair as a result.

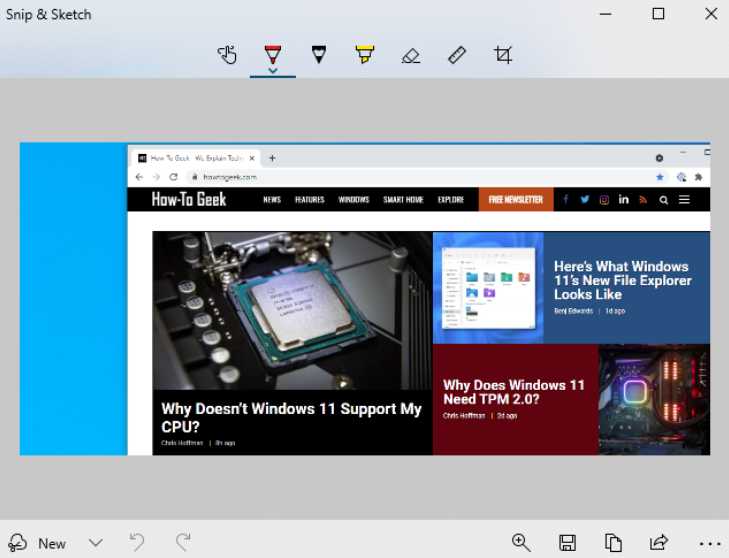
- The Snip and Sketch buttons are located at the top of the screen.
- Towards the top of the screen, you’ll see a bar with a number of buttons. Choose the function that you wish to use. Here’s what the buttons do in order from left to right:
Rectangular Snip: You will be able to use your cursor to create a rectangle on your screen at any location. Windows will take a snapshot of the region included inside the rectangle and preserve it.
Free form Snip: A Freeform Snip is when you can use your cursor to draw an arbitrary shape on your computer screen (or a stylus or finger on a touch screen). Windows will take a snapshot of the area that you draw around it and store it for you.
Window Snip: The cursor will take on the appearance of a crosshair. You may use it to capture a screenshot of a specific window by positioning it over it and clicking.
This button captures a snapshot of your whole display in full-screen mode.
Close Snip: The overlay is closed without a screenshot being captured. (Alternatively, you may use the Esc key on your keyboard to do this.)
When you use the keyboard shortcut to start Snip & Sketch, the program will remember the previous choice you selected.
Cropped Screenshots
Whenever you take a screenshot, you will be prompted with a message stating that the screenshot has been copied to your clipboard.
Paste this picture file into any other software that supports image files, such as Microsoft Word or Adobe Photoshop. (To paste, choose Edit > Paste from the menu bar or press Ctrl+V on your keyboard.)
For those who don’t want to wait for the message to vanish before clicking it, the notification will display in Windows 10’s Action Center.
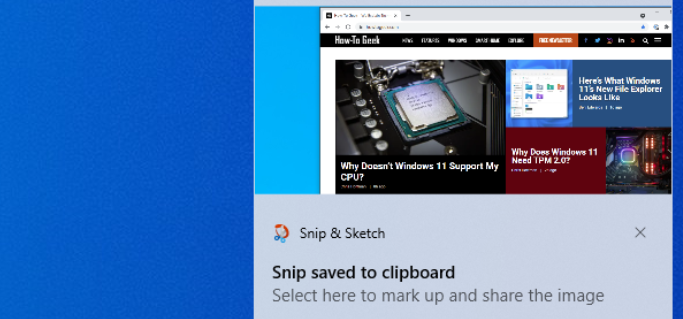
More choices are available by selecting the notice. A window called Snip & Sketch will be opened with options for writing on, highlighting, erasing, and cropping portions of the picture will be shown.
A “Save” option is also there, which allows you to save your screenshot as an image file from this location.
Delay Screenshot
You may find it beneficial to capture a menu or other UI item that won’t appear until you interact with it in some manner. A snapshot captured with a delay could be useful for this.
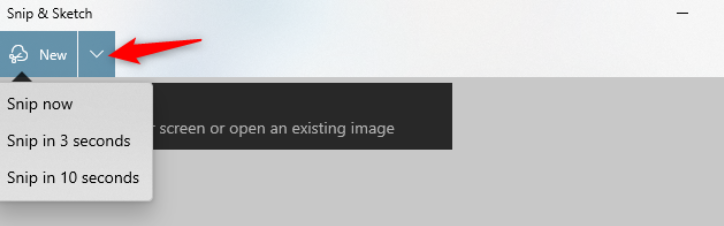
After a three- or ten-second wait, Snip & Sketch is capable of capturing a screenshot.
- In order to utilise this feature, you will need to launch the Snip & Sketch application window straight from the desktop.
- To access the “Snip & Sketch” program shortcut, click on the Start button (or use the Windows Key), enter “Snip” into the search box, and then click on the “Snip & Sketch” programme shortcut.
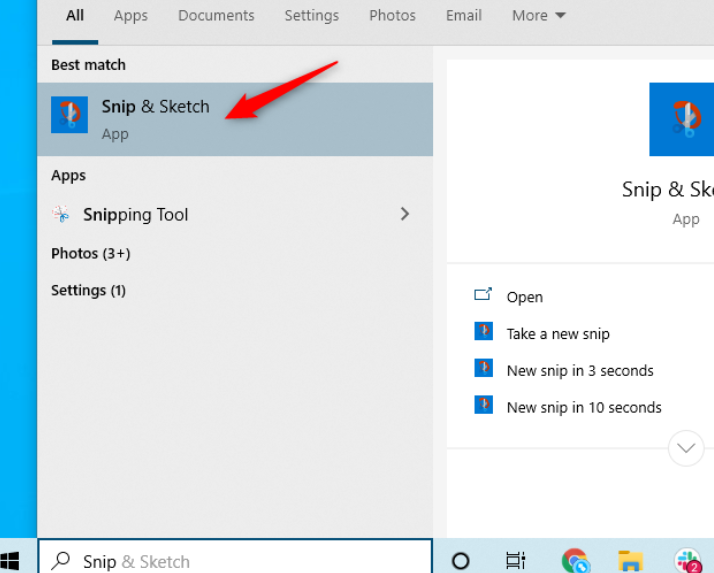
- The “Snip & Sketch” programme shortcut may be found in the Start menu of Windows 10.
- Click the down arrow to the right of the “New” button in the Snip & Sketch box and choose either “Snip in 3 seconds” or “Snip in 10 seconds” from the drop-down menu.
For example, if you go to menu > Options in the Snip & Sketch window, you can choose whether or not Snip & Sketch should open when you press Print Screen, whether or not Snip & Sketch should automatically copy screenshots to your clipboard, and whether or not you want to draw an outline around your snips (screenshots).
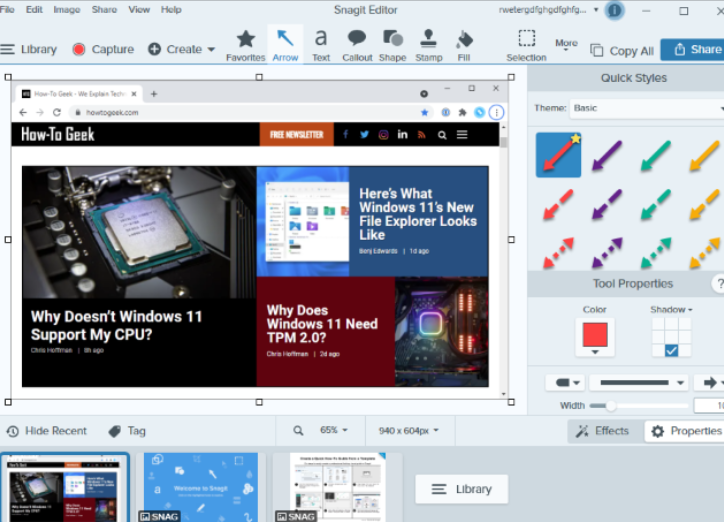
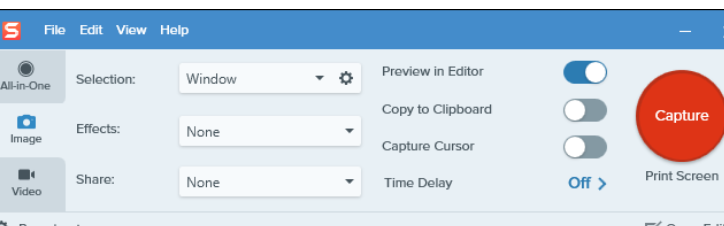
Screenshot using SnagIt
It is also worth the expense to get SnagIt by Techsmith, which is a very powerful screenshot application that is well worth the money you spend on it.
By giving features such as targeting certain windows and capturing the whole text of scrolling windows such as web pages in your browser, this tool makes the process of taking screenshots much simpler.
As an added bonus, SnagIt can capture movies of your screen and convert them into animated GIFs, as well as incorporate video and audio from your camera and microphone, and assist you in effortlessly trimming those video clips so that you only include the most important parts of them.
Other functions include the ability to extract text from screenshots, annotate screenshots, replace text in pictures, and pretty much everything else you may expect a snapshot tool to be able to do.
If you need to record a huge number of screenshots, this is terrific software that we strongly recommend you try out.
TechSmith offers a free trial of SnagIt so that you may decide whether or not the software meets your needs before making a purchase. It’s likely that if you take a lot of screenshots, you’ll find it tough to return to the more basic tools that come with Windows.