The task Clone Windows 10 is a need that arises when the system gets corrupt or a need to boot the Windows 10 system in the PC/laptop the same as it was before. It is a type of backup where the owner of a PC can set up a system quickly from a clone. As a part of troubleshooting, the steps to cloning Windows 10 are considered important and useful.

There are multiple ways to clone Windows 10 and the user can decide the most appropriate way under which scenarios, the steps to be taken. All you need is to know how to preserve your data and system that avoids chaos at the time of damage.
What is Clone?
Cloning is referred to as making a replica of an operating system that can be backed up as it is in its current state now. The cloning can be done with the system and the data available in the system. Why is it different from backup? The backup does not retain the state of the system. It will copy the files and folders, but not the system along with all the settings available as the system in function. Cloning retains the settings as well.
How to Clone Windows 10?
AOMEI Backupper is a freeware tool that is going to be used to clone Windows 10. There are alternatives for the user to clone the drive to the destination drives. The destination drives can be an external SSD or a SATA drive or the other partition in the same system.
- Download and install AOMEI Backupper.
- Follow onscreen instructions for a successful installation.
- Once done, you shall view the shortcut icon on the desktop.

- Click to open the tool.
- Pick the Clone icon from the left and view the options on the right side.
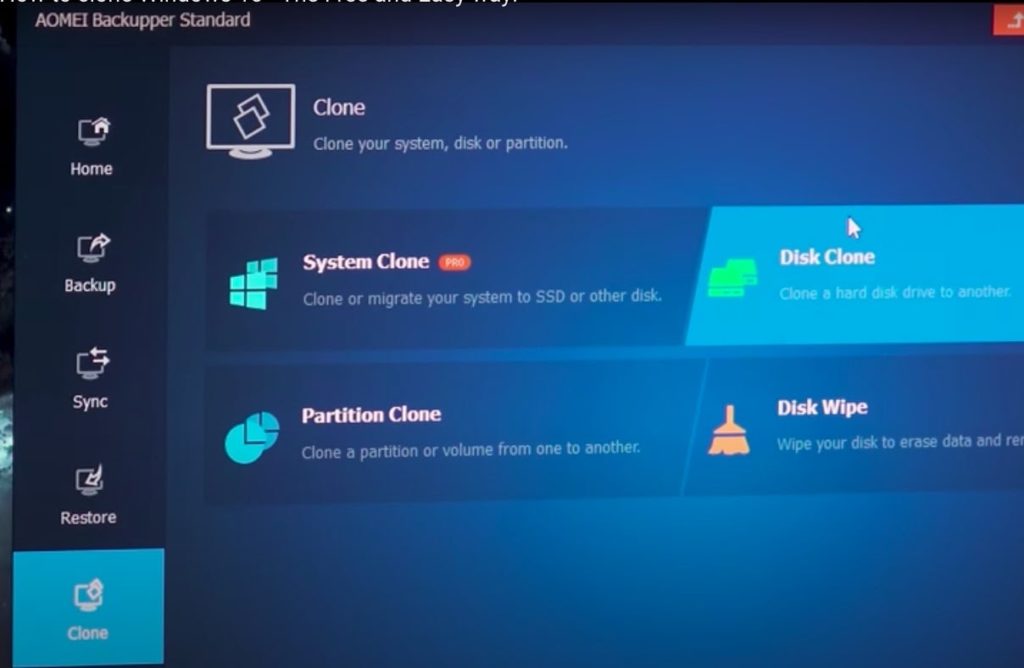
- Choose the Disk Clone section and click it. See the screen below.
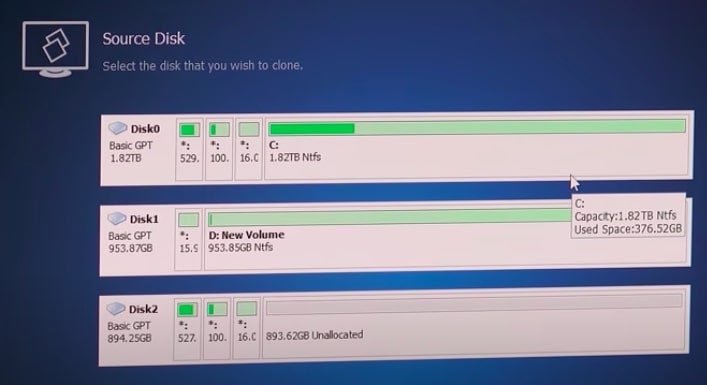
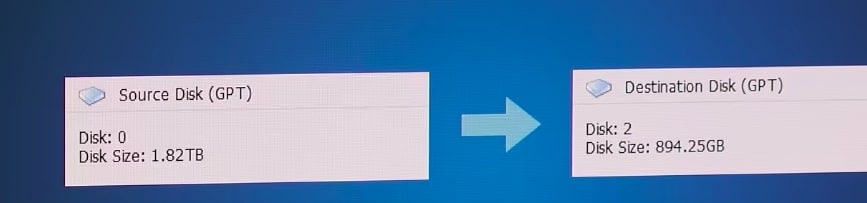
- Choose the source disk Disk0 where Windows 10 is installed.
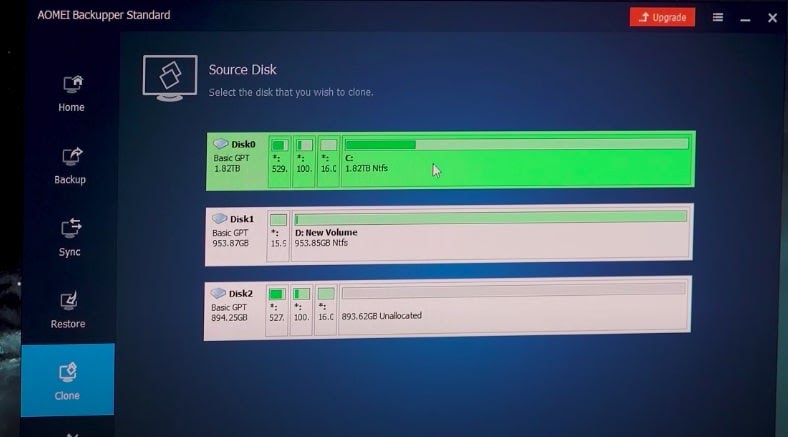
- We are cloning Disk2 in this example.
- Press the Next action that shows up as the blue button on the bottom right. The destination disk screen appears.
- Pick Disk2 as a destination drive where the clone is to happen.

- Before the cloning process starts, it will format the disk2 to clean up and then, start to clone Windows 10.
- Make sure you have a backup of the data that is going to be erased from disk2.
- Press Next. The confirmation box with the message below is shown.
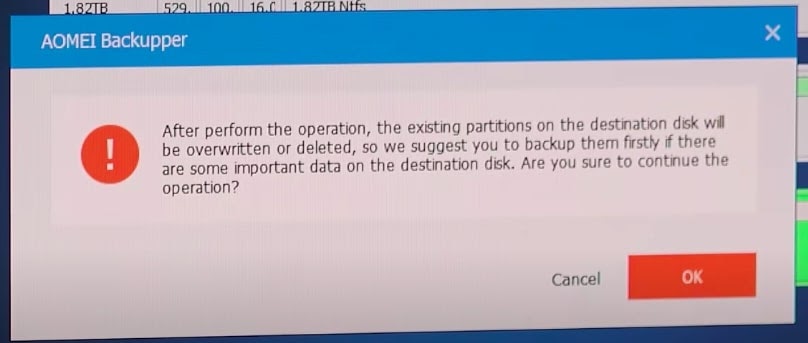
- Make the decision to proceed further by clicking OK. In case, the backup is not taken, cancel the operation and take the backup.
- The screen below comes up after OK.
- Click the Start Clone button located at the bottom right.
- The cloning process starts.

- To check the status of cloning, click the circular icon.
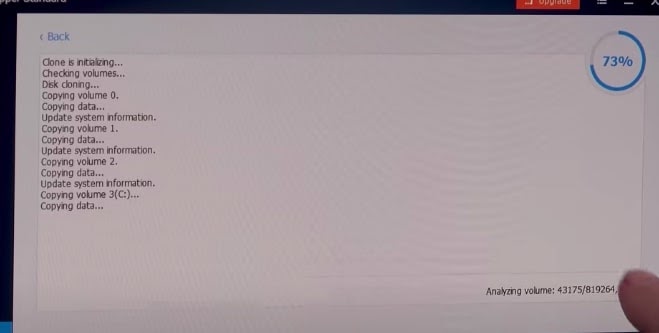
- The process may take an hour or more to complete the clone. The time taken to complete the clone depends on the data size also.
- Once 100% is complete, you shall see the screen below.
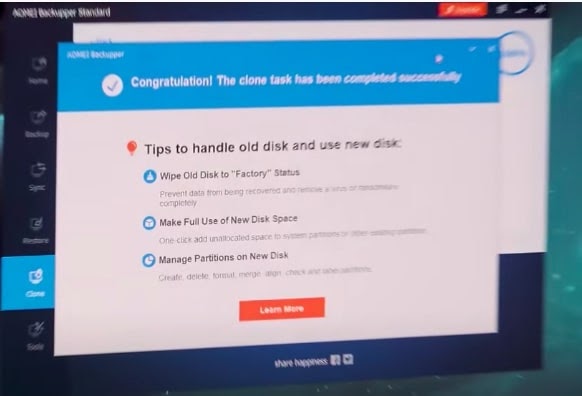
- Close the screen by clicking the cross icon on the top right side.
- You shall see the status window below.
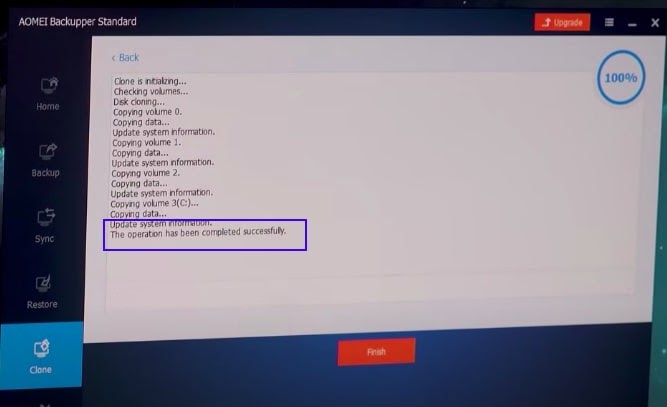
- Press Finish – the red button is shown.
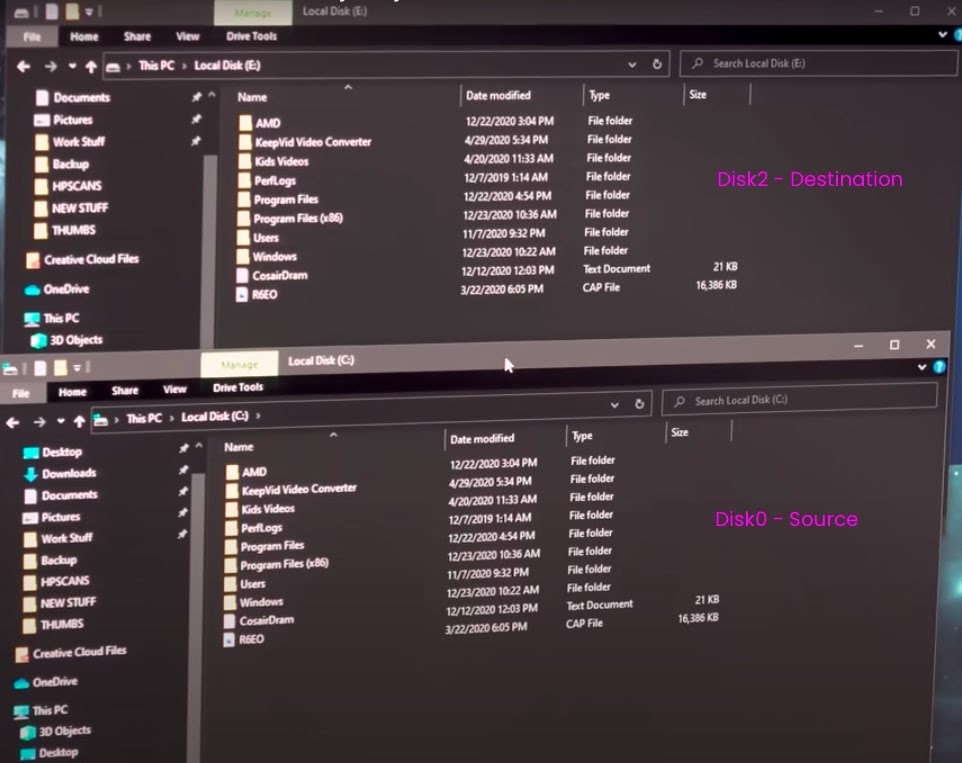
- To check the clone – open both the disk windows using the file manager and see the replica/clone of Windows 10 and the data available in the source drive.
How to boot from Clone in Windows 10
Once the cloning process gets completed and we see the clone drives. The next step is to check the clone of Windows by booting from the destination drive.
- Shut down the computer.
- The first step is to remove Disk0 and plug Disk2 into the CPU.
- Once plugged successfully, reboot the system and go to the boot options.
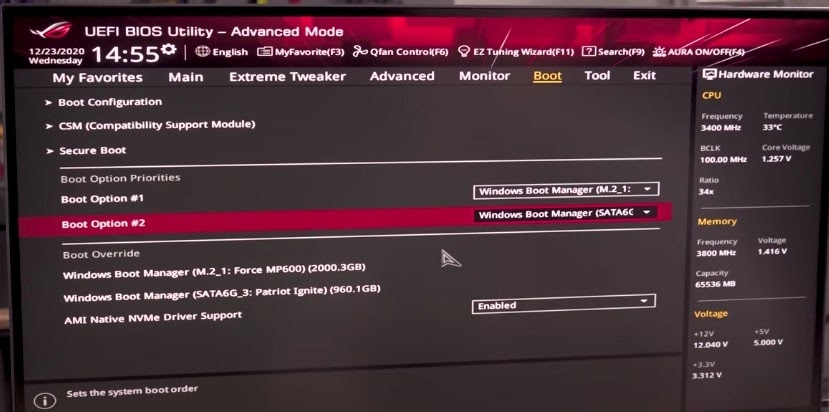
- Under the Boot Override section, choose the clone which is the SATAG_3 drive.
- Use the down arrow key to navigate to the clone drive and press ENTER.
- The system shall start with the cloned drive.

- The clone is exactly the same as the source drive.
How to Clone Windows 10 to SSD
The cloning process remains the same with SATA or SSD drives. The only difference is the speed of transferring data is fairly faster in SSD than in SATA. In the above steps, we cloned the system in a SATA drive and it took around 4 hours to complete the clone with data.
The SSD takes significantly less time to clone Windows 10 with data. It is all about which hardware resource you have and want to utilize by keeping the clone and booting it whenever the existing system is damaged or you are changing or upgrading the computer configuration or you are buying a new computer to replace the old one. All these cases require a clone so that setting up a system with all your current data is moved easily and without much effort.
Cloning Options in Windows 10
There are many tools available for cloning Windows 10. Some of them are paid but provide many options available for clones. Freeware such as AOMEI also gives backup and clone options with a simple and easy-to-use interface.
Other tools that provide the “Clone Windows 10” feature are:
- EaseUS Todo Backup
- Macrium Reflect
- Paragon Drive Copy Professional
- Acronis True Image
- Stellar Drive Clone
- O&O
- Active@Disk Image
All of these tools are for Windows Clone solution and give a variety of backup and restore as well as cloning options to retain the system with the data available. With one click boot option, the system can be loaded as expected with the user profile you have created in the original system.
Takeaway
Very important and interesting feature to clone Windows 10. The only thing to keep in mind is the availability of the disk size in which you want to clone and manage the extra space by creating additional partitions to utilize it for data. Once you get these things correct, cloning Windows 10 is a piece of cake. Check out more resolutions on StrangeHoot!
You may also like this:
How to Take Screenshot in Windows 7 & Windows 10
How to Fix Corrupted Files in Windows?
How to Install Hive on Windows 10
How to Stop Windows 10 Update in Progress
