Salesforce, a CRM solution company was founded in 1999. The company was publicly available in 2004 with CRM-based products and services. It is a platform that not only provides software solutions but also offers instances on a cloud platform to deploy applications.
Salesforce solutions are designed to fulfill the needs of businesses such as analytics, automation, community management, digital commerce, etc. Its cloud solutions, as well as customization platforms for different entities, are setting it apart from other CRM solutions in the market.
Salesforce experience cloud alternative: Salesforce community portal builder can help you create a community page with search and navigation on the left-hand sidebar.
Salesforce Instance vs Salesforce Organization
Before we get into the steps of integration, let us understand some basic terminology that describes Salesforce Architecture.
As we mentioned above, Salesforce provides a cloud platform for deploying the CRM applications of the companies. A Salesforce instance is referred to as a physical server, it’s the location and the space to host the applications for a company. From the instance name, one can make out in which datacenter the server is located.
Whereas, a Salesforce Org is referred to as an instance-specific to the company identity and configurations. For example, in the Salesforce instance, company XYZ has deployed its apps with its metadata and configurations is called Salesforce org. If the company XYZ has 2 orgs, the URL of each will be something like this:
| Org 1 | Org 2 |
| xyz34-my.salesforce.com/home/home.jsp | xyz36-my.salesforce.com/home/home.jsp |
Here is an illustration of the Salesforce instance and Salesforce orgs.
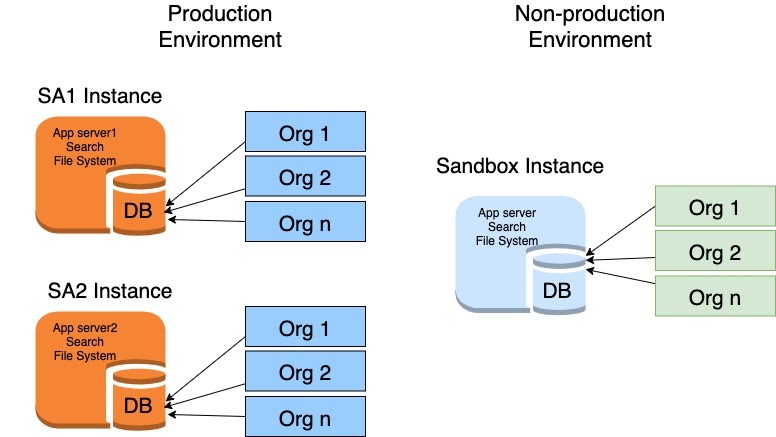
Salesforce organizations belonging to an instance point to the same database. In the above illustration, SA1 and SA2 instances are used as production environments whereas the instance on the right is either DEV or QA environment.
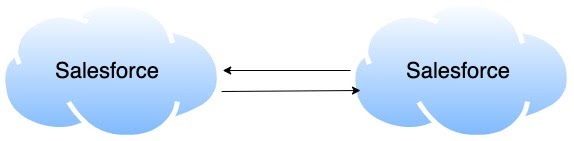
There are multiple ways by which you can integrate orgs to one account.
Method 1 – You can integrate data of Org1 to Org2
The orgs are nothing but salesforce instances designated by you. Orgs have multiple objects and their respective fields. You can customize them using your organization’s URL.
Below are the instructions on how to integrate 2 orgs into one account. (here, we will make both orgs to access the same data by establishing the connection.)
- Access Org 1. (This is the org from which the data will be accessed in the destination org.)
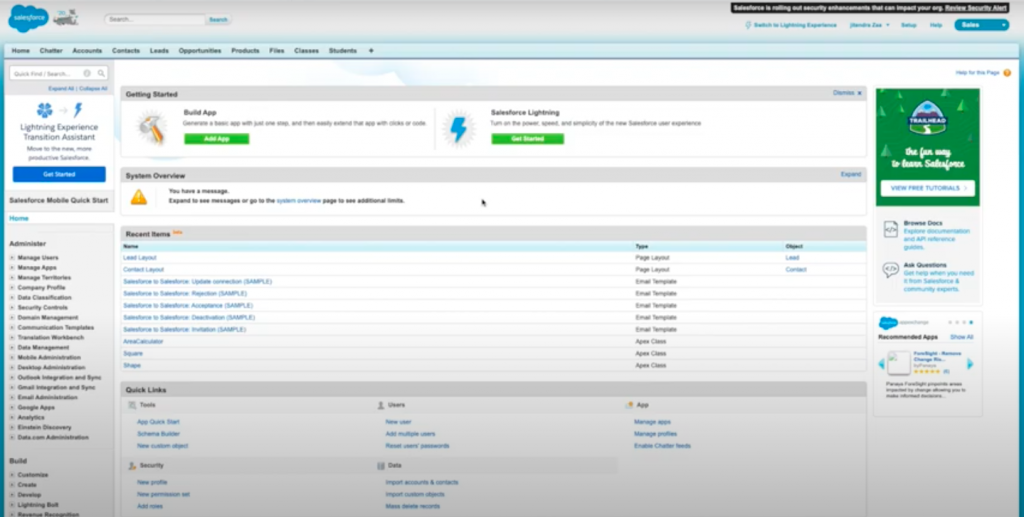
- From the top left search bar, enter the text Salesforce to Salesforce settings. The setup screen is shown as below.
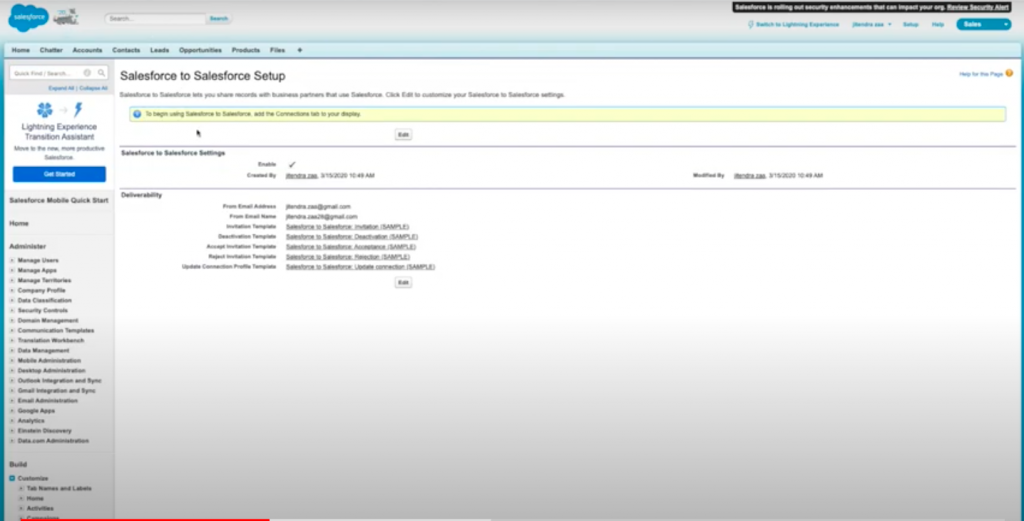
- Enable S2S (salesforce to salesforce) by selecting Enable under the Salesforce to Salesforce Settings section.
- Create a connection template. To do so, do the following.
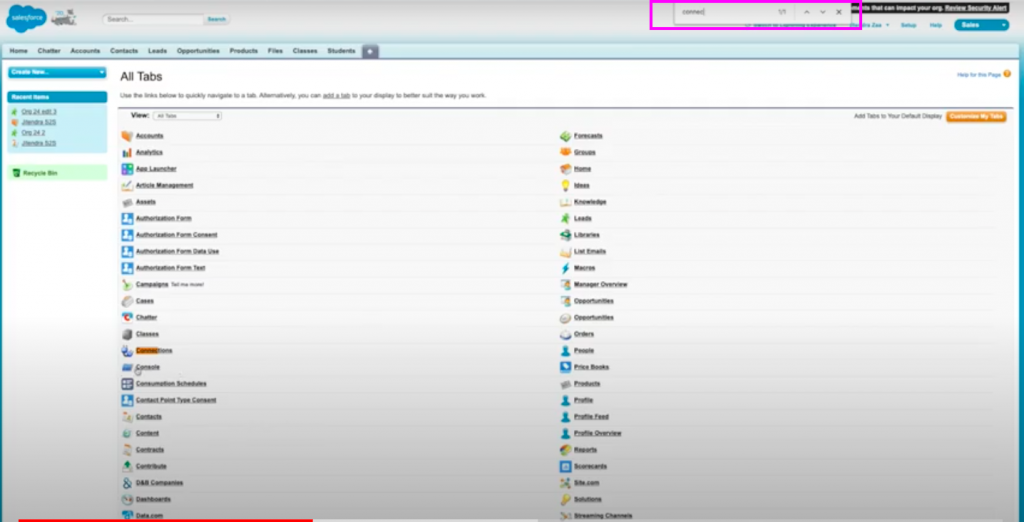
- From the tab bar on the top, click +.
- A search box appears in which you will enter the text “connection”.
- In the Connections page, Connection and Templates are available.
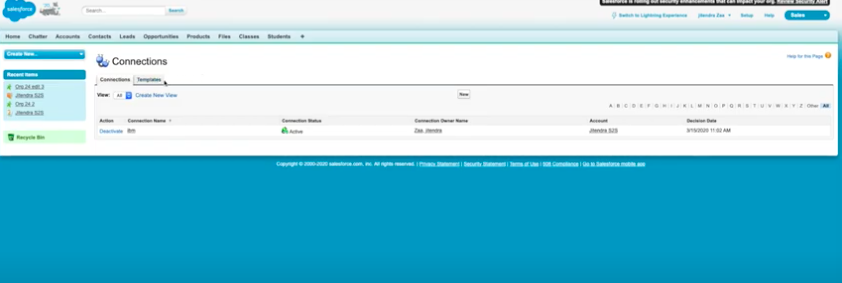
- Click Templates.

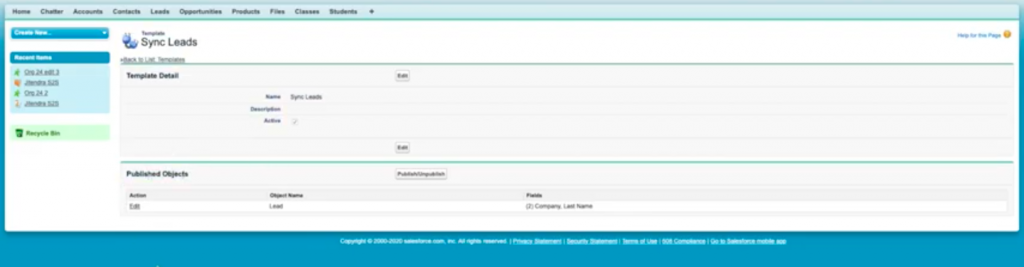
- Click New. A new template creation page appears.

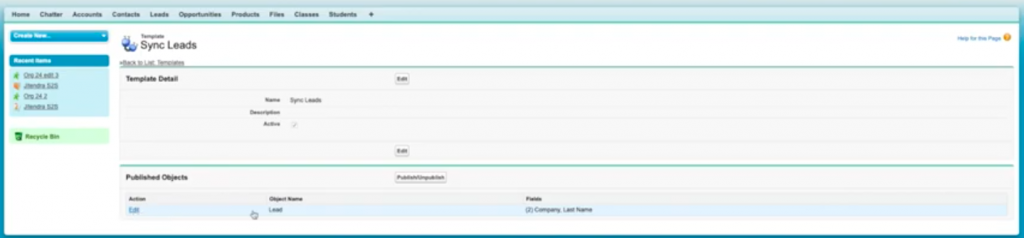
- Enter the details and select Active to make the template operational. The name can be given based on the data or objects that you want to integrate. In this example – Sync Leads.
- You can add/remove template objects from the list. Click Publish/Unpublish under the Published Objects section.
- Select the objects you want to publish with the template created by you.
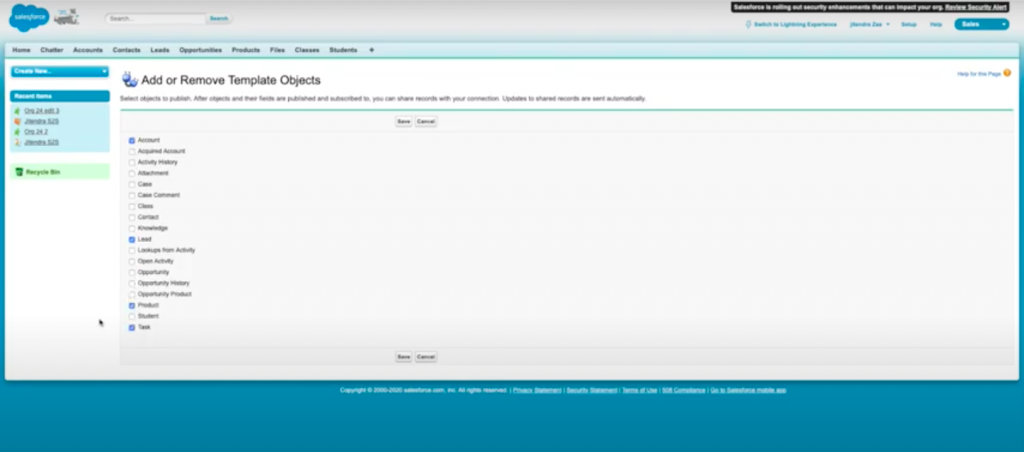
- Save changes.
- Choose fields to be added in the template.
- Edit the template to map fields.
- Choose the fields to be added and un-select the fields to be removed.
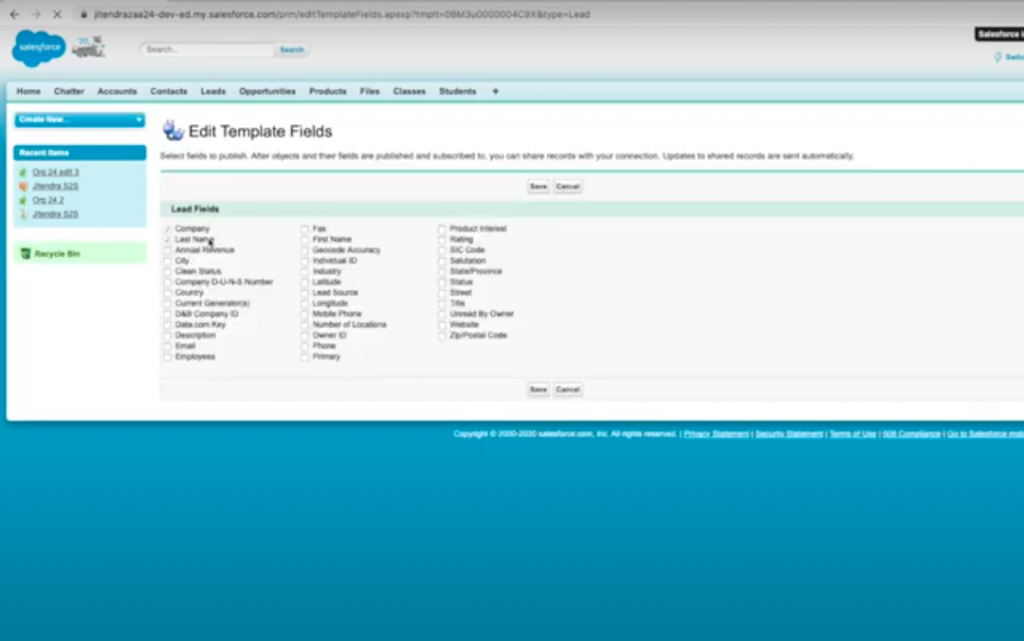
- Pick the fields and save your changes.
- Start to create a connection after template creation. To do so, follow the steps below.
- Click New for creating a new connection.
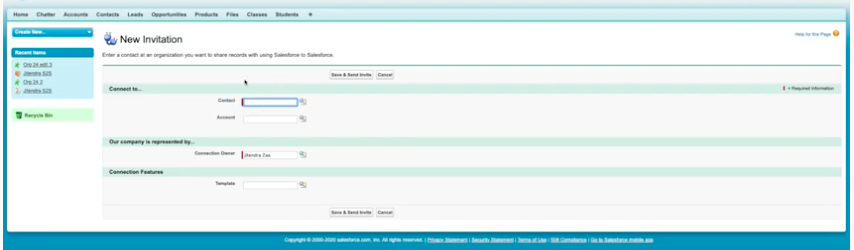
- Choose the Org2 contact from Connect to.
- Enter email and other details.
- Click Save and Send Invite. The contact will be notified via email.
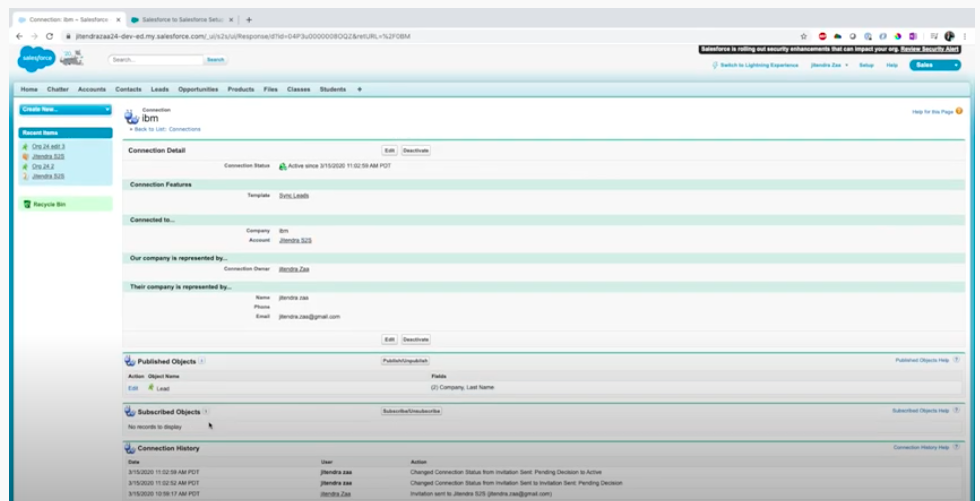
- Check the connection details.
- Now, click Setup from the top right corner. And go to the Lead object setup. (Search by entering keyword – Lead from the search bar on the left.)
- Click Search Layout. You will see the list of Lead Search Layouts.
- Click the layout and you will see the list of actions.
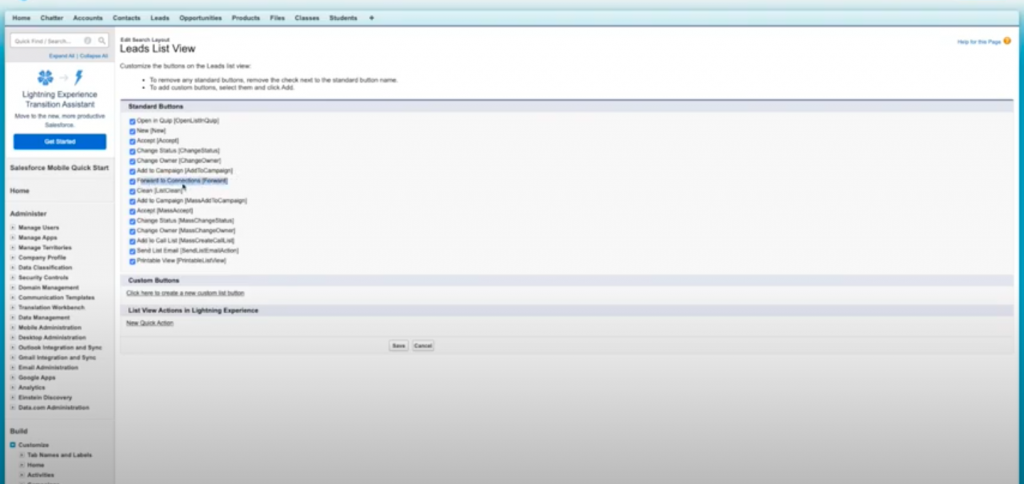
- Select the checkbox – Forward to Connections/Forward. Save the changes.
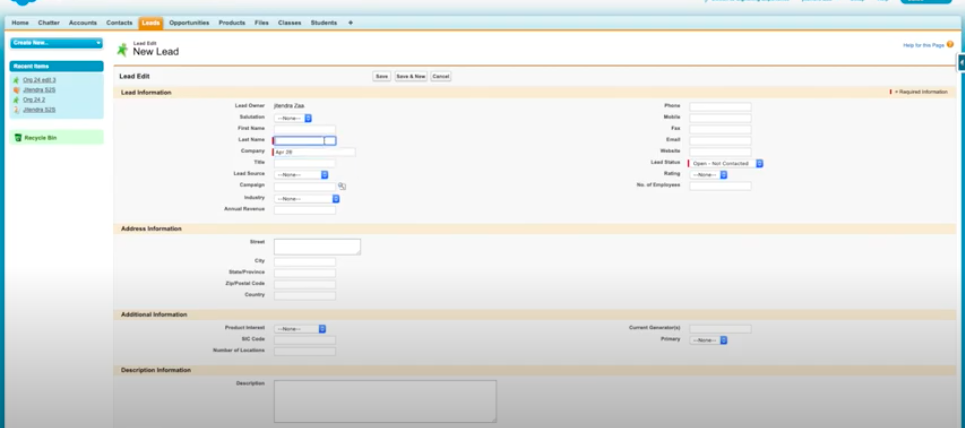
- Create a new lead record with appropriate details and save the lead.
- Go to a list of leads. You will see the lead you have created.
- Select the check box next to the lead and click the Forward Connection/Forward button.
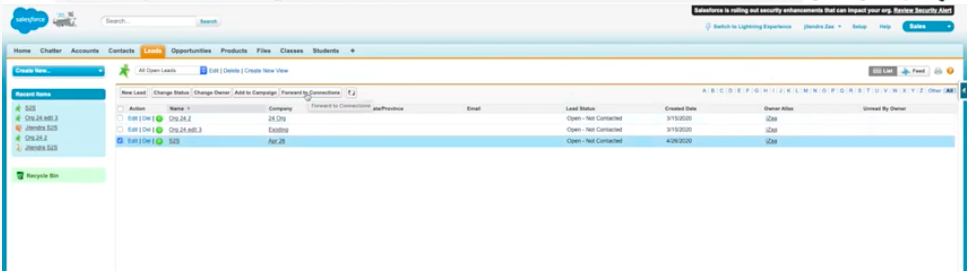
- From the Available Connections list box, select the connection to move to the Selection Connections box.
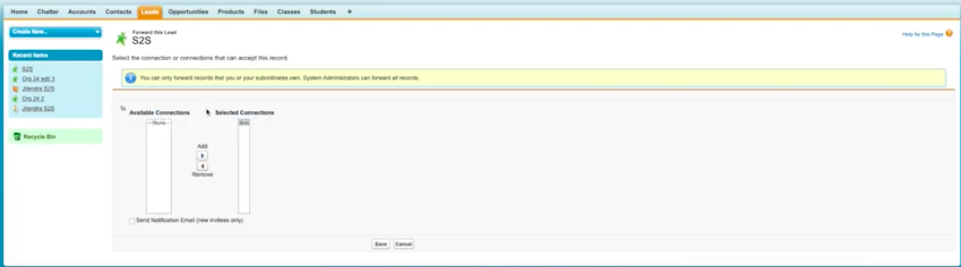
- Save the changes.
- Access Org 2. (This is the destination org to which the lead data will be accessed.)
- Go to the leads and see the list of leads. You will see the lead that we have forwarded from the Org1.
- Manually doing this task is time consuming. You can create a trigger to automate the tasks and get the data and objects to the destination org.
Method 2 – You can integrate data between Org1 and Org2 using Informatica
Informatica Cloud is used to integrate data or objects between 2 Salesforce Organizations.
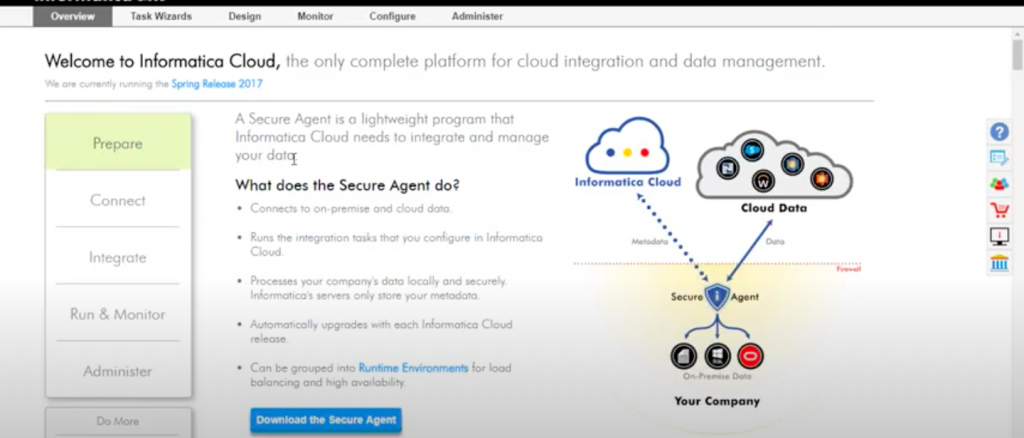
- Access the Informatica Cloud portal.
- Download the secure agent as shown below. If you already have it installed, ignore this step.
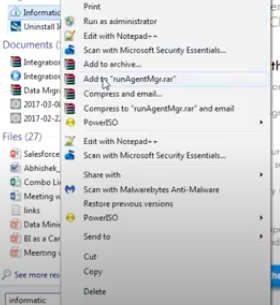
- Once installed successfully, run it as an admin.
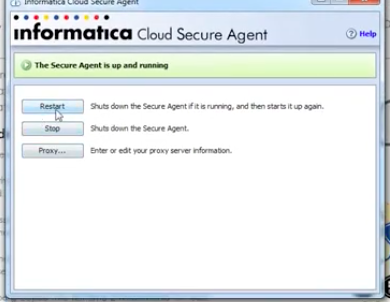
- You will see the agent running as shown below.
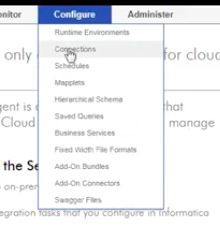
- Go back to the Informatica Cloud home page. Click Connections from Configure.
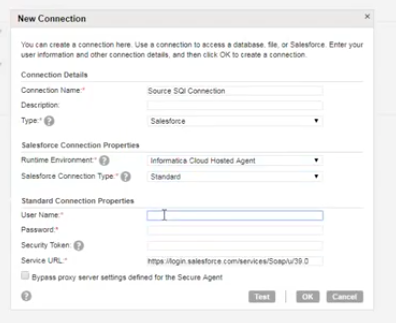
- Create two connections. Source and Destination. Make sure you have a security token, username and password of both salesforce organizations.
- Once done, you can test the newly created connection.
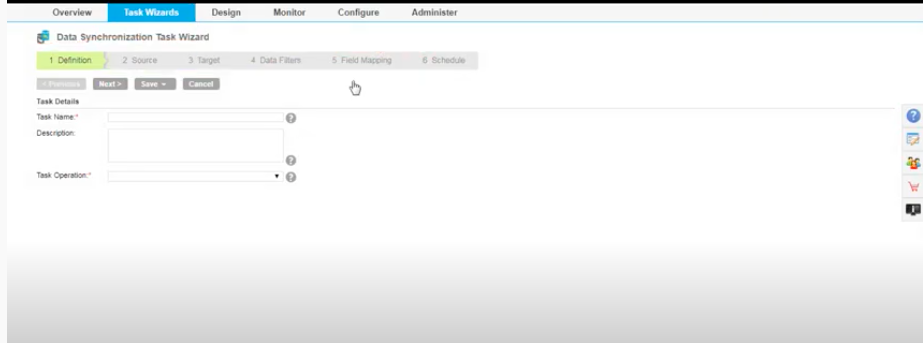
- From the Task Wizards, create a task by following onscreen instructions.
- Select connection from Source.
- Select connection from Target.
- Select data or objects to be integrated.
- Do field mapping.
- Click Schedule. Save and close without scheduling.
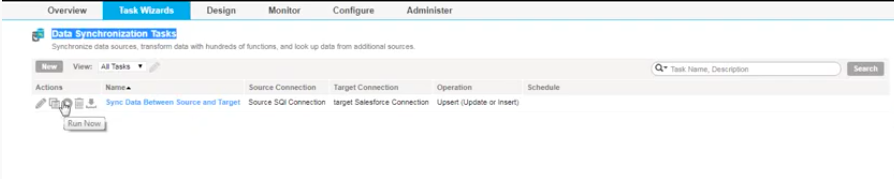
- The new task is added in Data Synchronization Tasks.
- If you want to start the integration process now, click Run Now.
- Access your destination org and validate the data is successfully integrated there.
Integration flexibility with Salesforce
Salesforce allows integration for not only its own components but also third-party apps within the organization. The only thing is third-party API should be available with details and you can successfully integrate the data or objects or entities of Salesforce.
