In the current scenario, Google’s Gmail is one of the most popular email services as it is easy to use and manage. it provides many premium features like forwarding an email, archiving/unarchiving old emails, sending the mass email,s, etc.

There are lots of benefits to using Gmail. One of the greatest advantages of using Gmail is that it provides techniques to access other business email accounts (or third-party mail clients) such as Outlook, Yahoo, webmail, thunderbird, or accounts from other email service providers.
POP and IMAP are the main underlying methods employed to access business emails. In this article, we are going to learn how to add POP/IMAP email with Gmail. But, before diving into the steps, let us understand POP and IMAP functionality.
IMAP and POP are two distinct email accessing techniques that use POP3 and IMAP protocols and work in a below-given manner:
IMAP
IMAP is preferred when you want to access your emails regardless of your location and device used. IMAP uses a mechanism in which users do need not to download or store the emails on the device to read them, rather the email service is used to access and read the email.
It provides a faster way of checking the messages as compared to POP. However, the user has to click on the mail and attachment if he/she wants to download it.
POP
Unlike IMAP, POP downloads all the messages from the email service, locally. After the completion of the downloading, POP deletes all the messages from the email server. So, this implies the downloaded email can only be retrieved by the same device on which it was downloaded before.
Steps to add POP/IMAP email with Gmail:
Now, let’s learn how to add POP email with Gmail, in order to receive business emails from other email clients on your Gmail.
Step 1: Sign in to Gmail
In order to access the Gmail account, you have to first log into Gmail by typing the address “gmail.com” over the web address in the browser.
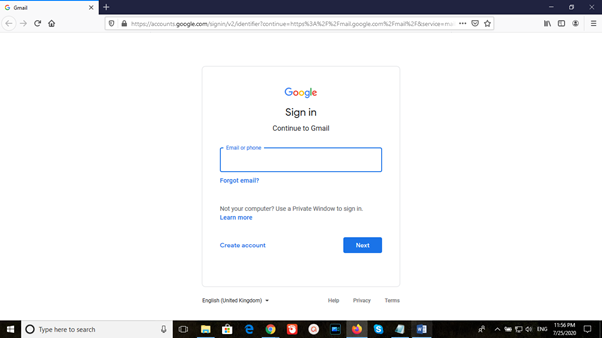
Type your email id or registered phone number in the email field and then if your email is correct it would ask your password, insert your password.
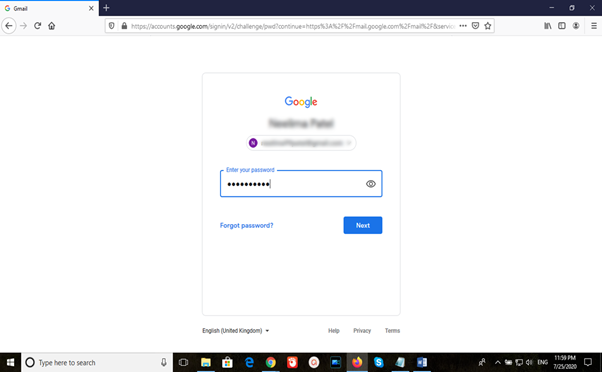
After inserting the password and clicking on next, your account eventually gets opened if the password matches.
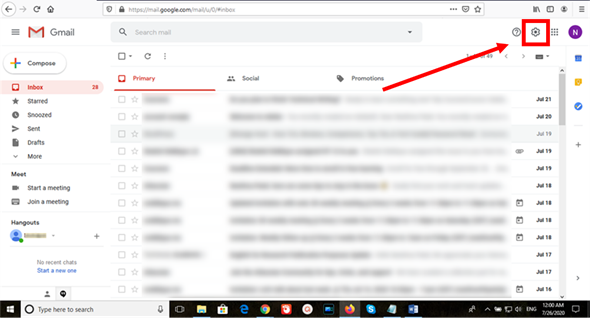
Step 2: Go to settings
After a successful sign-up search for the gear icon as shown in the image below, which is a settings button.
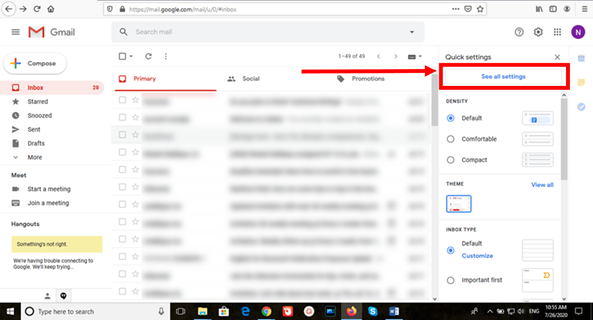
Once you click on the Settings button, it will open up a quick settings panel. Now click on the “See all settings” button.
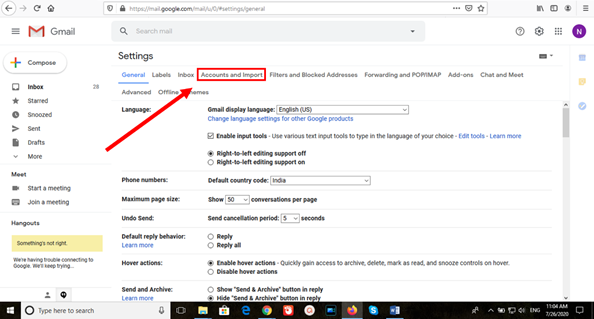
Step 3: Go to accounts and import
Click on the “Accounts and Import” link shown below the settings.
Step 4: Click on Add a mail account
Now, for adding a POP3 email account click on the link “Add a mail account”.
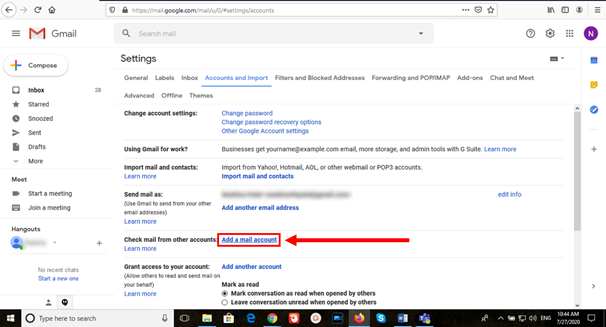
As soon as you click on the add a mail account, it opens a pop window, in which you need to enter the email address of the other business email account you wish to add to Gmail.

Step 5: Enter email address
When you enter your email address you will be shown two options with radio buttons. Either you could link your account with google mail service “Gmailify” intended for accessing other email accounts, or importing emails from other accounts using POP3. Select the second option for adding a POP email with Gmail.
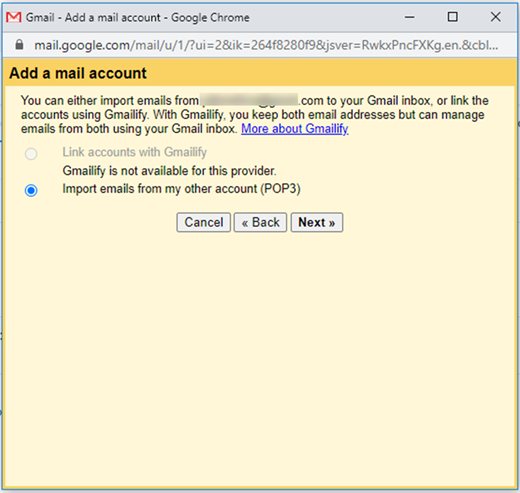
Here “Gmailify” option is not visible because we are adding a POP Gmail account but if you add some other email account, like yahoo, outlook, Hotmail, or any webmail, the option will be visible.
Step 6: Step 6: Enter the mail settings
In this step, the user has to insert the username, password and select the POP server and Port.
- Check the box for the setting “Leave a copy of retrieved message on the server”, if you want to access your email from different email client and machine. However, some mail server does not provide the following service of “leaving a copy of the retrieved message on the server” and when you try to proceed by checking the box, it will immediately show the error message.
- If you are concerned about the security of your mails, check the box “Always use a secure connection (SSL) when retrieving mail”.
- You can also select labeling for the incoming messages by checking “Label incoming messages” box.
- To avoid the mails from another account for getting displayed within your Gmail account, check “Archive incoming Messages” box.
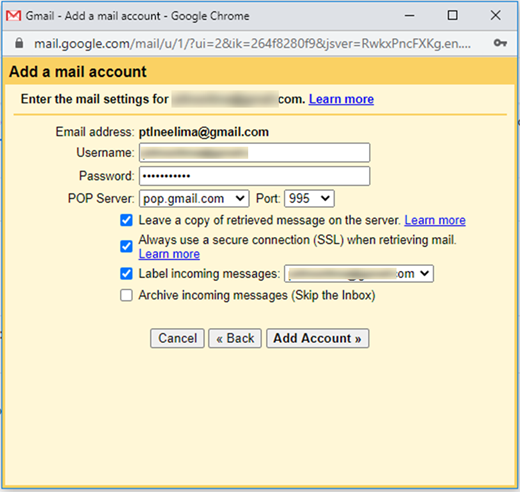
Once you enter all the details, click “Add Account”.
Step 7: Send messages from the added account
Now you will be shown a window asking whether if you would like to be able to send the email using the added email address.
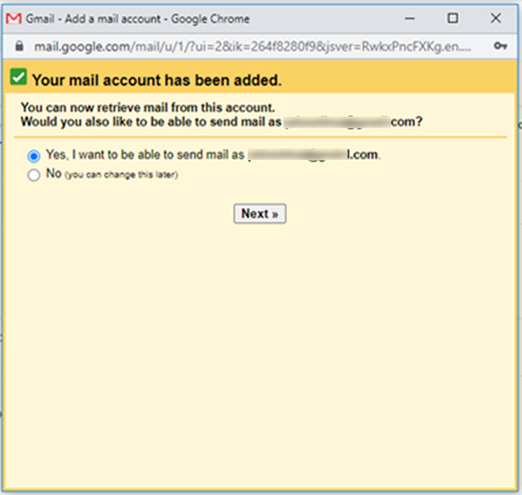
Click on yes if you want to send an email as the added email address and click next.
Step 8: Add another email address you own
In this step, you have to type Name for the added email address. The use of an alias makes the sent messages from the “sent mail as” address appear unread in your inbox and sent mail.
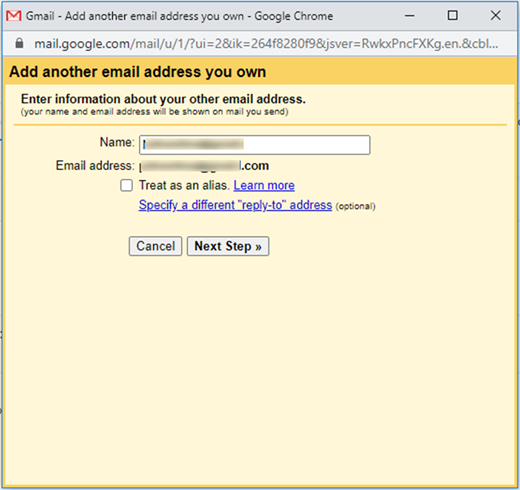
Similarly, when you reply to the email received from the same email address, the “to” field will be populated as your primary Gmail address. So, to eliminate future complications uncheck the “Treat as an alias” box and then click “Next Step”.
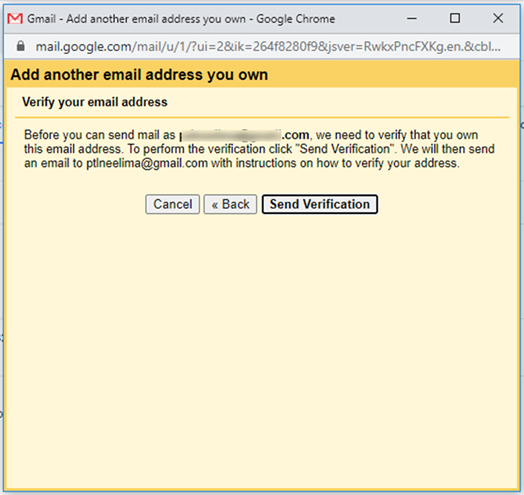
Step 9: Verify your email address
Now, you will receive a message from Gmail asking for sending verification on the added email address. Click on “Send verification” for further process.
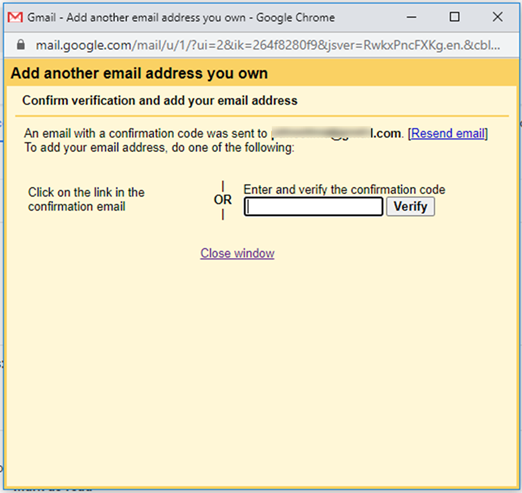
Once you receive the confirmation code on your added email address type the code in the textbox to verify the confirmation code and click “Verify”.
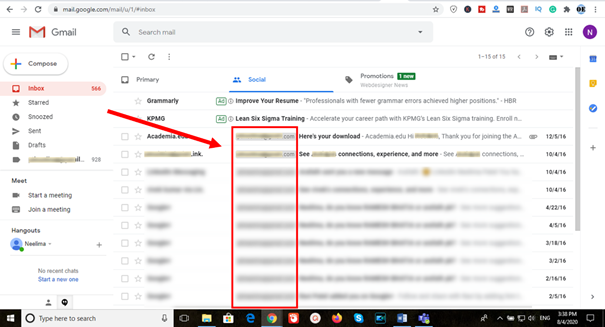
After verification, you will be able to use your added POP email with Gmail. As shown in the above image the mails from the added email address will be shown along with the label.