The margin in a document is the unused or empty space around a document. A document has four margins- top, bottom, left, and right. The area for the margin doesn’t have any text or images. Margins help in making a document cleaner and aesthetic as they help in avoiding the text or the image getting close to the edge of the document. Another advantage of Margins is to make the binding of printed documents easier.
Just like any other word processor you can change margins in Google Docs and control the amount of space you want to keep as margins on all four sides of a page.
There are two methods to do so. Let’s learn how you can change margins in Google Docs. Just follow the following simple steps :
Method-1 To Change Margins In Google Docs
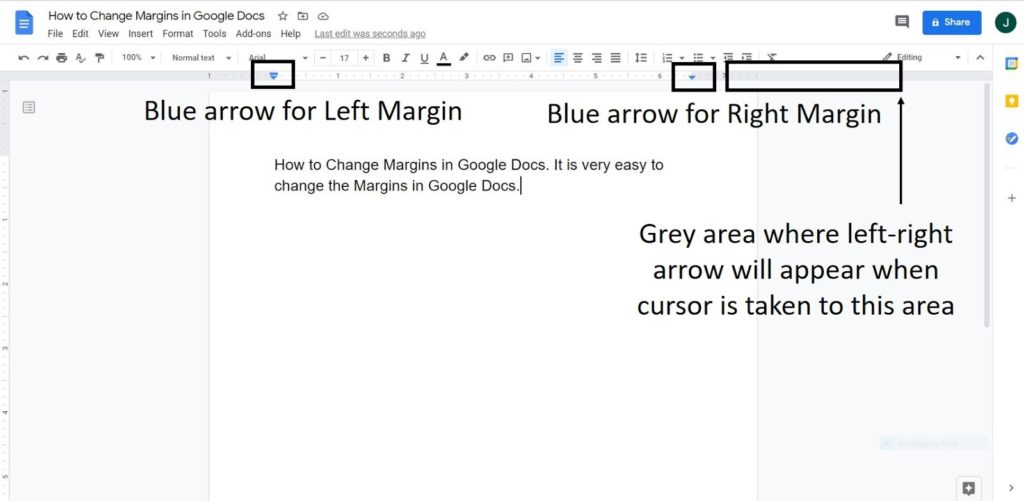
Step-1: Open Google Docs and open a new document/previously saved document whose margin you want to change. All the documents will have some default margins. You can see two blue arrows as shown in Figure 1 below which will be used to change margins in Google Docs. Alternatively, you can see a ruler at the top and there is a grey part as well on the ruler. Move your cursor to that part and you can see the symbol ‘↔’ i.e. a left-right arrow.
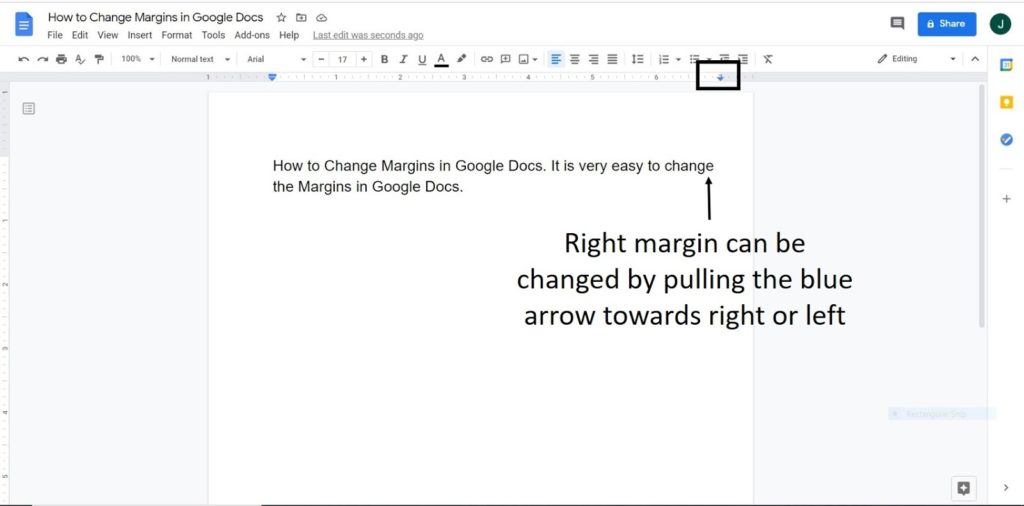
Step-2: Now to change the right Google docs margin you have to take the cursor on the blue arrow and then you have to left-click. Then drag it to the right side to increase the margins and towards the left side to decrease the margin. Alternatively, you can take the cursor on the grey part of the ruler. A left-right arrow ‘↔’ will appear. You can then left-click the mouse and drag the left-right arrow towards the left or right as per your need.
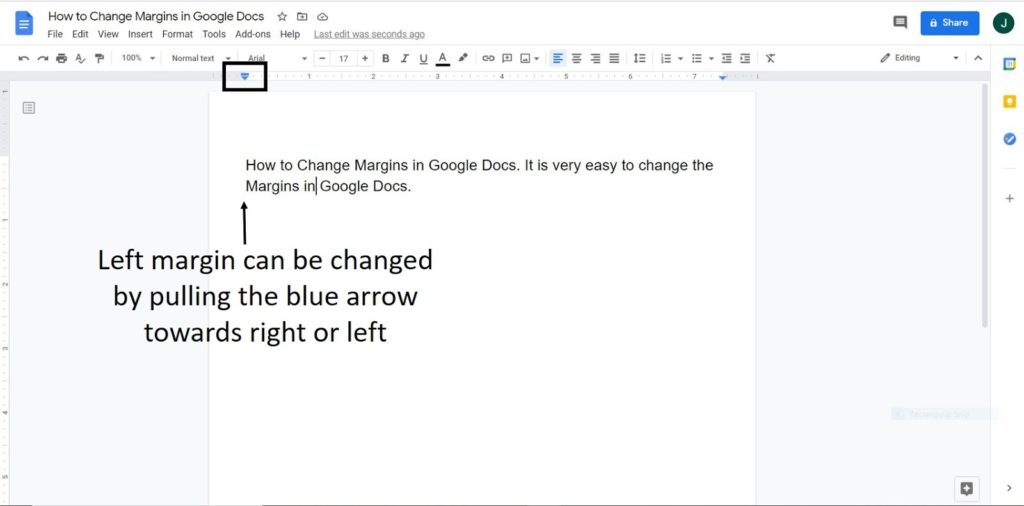
Step-3: As shown in Figure 3 below, to change the left Google docs margin you can take the cursor on the blue arrow, and then you have to left-click and drag it to the right side to increase the margins and towards the left side to decrease the margin. Alternatively, you can take the cursor on the grey part of the ruler. A left-right arrow ‘↔’ will appear. You can then left-click the mouse and drag the left-right arrow towards the left or right as per your need.
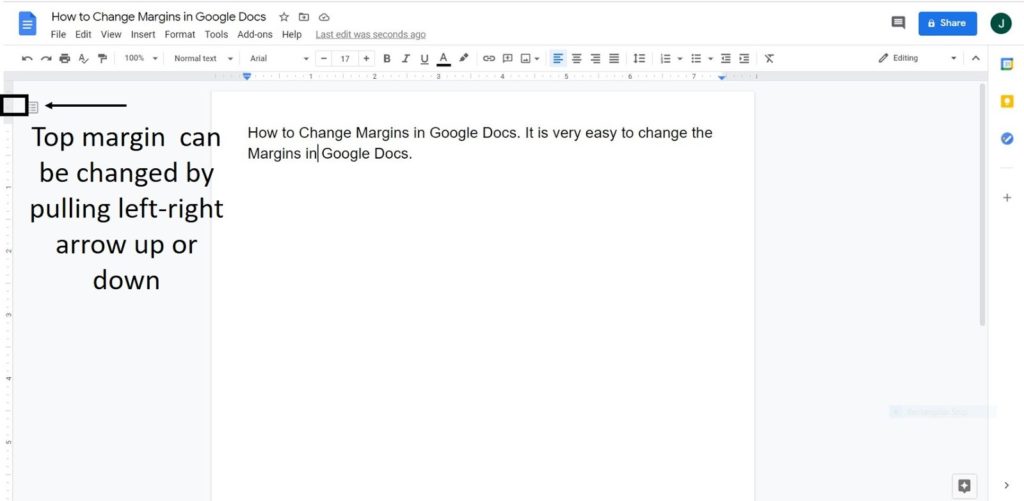
Step-4: Once you are done with the left and the right margin, to change the top Google docs margin of the document in Google docs take the cursor on the grey part of the left ruler as shown in Figure 4 below. A left-right arrow ‘↔’ will appear. Now left-click on your mouse and drag this arrow towards the top to decrease the top margin or pull it down to increase the top margin.
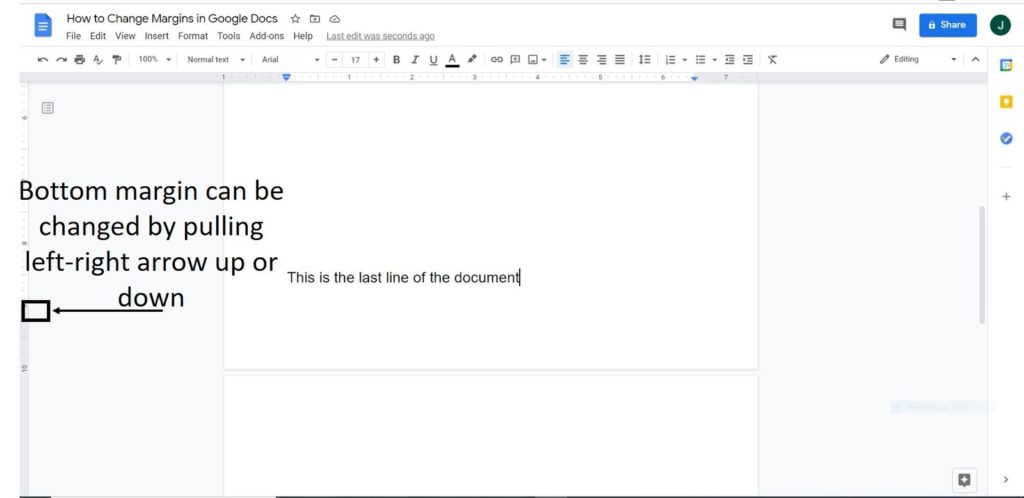
Step-5: Finally, to change the bottom Google docs margin, you have to first come to the end of the document. Now take the cursor on the grey part of the left ruler as shown in Figure 5 below. A left-right arrow will appear. Now left-click on your mouse and drag this arrow up to increase the bottom margin or pull it down to decrease the bottom margin.
In case you want to change the margins of selected paragraphs in a document, even that is possible. You have to select the paragraph (by pressing the left click of the mouse and drag to the end of the paragraph). Once selected, you can use the above steps to change the margins of the Google docs. The changes in the margin will be applied only to that paragraph.
Method-2 To Change Margins In Google Docs
The second method is more useful when you want to change all the margins equally in one go and you want to exactly know how much margin you want on all the sides (It can be different on each side if you want).
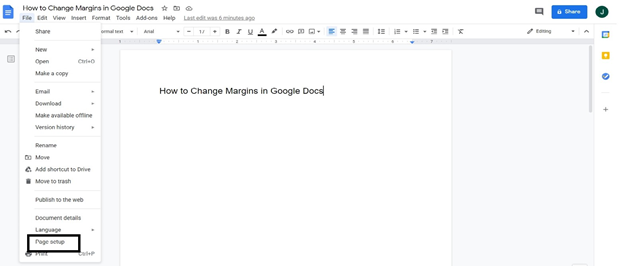
Step-1: Go to the ‘File’ tab as shown in Figure 6 below and then click on it. Then go to the tab for ‘Page setup’
Step-2: Once you click the ‘Page setup’ tab, a window as shown below will appear with default margins (1 inch in this case) as shown in Figure 7
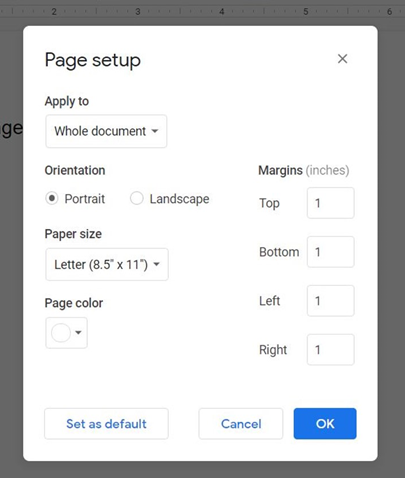
Step-3: Now you can change the margins in Google Docs as per your requirement by typing the margins you want in the document. By default, the margins are in inches. As shown in Figure-8 below, all the four margins were decreased and were made as 0.5 inches.
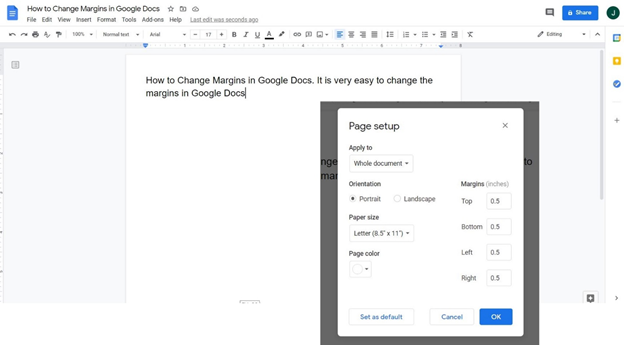
Other features of the document which you could change in this window are whether you want to apply the margin changes to the whole document or to some selected portion. You can also change the orientation of the document whether portrait or landscape. The paper size can also be changed. There are multiple options under paper sizes like the default ‘Letter’ or ‘A4’ or ‘Legal’ etc. Choose the one which is suitable for your work. There is also an option to change the paper color.
If you are regularly working with some specific margins in Google docs (which are not default) you can make those margins as default margins by clicking on the ‘Set as default option.
As you could see, these two above methods could be used to change margins In Google Docs and it doesn’t take more than a few minutes. Although simple, these steps help you in making your Google docs more attractive and readable. This feature will help you when you print and bind your documents.
Follow the above steps to change margins in google docs and there you are with a great-looking document!
You may also like:
- How to Make a Graph on Google Docs
- How to Hide Comments in Word
- How to Make One Page Landscape in Word
