Google Docs is probably the most preferred document-sharing tool. It allows seamless collaboration and sharing of content without any need to spend extra bucks. However, it lacks some features which if would have been inbuilt by the makers would have imparted more power to the editor.
If you are a regular user of Google Docs, you would know that Google Docs lacks the feature of inserting captions to images and tables. However, there are some ways in which you can insert a caption in Google Docs.
You can insert a caption in Google Docs using the following methods:
- Using Table Method
- Using Inline Feature
- Using Text Box Feature
- Using Caption Maker Add-on
Insert image caption in Google Docs: Using Table Method
In your Google Doc, insert a table from the Insert option.
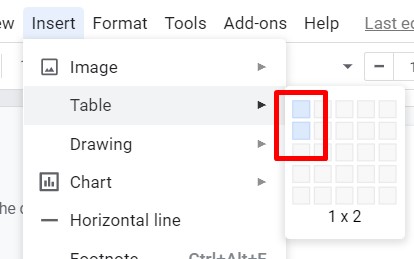
In one row, drag and drop the image you would want to add in Doc and caption it.

In the second row, type the caption of the image. Bold and centre it if you wish so.

Now, click on the table border. Change the table border colour to blend with the background colour. Repeat for all sides.
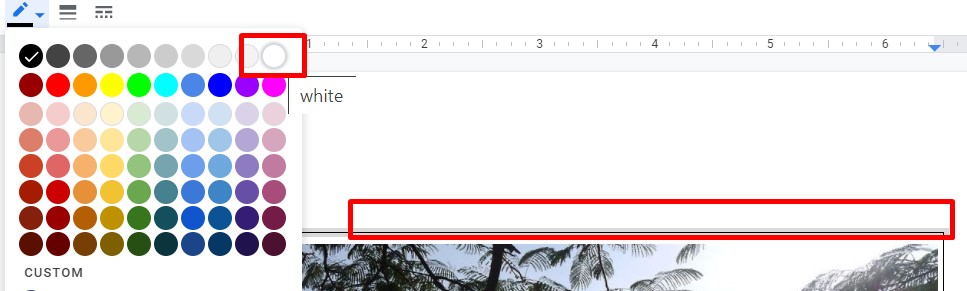
After all rows and sides are done, you are left with the image and the caption!!

Does it feel like a time-taking method? Let’s look at a simpler method now.
Insert image caption in Google Docs: Using Inline Feature
Copy and paste the image into the doc. Double click it and you will find the option below the image – Inline. Click it.
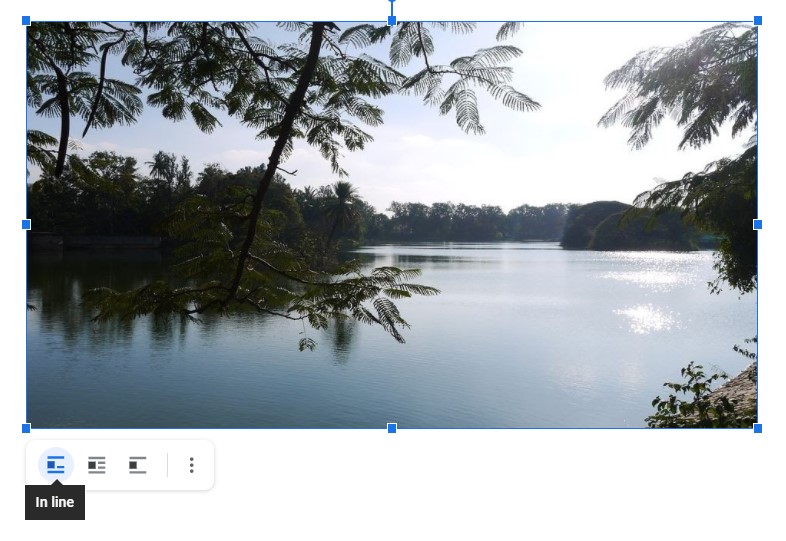
As soon as you click Inline, you can see the cursor positioned in the

This method is an easy way to add caption on Doc; however, sometimes while saving the doc, you may have to ensure that the inline feature is applied and it is staying still as you formatted it.
Insert image caption in Google Docs: Using Text Box Feature
Google Docs has a feature called Text Box in its Drawing option in the Insert Menu.
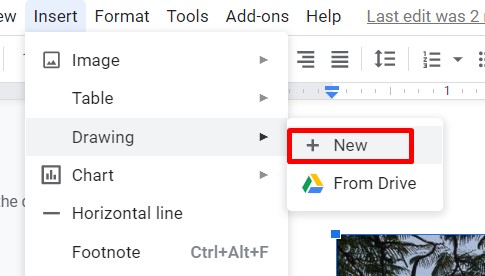
Place the cursor below the image. Now, Click Insert. Choose Drawing. Choose New and then click on Text Box.
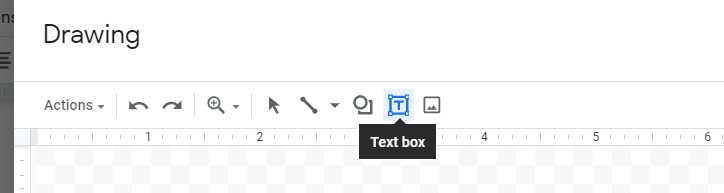
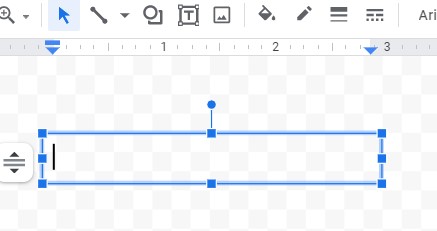
A text box appears wherein you can type the desired text as a caption. Type the caption and Save and Close the box.
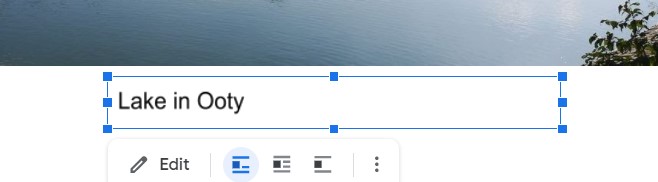
You can find that the text in the box appears below the image. Adjust is as per the desired look and feel.
Insert image caption in Google Docs: Using Caption Maker Add-on
Add-ons are one great feature of Docs. You can add desired functionality that you feel is missing from Doc. In the same lines, you can choose a Caption Maker add-on and create a caption for Google Doc images. Let’s see how.
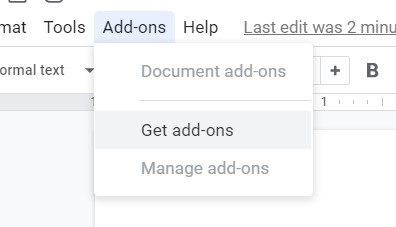
Go to Add-ons on the main menu of Doc. Choose Get add-ons.
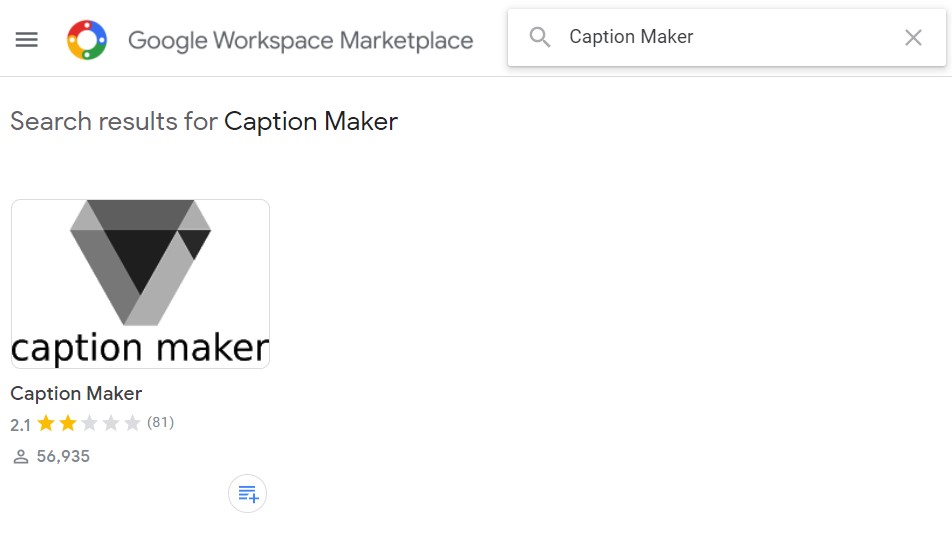
You will see a window where you can download Add-ons. Search for Caption Maker and install it.
Then, Caption Maker is installed in the Doc Add-ons.
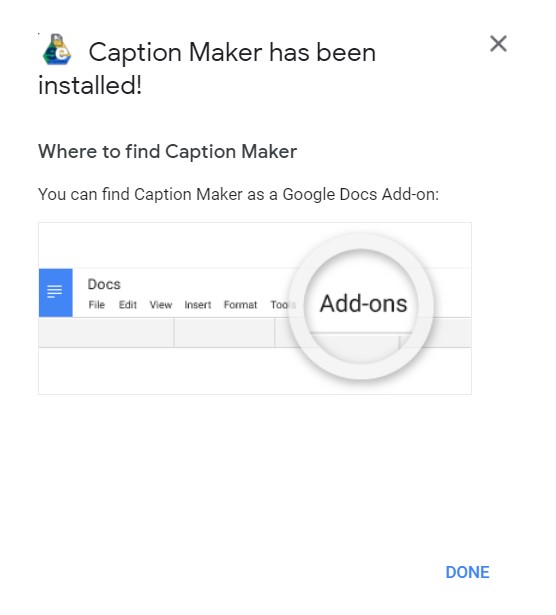
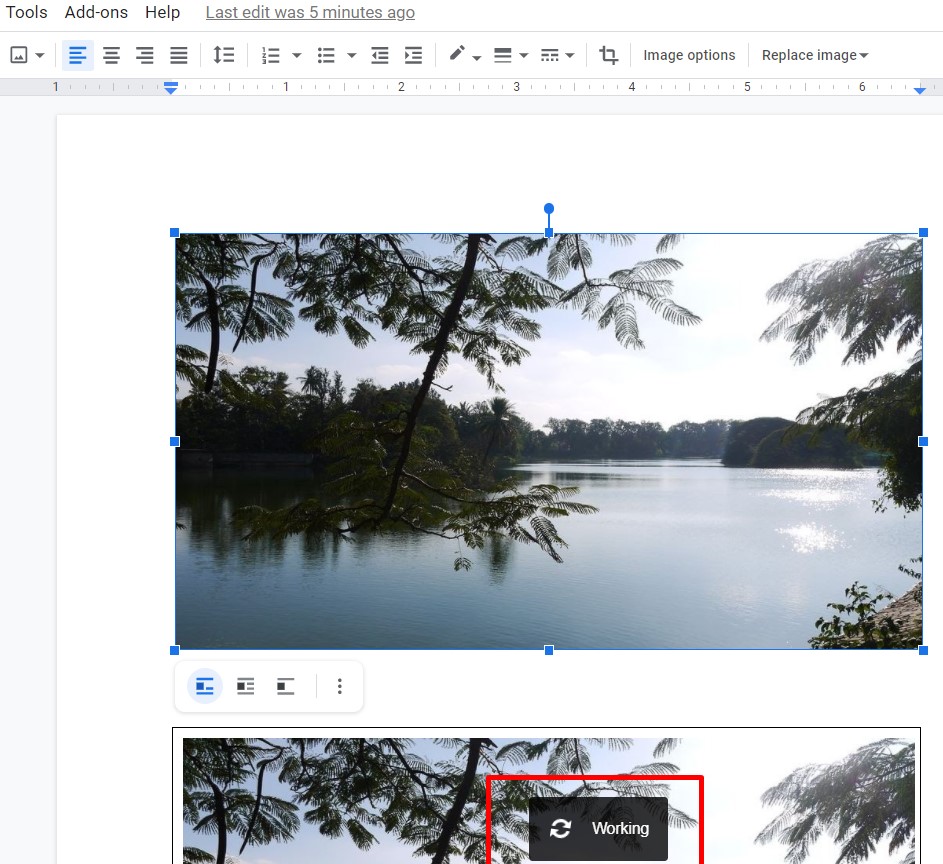
You can find it in the Add-ons menu. Click it. The Add-on will start getting ready for inserting captions.
The features of Caption Maker will present themselves on the right-hand side.
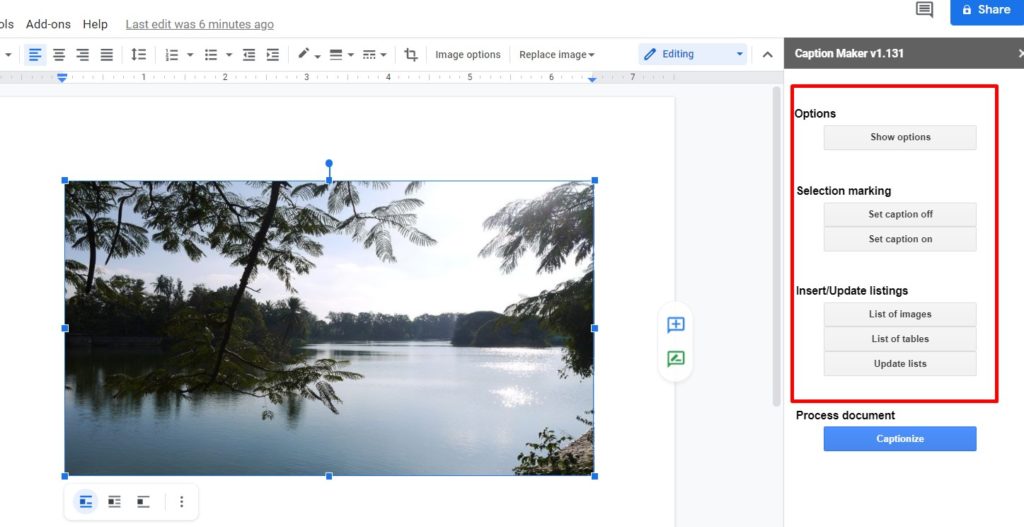
Click Show Options.
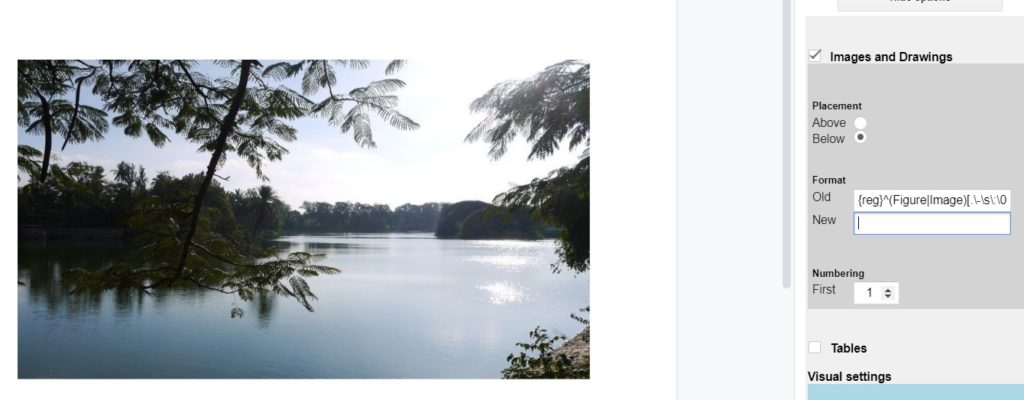
You can see the options as shown here. One benefit of Caption Maker is you can also add a caption to tables. And the process remains the same. In the example here, we are adding a caption for images only.
In the New box, enter the caption for the image. You can also customize your caption’s colour, size, and formatting.
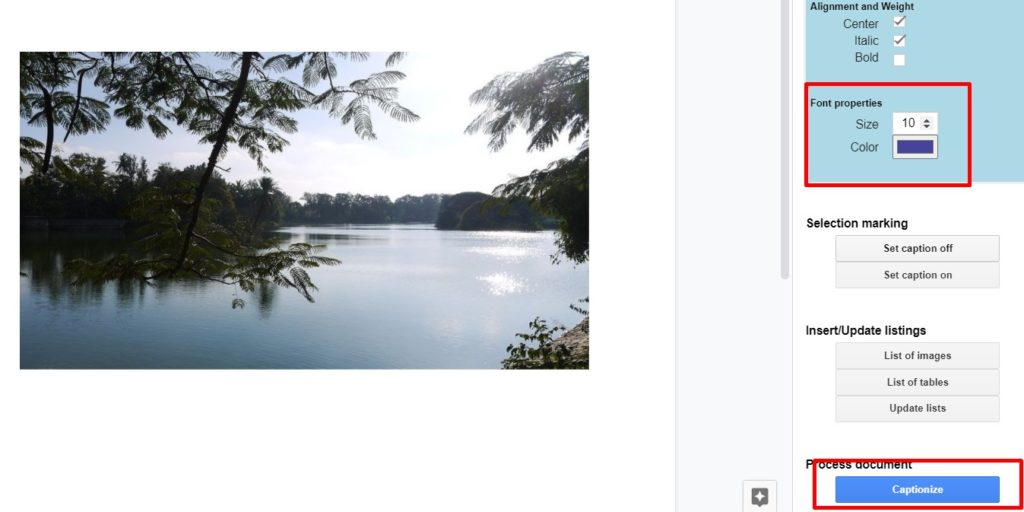
Once you have done the captioning and formatting, click Caption. You can see a message saying the tool has added captions.
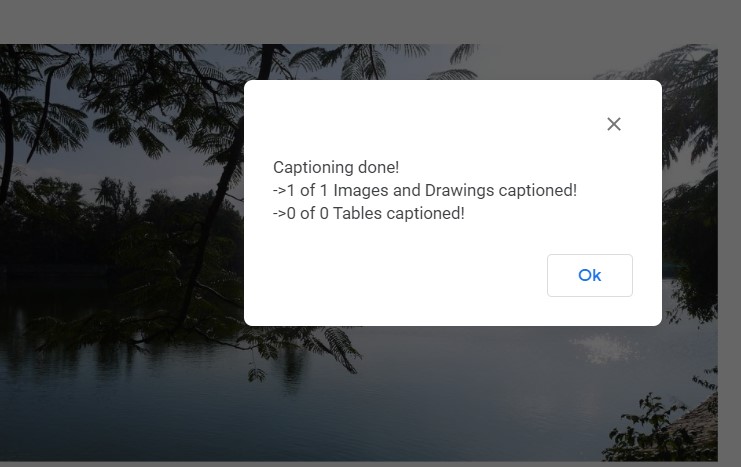
Yay!! Captioning is done.

This process may seem to be longer, but when you have many images and tables in your doc, you can caption them with ease.
Thus, these are the methods to add a caption in Google Docs. You can choose one based on your need and time.
So, which one are you picking? Let us know in the comments.
Also read:
- How to delete pages in Google Docs
- How to make Graph in Google Docs
- How to change margin in Google Docs
- How to save Google calendar in PDF
- How to check connected applications to Google
- How to create histogram in Google Sheets
- How to create quiz in Google Forms
