Google Docs has almost converted MS Word users to its side. With all features that MS Word provides, Google Docs has it all. Document users do not need to worry about a Microsoft Office licenses for using the products. Review, tracking, styling and formatting – all are possible through Google Docs along with sharing, printing and converting to PDF.
Inserting images in Google Docs is easy and quick. All you need to know is where the image is kept. Pick that source, be it Web, Local Desktop, Google Drive or Web Search. Once the image is in Google Docs, it is easy to move anywhere the user wants to place it.
Also read:
- How to insert image caption in Google docs
- How to delete pages in Google docs
- How to use subtract in Google sheet
- How to save Google calendar as a PDF
- How to create graphs in Google docs
- How to use the unique function in Google sheets
[Method 1]Moving an image in Google Document
- Get the image in Google Docs as shown below.
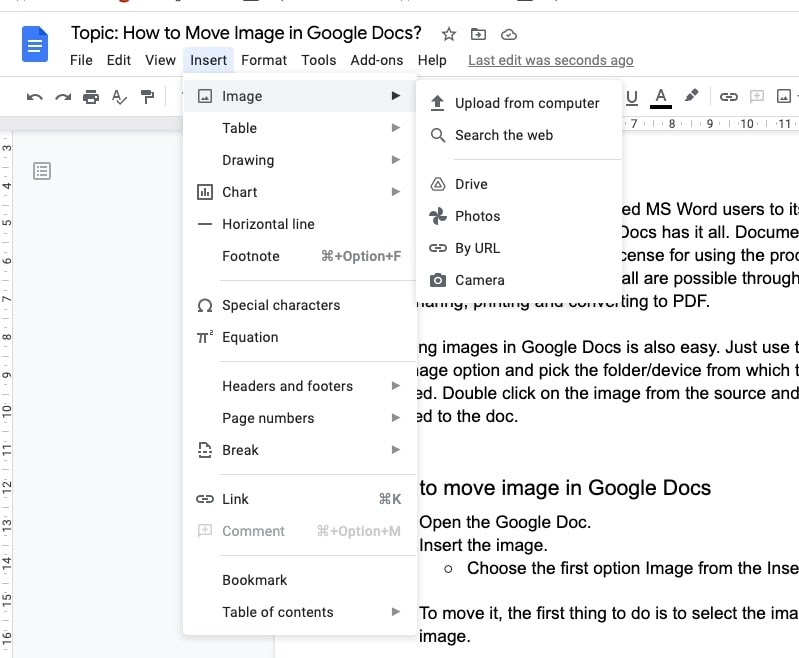
- Choose the source of the image – Upload from computer.
- Pick the folder in which the image is available.
- Double-click to get the image into the document.
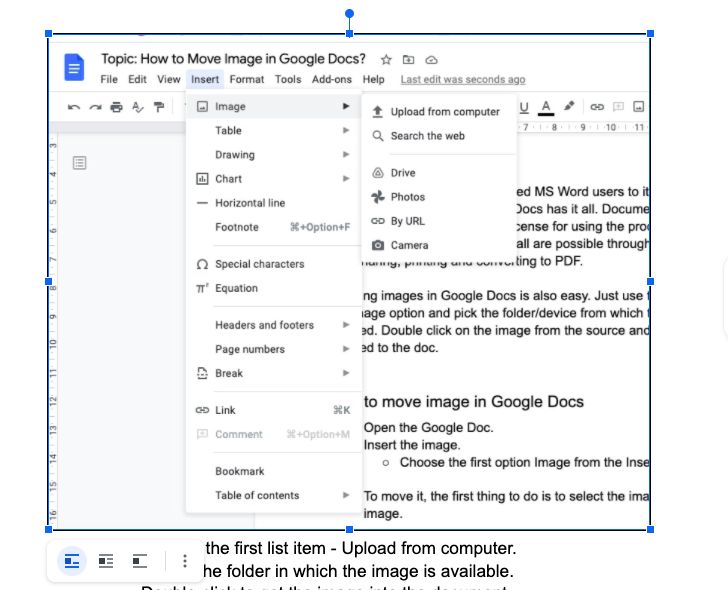
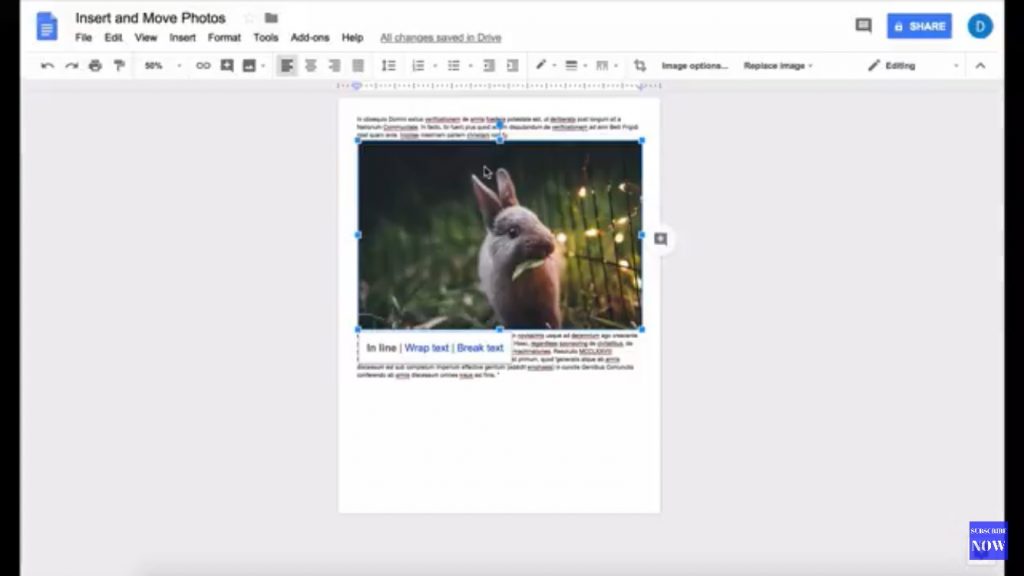
- The first thing to do is to select the image by clicking the image.
- At the bottom left below the image, the user shall see 3 icons.
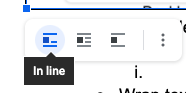
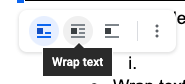
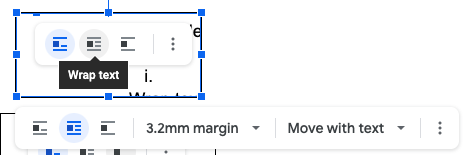
- Choose the first, Wrap text option. Margin and moving options are shown.
- Set a margin to keep around the image.
- The second drop-down is to pick the option for positioning of the image.
- To move the image with text, keep the Move with text option.

- Explore the Position options to set it accordingly. The below settings are shown.
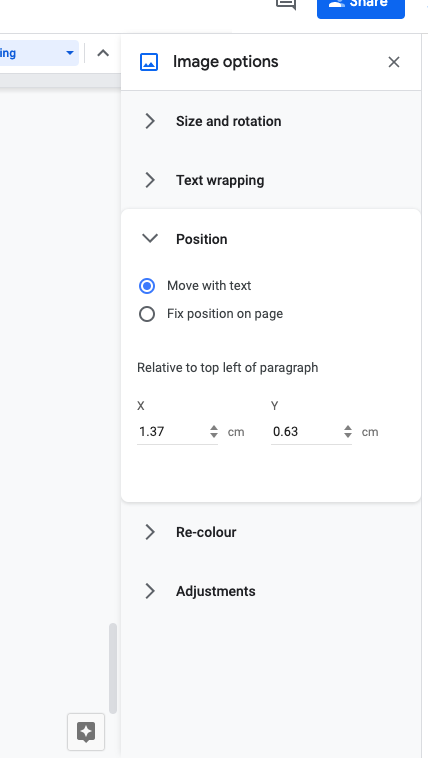
- Adjust the X and Y positions.
- Click the image and move it with a trackpad or mouse.
- You will see the image moving in the document. Release the mouse at the place the image is to be kept.
- Around the image, text may be seen for the best fit.
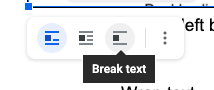
- Choose the third icon and view the options. This is an alternative way of moving images.

- Set the margin around the image.
- Choose the Move with text item.
- Click the image and use the mouse or track page to move it from one place to another in the document.
- Release the mouse once you reach the place where the image is to be kept.
- You have successfully moved the image with the break text option.
[Method 2]Change Position of an Image in Google Docs:
Before you can move the image around freely you might want to adjust the text wrapping settings which affect the image. The settings available are:
- Inline: with this, you can make the image in-line and by the text. The image will therefore act as text and move if any text is deleted or added. This, however, makes it a lot harder to move the image about.
- Wrap text: this setting makes the text arrange itself around the image more naturally all the while giving you more freedom and flexibility with the image.
- Break text: with this, the image acts as a break and gap between text and portions it rather than arranging naturally with it. This means, that the text will only appear above and below and not right or left as with the previous options.
You will find these settings below the image when you click on the image or you search in the image formatting options.
To move the image, double-click on the image and the cursor will change into directional arrows. While holding the right-click button, move the image to the desired location and let go of the mouse key.
Change the size of an image:
- Click on the image you want to resize, and the resizing handles or blue outline will appear around the image.
- Use the corner handles to resize the image whilst keeping the same proportions of height and width of the image. If you want to change the ratio and make it taller or wider then use the top or side handles respectively.
How to move images in the google docs app.
You have to enable editing mode by clicking on the pencil icon to edit and move the image.
- Tap on the image and you will then see the resizing handles
- Tap the image again and hold it.
- Move your finger to where you want to drop the image.
- You can also preview the image right before you drop it.
You can also click on the image and press image options where you can change text wrap settings:
- Make it in-line
- Wrap the text around it
- Break text and portion it above and below the image
- Send the image in front of the text so that text does not interfere with the image
- Send it behind the text
You can also crop the image and rotate it or reduce the opacity of the image to make it fit more naturally with the text.
Break Text and Wrap Text
Both options are similar for moving the image. While placing the image the text would be wrapped around the image if any. In case of break text, the image will be placed where you have chosen without the text around it. The choice is yours how you want to move and place the image in Google Docs.
