Notifications are the messages that you see everywhere. In your mail inbox, on your smartphone as push notifications, or on any application you are using on the Web / Online.
Nowadays, we all use online shopping portals to buy stuff. We search for a product we want to order and it is not available (out of stock). You will get an email or a push notification on your app that the product is back in stock and you can proceed with the order. Once the order is successful, you get notified via email that your order is successful and it will be delivered on this date. You can also track the order.
Another best example of a notification is – in your Google calendar you have set reminders for your loved ones’ birthdays. You get a desktop notification or email notification or push notification from the Calendar app on the specified birth dates.
All your social media apps – run on notifications. You get a message from someone, you get notified. WhatsApp, Facebook, Instagram, Twitter, LinkedIn – all apps user notifications for updates/messages you get from your contacts.
Business applications – for marketing their products and services, they set up notifications to the users. If they have built a mobile app or a website for selling their products or services, notifications are important for them to reach out to their target audience.

Notifications are also useful for food ordering apps. You order food online and you get notification of your food going to be delivered at this time by this delivery agent and so on. You are getting updates on each step of food being prepared, packed, out for delivery, and delivered. All of these updates are sent out as notifications to the app or the Web portal you are using.
Some in-app notifications are important for internal users as a warning or as alerts to take proactive actions. For example, if the password is about to expire in the next 5 days, please reset it now. You will be notified by the email client you are using and the password policy is set by the system. Another important notification is your drive space is getting full, please remove unnecessary storage to free up the space.
Some important notifications are – the website is going to be under maintenance as on date and time. You will be notified well in advance of any maintenance work.
Other important notifications are whether your bill payment is due or an alert of debit or credit to your bank account. You are immediately notified via email or push notification from the bank if any transaction is done from your account.
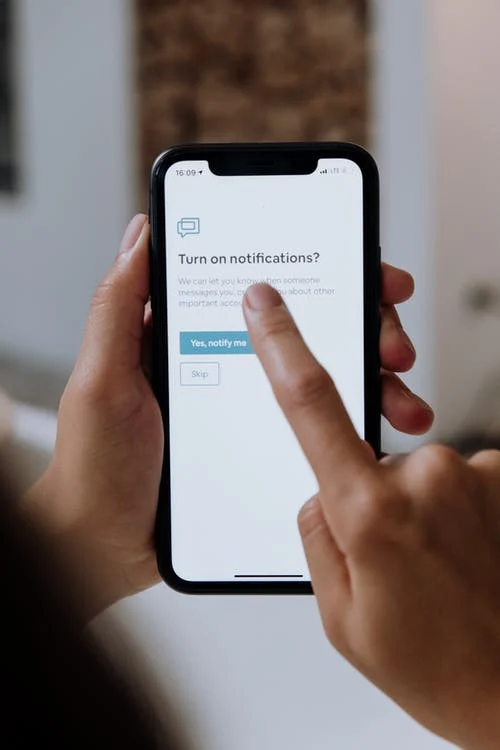
In this article, we are going to learn about the OneSignal notification service that is offered as SDK, APIs, or a plug-in. OneSignal can be used as a plug-in for the websites created in WordPress CMS.
OneSignal as a plug-in
OneSignal platform offers the service to send push notifications, email notifications, and in-app notifications on Web portals that use CMSes such as WordPress and Shopify.
The purpose to integrate OneSignal is to keep traction on your website and increase the user engagement rate.
The following features are supported in the OneSignal service. Let us have a look at them.
- Browser Compatibility – Mozilla Firefox, Google Chrome, Microsoft Edge, Safari, and Opera are supported browsers on which the OneSignal notifications can be enabled. All the sites of HTTP and HTTPs are supported to receive notifications from OneSignal.
- Scheduling and Automation – Every time a new post is published from your WordPress admin panel, you can intimate the followers by sending notifications using OneSignal. You can set up reminders if they haven’t visited your site for quite some time. You can also schedule the OneSignal notifications to visitors based on the time zone.
- Target Audience – You can choose the target audience to whom you wish to send out notifications based on their demographics such as their language, their preferences, and so on.
- Analytics – OneSignal provides you analytics on the notifications being sent and the users got converted to visitors of your website. This helps in utilizing the notifications effectively.
Let us understand how to automate the notification service in your WordPress admin panel using OneSignal.
Step-by-Step instructions on how to automate One Signal Notification using WordPress
- Login to your WordPress admin panel.
- On the left menu panel, select the Plugins option and click Add New.
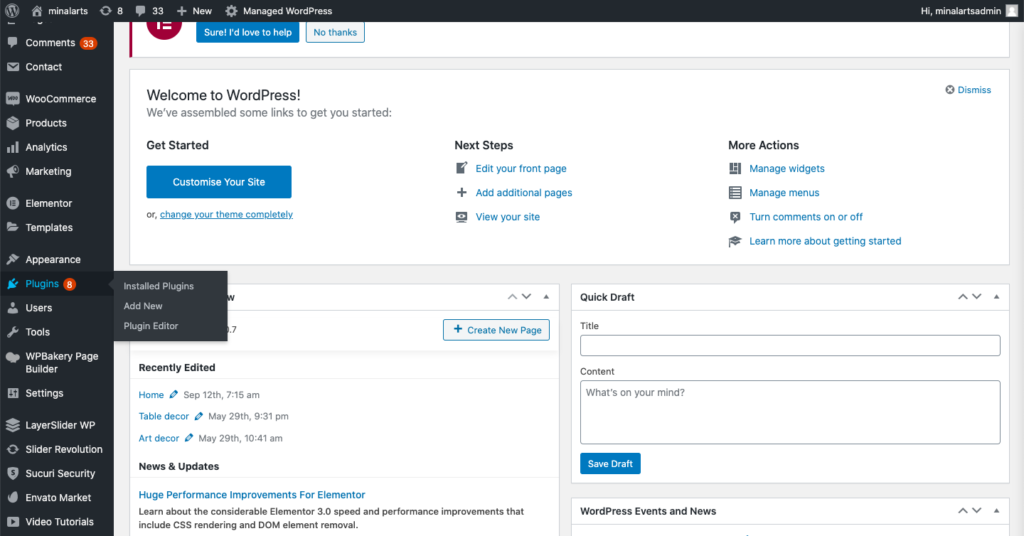
- On the Add Plugins page, enter the keyword, OneSignal in the Search Plugin field. You will see the search results below.
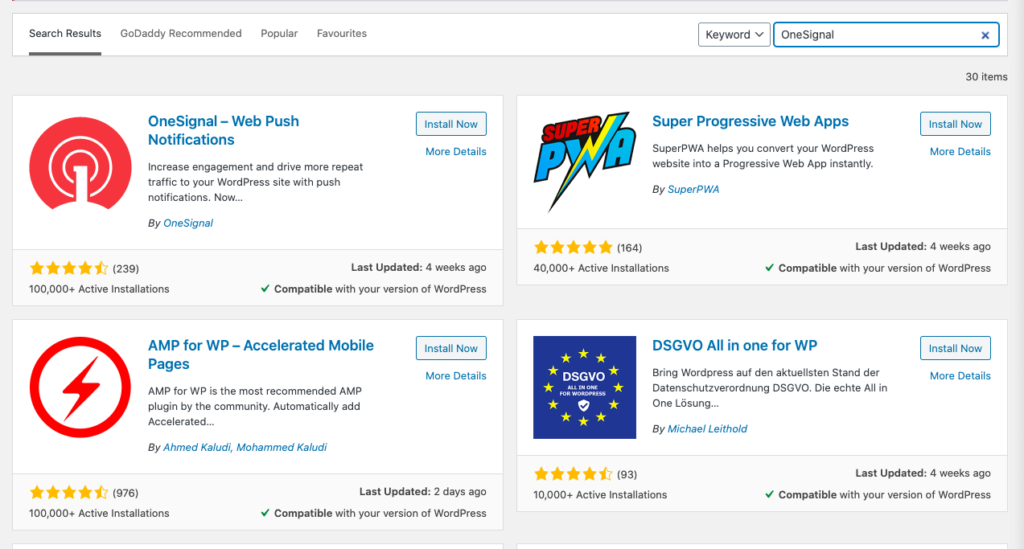
- Click the Install Now button on the OneSignal – Web Push Notification plug-in.
- Once installed, the Install Now button changes to Activate.
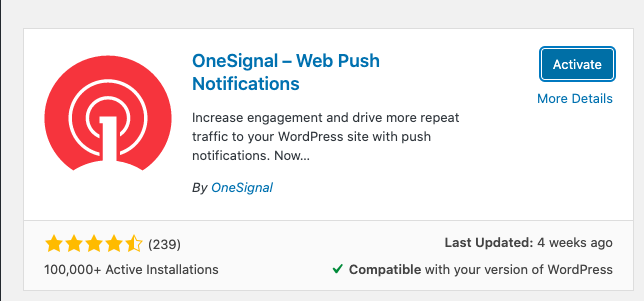
- Click the Activate button. You will see the OneSignal Push menu is active and available in the left menu panel.
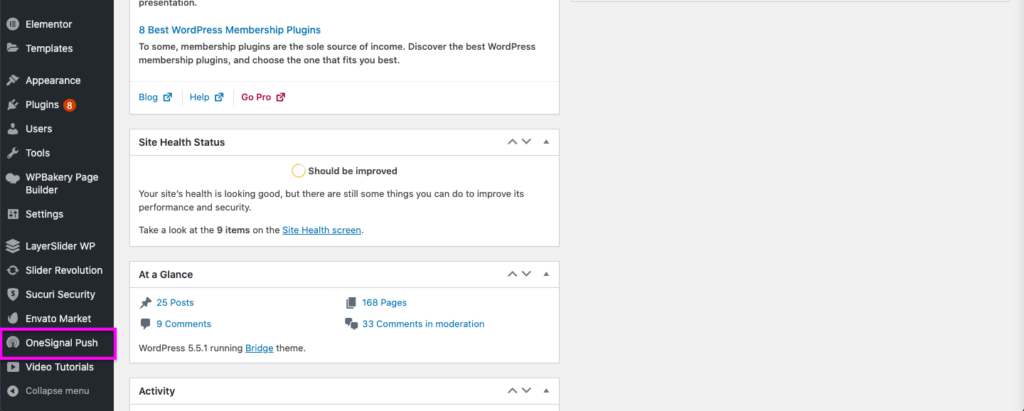
- Click the OneSignal Push menu. The setup and configuration page are shown.
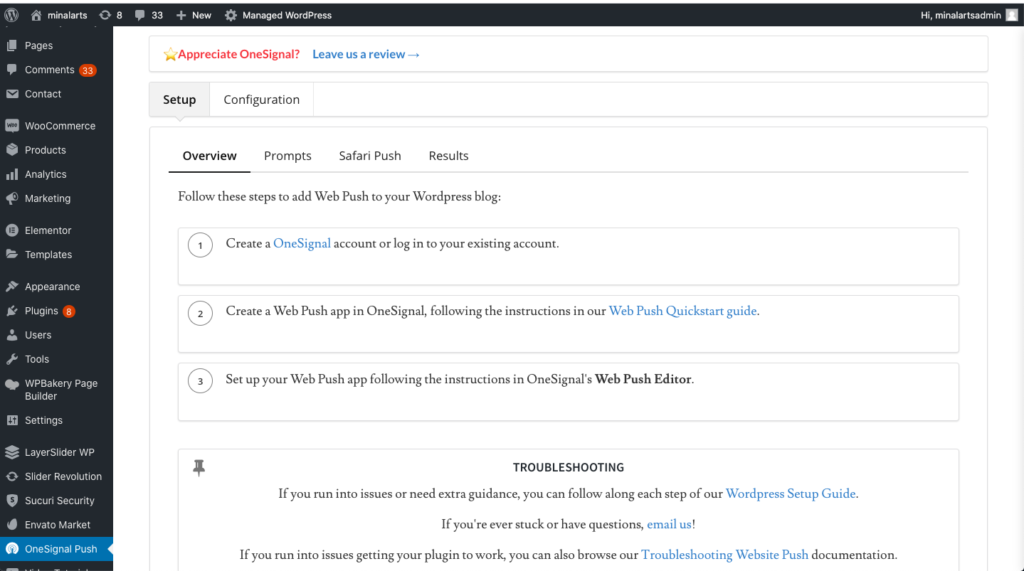
- Click the Configuration tab located next to the Setup tab. You can automate the notifications by setting up the parameters shown below.
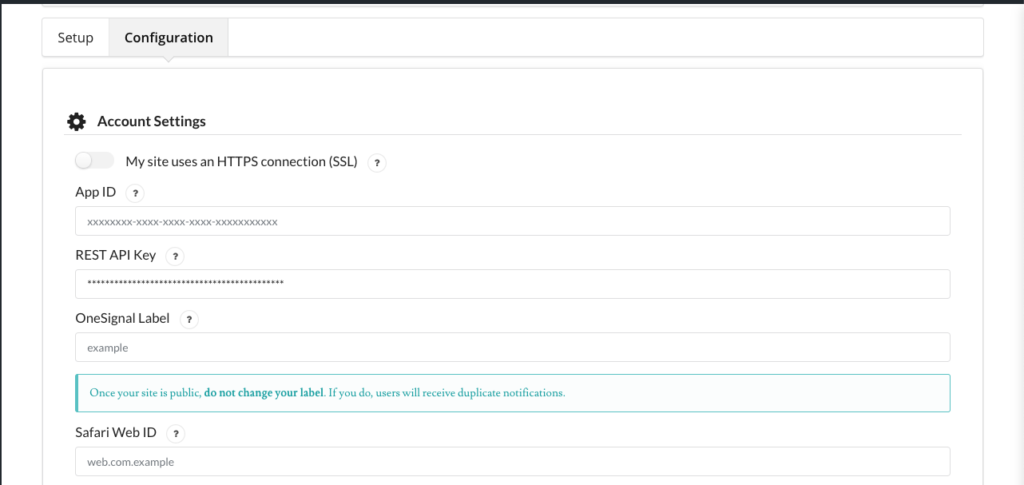
- If your site is using HTTPS (SSL certificate enabled), you need to set the My site uses and HTTPS connection (SSL) switch enabled.
- Enter the authentication key to establish communication with OneSignal. For more information on this, go to FAQ videos on the https://wordpress.org/plugins/onesignal-free-web-push-notifications/ website.
- Open your post. In the Post Editor, you will see the option to send a notification in the top-right corner.
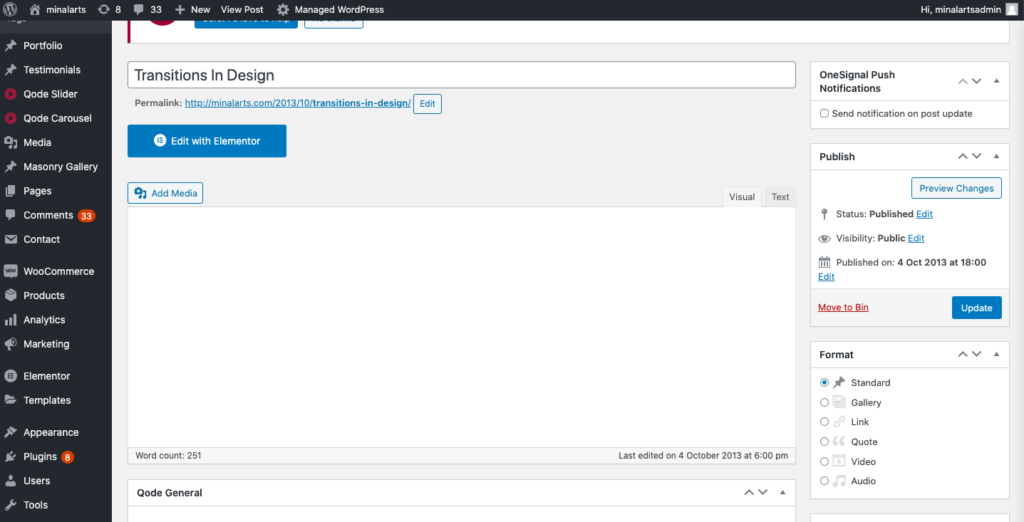
- Select the send notification on the post-update check box. Once you update the post, the notification will be sent to the users.
- To automate notification every time you publish the post, go to the Automatic Notification Settings section under the Configuration tab of the OneSignal Push menu.

- Enable the options to automate push notifications. Click Save.
- To set up a subscription for the users, go to the Prompt Settings & Subscription Bell section.
- Following are the options for user subscription for notifications that are being sent from your Website.
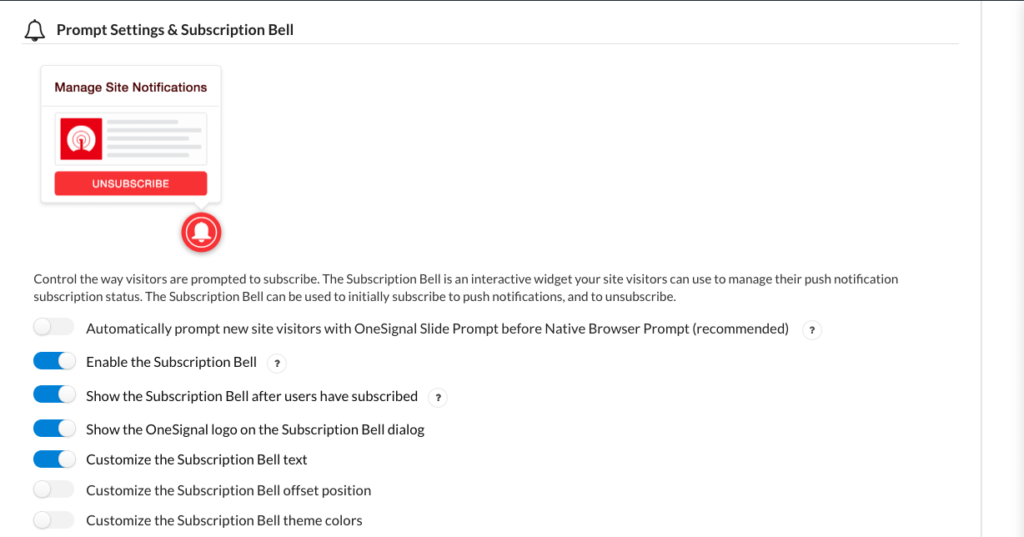
- Switch on the option to enable Subscription Bell for the users who visit your website.
- If you want to show the OneSignal logo on the notification message, enable the option.
- To set the customized message for Subscription Bell text, enable the option and the text message field will be enabled.
- To set the position and color theme options for the subscription bell, enable the options to do the same
For more information on how to work with subscriptions and notification settings, please visit https://documentation.onesignal.com/docs/wordpress.
Takeaway
If you want to quickly set up notifications without much coding knowledge, OneSignal is the best platform to integrate notifications for your website. It provides a lot of help material to set up and automate notifications based on your requirements. It provides the analytics of the website visitors that will help you decide the posts that are most clicked by the visitors.
Read: How to use GMass Chrome Extension?

