Install Hive on Windows 10 is not an easy process. You need to be aware of prerequisites and a basic understanding of how the Hive tool works. Big Data Hadoop is known to people who are into data science and work in the data warehouse vertical. Large data can be handled via the Big Data Hadoop framework.
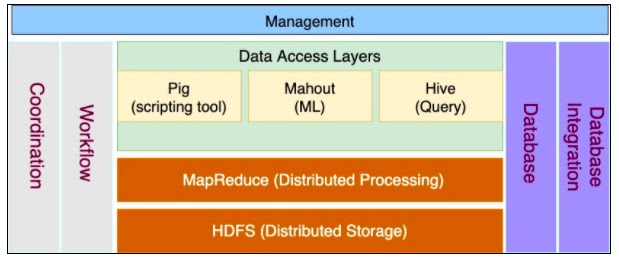
In this article, we are going to see how you install Hive (a data query processing tool) and have it configured in the Hadoop framework.

Prerequisites to successfully perform Hive Installation
Before you start the process of installing and configuring Hive, it is necessary to have the following tools available in your local environment.
If not, you will need to have the below software for Hive to be working appropriately.
- Java
- Hadoop
- Yarn
- Apache Derby
Install Hive on Windows 10 [step-by-step guide]
- Check whether Java is available in your machine. Follow the steps below to verify the same.
- Initiate CMD window.
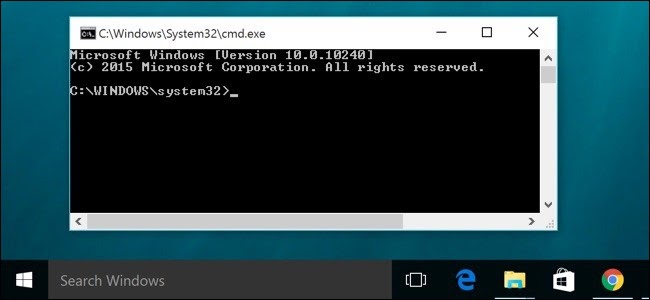
- Enter the text as a command below and hit ENTER.
| C:\Users\Administrator\java -version |
- You will see the details as output shown below.

- In case your Java version is older, you will need to update by following the next steps.
- In the search bar at the bottom left, enter the keyword “About java”.

- You will see the search results available.
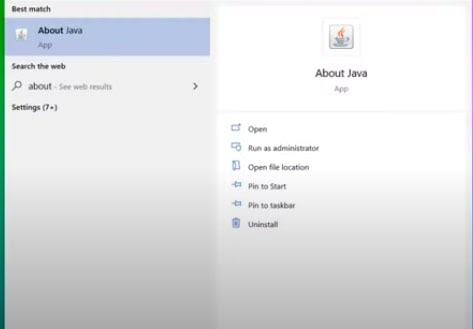
- Open the Java app. The pop-up appears as below.

- Click the link shown in the text, you will be redirected to the Java webpage.
- Click the red (agree and start free download) button shown in the image below.
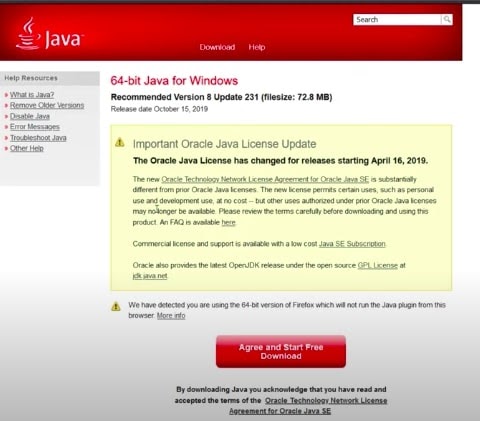
- An exe file will be downloaded and saved in your Downloads folder.
- Run the exe file by double-clicking. See below.

- You will get a prompt that states the old version is available in the system.

- Choose Uninstall.

- Choose the Next option. Once the new version is installed, you will see the success message as below.
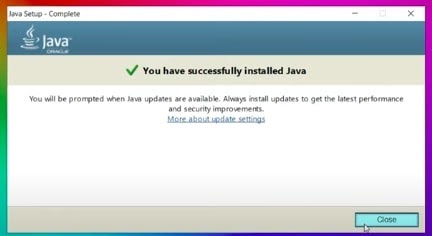
- Choose Close to shut the window.
Install Hadoop 3.3.0 in Windows 10
- Install Hadoop 3.3.0 in your Windows 10.
- Download the package from https://hadoop.apache.org/release/3.3.0.html
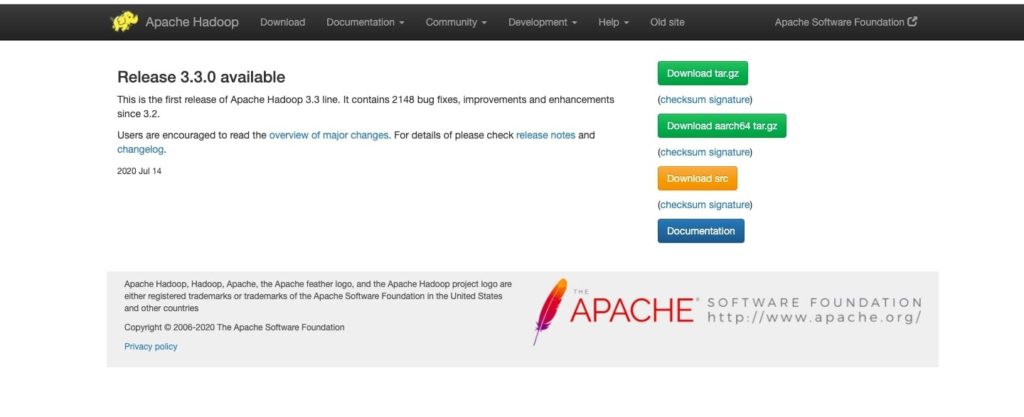
- Click the top right corner green button that says “Download tar.gz”.
- Once downloaded, check whether Java is installed.
NOTE: We already have installed/updated Java in the previous step. Java JDK 8 is the prerequisite for Hadoop installation.
- Before we proceed with the installation steps, make sure your Java is installed in your root drive (c:\). If not, please move the folder from C:\Program Files to C:\Java.
NOTE: This will avoid conflict while setting environment variables.
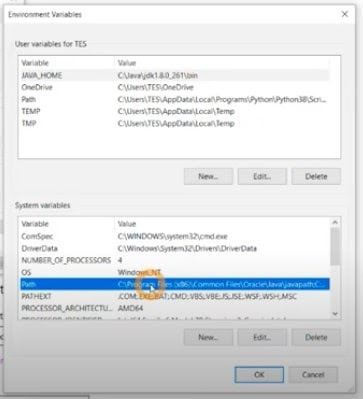
- In your Windows 10 System Settings, search for environment settings.

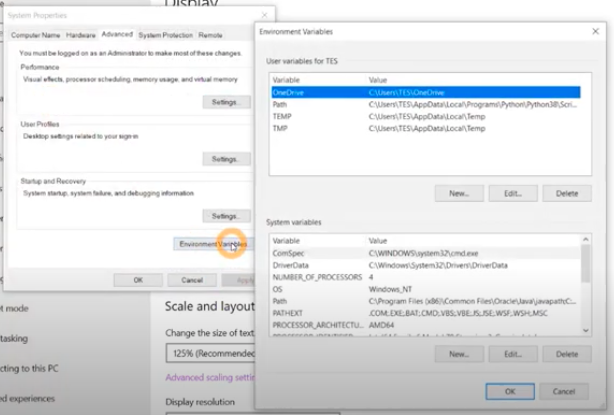
- Choose the option Edit system environment variables.

- Click the button that says Environment Variables. See the image below.
- Add a new variable by clicking New.
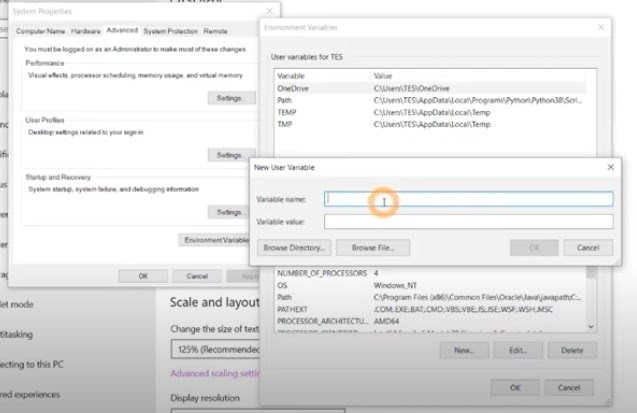
- Enter the name as JAVA-HOME.
- Enter the path where Java is located. Java path for us is under C:\Java\{jdknamwithversion}\bin.
- Once the new variable is set, edit the path variable.
- To do so, select the Path variable and click Edit.
- Click New and paste the path.
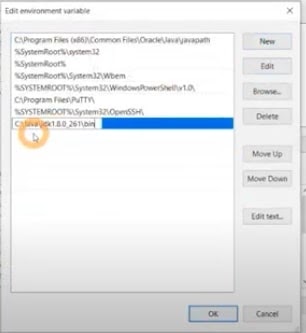
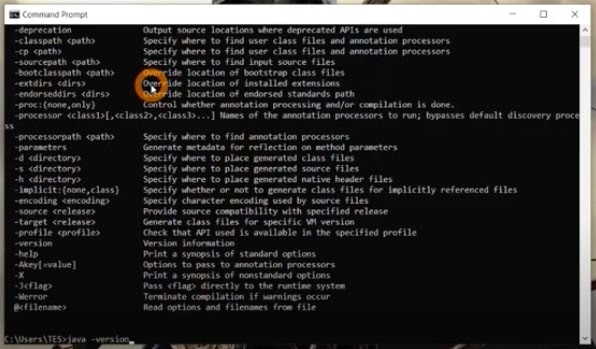
- Check Java is working as expected by entering the command javac from the command line window.
- Now, go to the folder where hadoop tar.gz is downloaded.
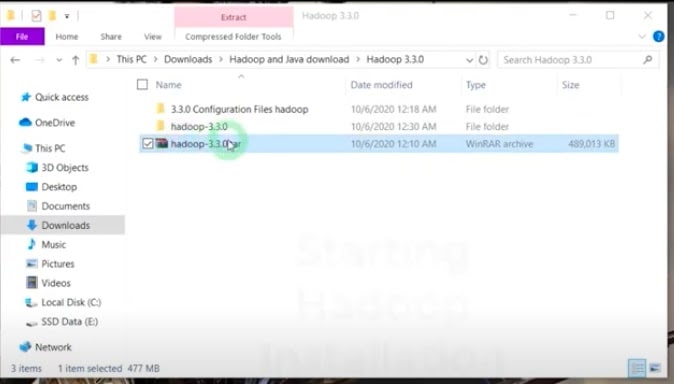
- Extract hadoop-3.3.0.tar.gz. You will get another tar file.
- Extract hadoop-3.3.0.tar. Once done, you will see the extracted folder.
- Copy the folder hadoop-3.3.0 in your C:\ drive.
- Edit 5 files under this folder. Go to C:\hadoop-3.3.0\etc\hadoop.
- core-site.xml
- hadoop-env.cmd
- hdfs-site.xml
- mapred-site.xml
- yarn-site.xml
- Open these files in notepad editor.
- Enter the code below in the core-site.xml file.
| <configuration> <property> <name>fs.default.name</name> <value>hdfs://localhost:9000</value> </property></configuration> |
- Enter the code below in the mapred-site.xml file.
| <configuration> <property> <name>mapreduce.framework.name</name> <value>yarn</value> </property></configuration> |
- Enter the code below in the yarn-site.xml file.
| <configuration> <property> <name>yarn.nodemanager.aux-services</name> <value>mapreduce_shuffle</value> </property> <property> <name>yarn.nodemanager.auxservices.mapreduce.shuffle.class</name><value>org.apache.hadoop.mapred.ShuffleHandler</value> </property></configuration> |
- Create 2 folders “datanode” and “namenode” in your C:\hadoop-3.3.0\data folder before we update the hdfs-site.xml. The folder paths will look like this.
| C:\Hadoop-3.3.0\data\datanodeC:\Hadoop-3.3.0\data\namenode |
- Enter the code below in the hdfs-site.xml.
| <configuration> <property><name>dfs.replication</name> <value>1</value> </property> <property> <name>dfs.namenode.name.dir</name> <value>file:///C:/hadoop-3.3.0/data/namenode</value> </property> <property> <name>dfs.datanode.data.dir</name> <value>/C:/hadoop-3.3.0/data/datanode</value> </property></configuration> |
- Set the JDK path into the hadoop-env.cmd file as below.
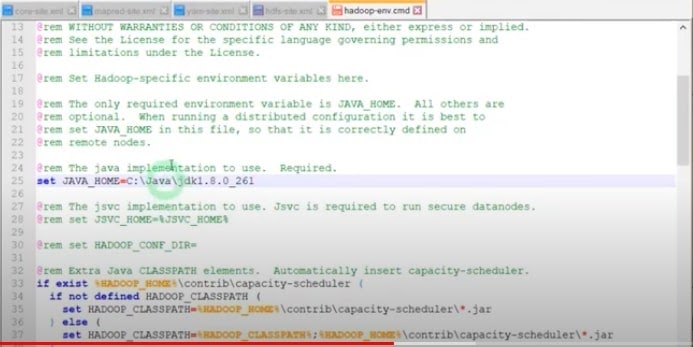
- Save all the files we updated as above.
- Next, set the HADOOP path variable from Windows 10 system settings.
- Choose the option Edit system environment variables.

- Click the button that says Environment Variables.
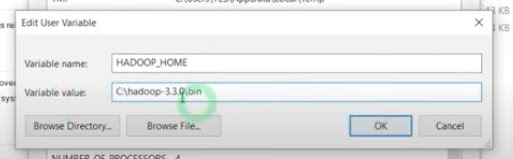
- Create a new variable HADOOP_HOME.
- Set the path as C:\hadoop-3.3.0\bin.
- Edit the path variable and set the path of Hadoop as below.
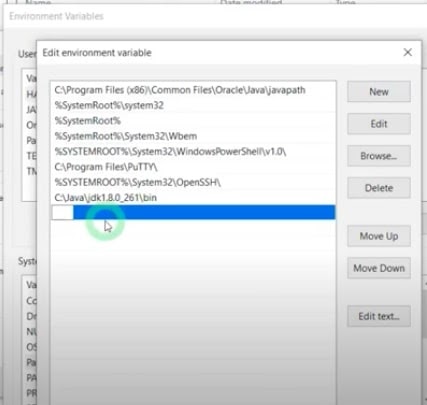
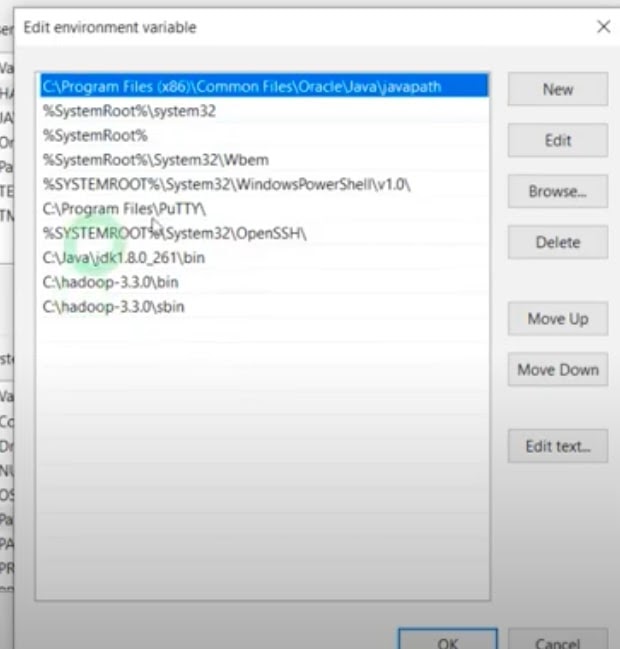
- Enter C:\hadoop-3.3.0\bin and OK.
- Set another path for the sbin folder. Perform the same step as above.
- Now, go to the bin folder under your hadoop-3.3.0 folder.
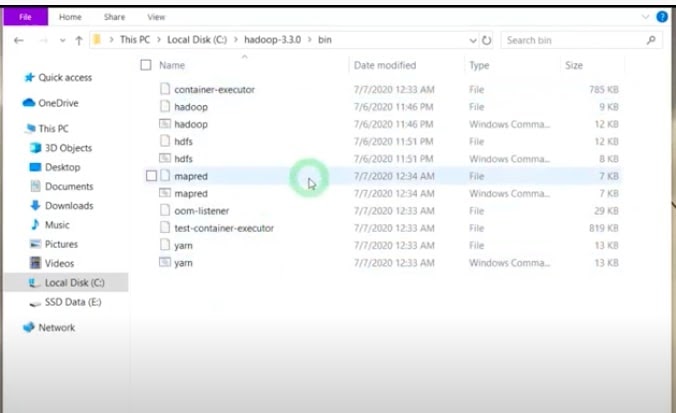
- Copy configuration files for Hadoop under this folder. Please refer to the Configuration zip file to copy the files.
- Delete the existing bin folder and copy the bin folder from this configuration.zip to C:\hadoop-3.3.0\.
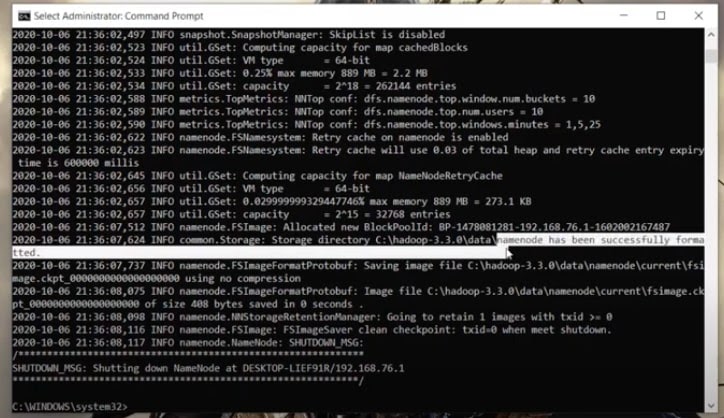
- You are ready as you have successfully installed hadoop. To verify success, open CMD as administrator, enter the command below.

- You will get the message as below.
- Now, the next step is to start all the services. If your installation is successful, go to your sbin directory and enter the command as below.

- You will see namenode and datanode windows will start after executing the above command.
- Then, give the command, start-yarn. Two yarn windows will open up and will keep running.
NOTE: If all of the above resource files do not shut down automatically, be assured that your installation and configuration are successful.
- Enter the command jps. You will see a number of processes running on all four resources.
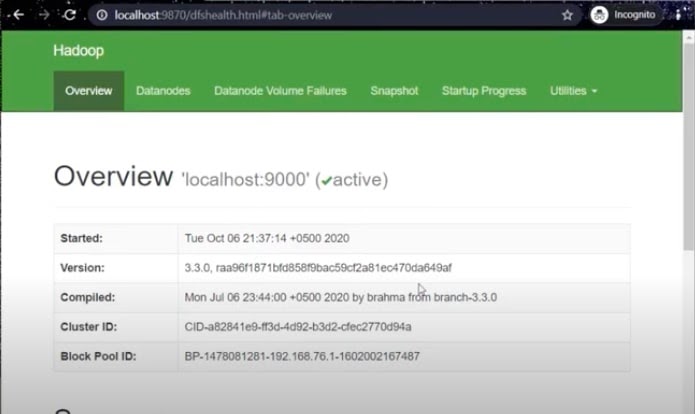
- To access Hadoop, open your browser and enter localhost:9870. You will see it below.
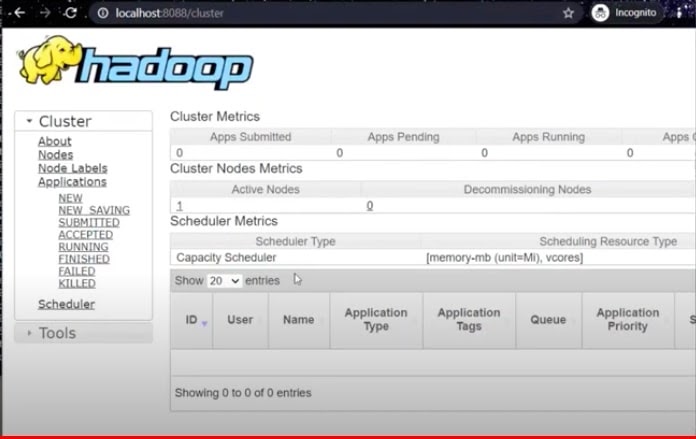
- To check yarn, enter localhost:8088 in a new window.
- Now, you are ready to install Hive. Download the package from https://downloads.apache.org/hive/hive-3.1.2/ by clicking the apache-hive-3.1.2-bin.tar.gz link.
- Extract the folder using the 7zip extractor. Once extracted, you will see hive-3.1.2.tar file. Extract the same again.
- The way we have set environment variables for hadoop, we need to set the environment variable and path for Hive too.
- Create the following variables and their paths.
- HIVE_HOME: C:\hadoop-3.3.0\apache-hive-3.1.2\
- DERBY_HOME: C:\hadoop-3.3.0\db-derby-10.14.2.0\
- HIVE_LIB: %HIVE_HOME%\lib
- HIVE_BIN: %HIVE_HOME%\bin
- HADOOP_USER_CLASSPATH_FIRST: true
- Set the above path for each variable as shown after “:”.
- Create the following variables and their paths.
- Copy and paste all Derby libraries (.jar files) from derby package to the Hive directory: C:\hadoop-3.3.0\apache-hive-3.1.2\lib

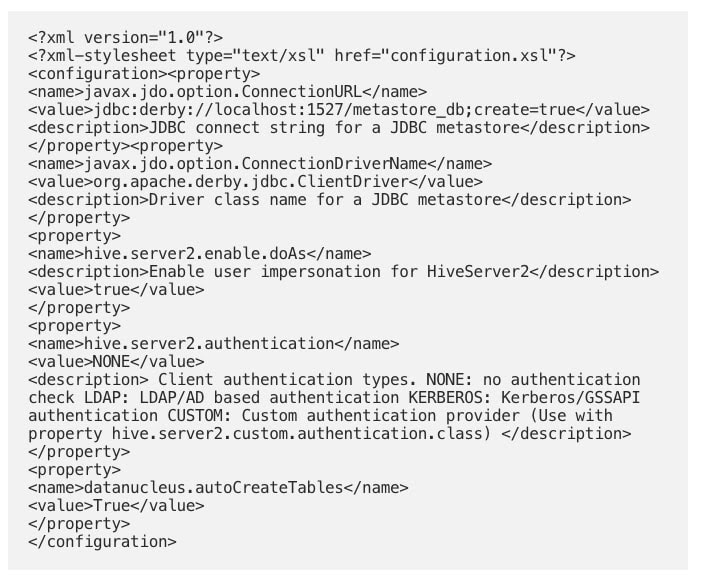
- Locate hive-site.xml in the bin directory. Enter the code below in the XML file.
- Start Hadoop services by: start -dfs and start-yarn as we saw in the Hadoop section above.
- Start derby services by: C:\hadoop-3.3.0\db-derby-10.14.2.0\bin\StartNetworkServer -h 0.0.0.0
- Start hive service by go to your Hive bin directory through the command line. Enter hive. If that command doesn’t work, the following message will be shown.

NOTE: This is due to the Hive 3. x.x version not supporting the commands in Windows 10. You can download the cmd libraries from the https://github.com/HadiFadl/Hive-cmd link. Also, replace the guava-19.0.jar to guava-27.0-jre.jar from Hadoop’s hdfs\lib folder.
- Once done, run the command hive again. It should be executed successfully.
- Metastore initialization after starting the hive service.
NOTE: Again, you will need to use the cgywin tool to execute
- Create the 2 folders: C:\cygdrive and E:\cygdrive.
- Open the command window and enter the following commands.

- Specify the environment variables as below.

- Enter the command below to initialize Metastore.

- Now, open the command window and enter the command as shown below.

- Open another command window and type hive. You should be able to successfully start the hive service.
Is Installing Hive on Windows 10 a complicated process?
As we saw, version 3. x.x of Hive is a little difficult to install on the Windows machine due to the unavailability of commands support. You will need to install a commands library that supports Linux-based commands to initialize Metastore and Hive services for successful execution.
If you set environment variables and paths correctly in Hadoop and Hive configuration, life will become easier without getting errors on starting the services.
In this article, you have got an overview of the steps on “install hive on Windows 10”.
Read More: How to Install Server Nginx on Ubuntu
