The Fix Broken Registry Items task is to do with Windows OS. MS Windows OS consists of a package(s) of library files and configuration databases. The database stores primary data related to hardware and software information.

The operating system acts as an interface between hardware components and applications that are used by the users. Each software that requires hardware components for operating commands and actions, the operating system plays a major role.
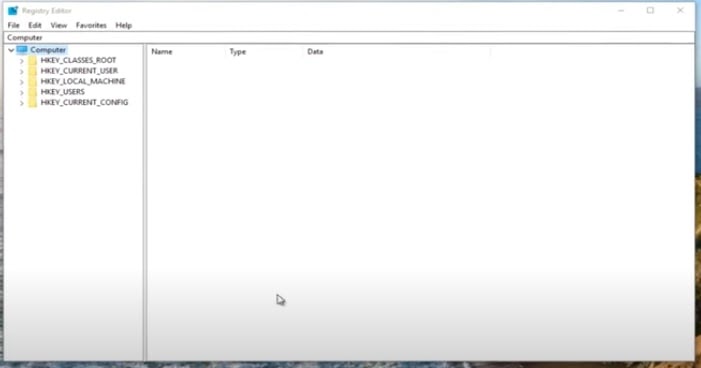
The Windows registry is a master database where configuration parameters of hardware and applications are stored. The parameters include user profile, device driver, and events. These settings are the key-value pairs available in the form of strings or numbers.
NOTE: Due to virus attacks encountered in your system, registry settings may get damaged. This happens when you download the .exe files from the Internet as freeware.
You may choose to resolve the errors by manually modifying registry files. It is suggested to consciously make changes to registries because it may hamper your system if you do it wrongly.
Errors and Symptoms of Broken Registry Items
Most of the time, the user does not know the registry is broken in the system. Sometimes, it throws an error message popup stating “invalid values for registry”.
Many times, no errors are thrown, but other symptoms such as blocking the user to do some actions on Windows, tremendously slow performance working on any application(s), unintended system shutdown, problems in installing and uninstalling new software or updating the software version(s) and so on. Any registry error, blue screen error after system restart, unable to start the application are some more symptoms of the broken registry issues.
Causes of Broken Registry Files
The broken registry of Windows, there can be several reasons. You can relate your issue to any of the below to understand that the issue is with the system registry.
- The files related to hardware driver(s) which are not used by the system
- The uninstallation of the application is not done correctly
- Some corrupted application(s) / components of Start menu
- Broken links, paths and shortcuts of corrupted applications
- Browser objects are corrupted
- ActiveX objects are damaged
Fix Broken Registry Items (Windows 7/8/10)
There are multiple ways in which you can fix the system issue that has occurred due to a broken registry.
NOTE: Before you start to fix and try any of the below methods to fix the OS issue, a backup of the existing registry needs to be taken. We will see how to do the backup of the system registry before going to resolution(s).
Take a backup
- Enter the keyword – Regedit in the search box available at the bottom.
- You will see the match under the Best match section.
- Right-click to open the context menu.
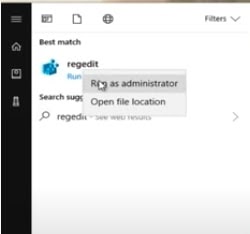
- Choose the first option from the context menu (it will allow you to open the registry in admin mode). You will see the pop up below.
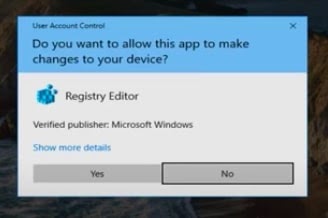
- The option is to choose Yes. The pop-up will be closed. And the “registry” window appears.
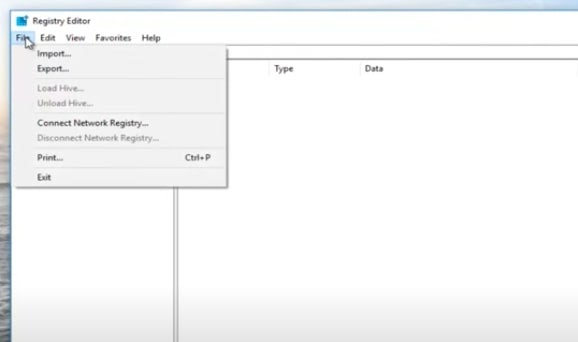
- Click File. You will see the context menu with a list of options.
- The option to choose from the list is “Export”. The “Export Registry File” dialog appears.
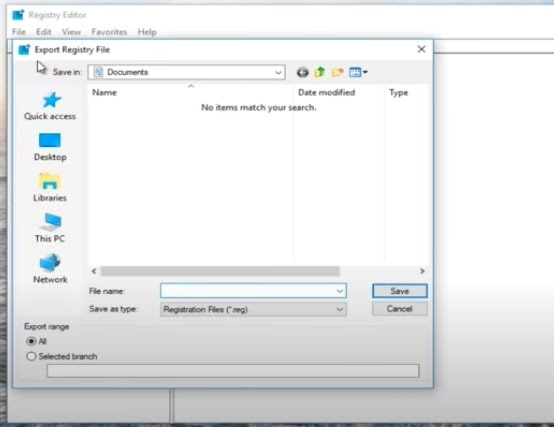
- Enter the backup name you want to keep.
- Choose the folder under which you want to keep the backup file.
- Save your file. You have taken a backup of the registry.
Resolution 1 – Use the Registry Repair tool to fix broken registry items
This solution is easy to apply. Search for free repair software from the Web. Download and install the executable to your machine using the administrator profile.
- From the Web, download the registry repair software.
- Click Download Now (as highlighted with the green border).

- Double-click the .exe file (RegpairSetup) which you have saved in the default folder.
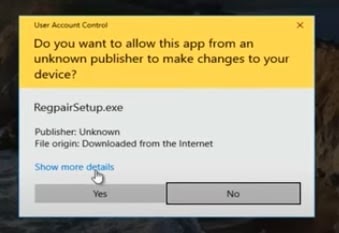
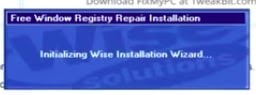
- Choose Yes. The installer starts.
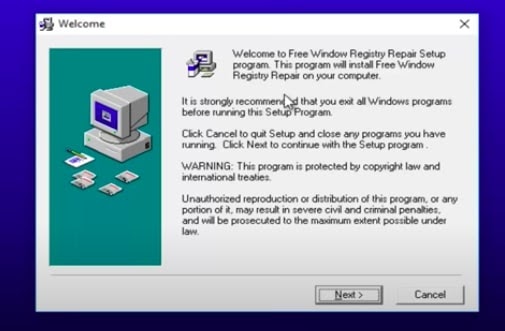
- The wizard with the Welcome screen will be shown.
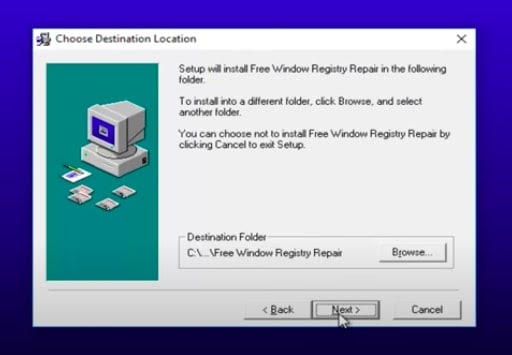
- Pressing Next will redirect you to the destination folder selection window. Keep the folder that is shown on the screen. Note the path before hitting Next.
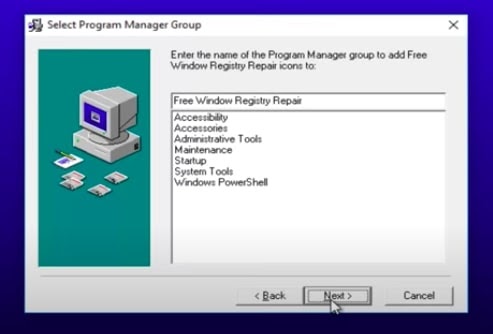
- Pressing Next will redirect you to the window where you need to enter the name of the software. You can keep the default name. In this, the default name shown is – Free Window Registry Repair.
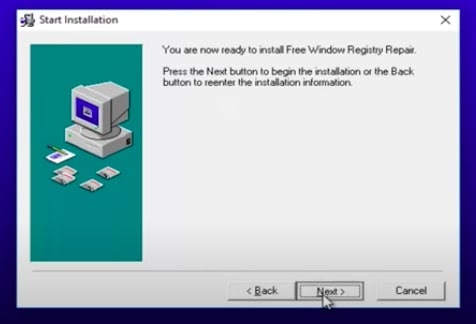
- Pressing Next, you will be redirected to readiness to proceed with the installation screen.
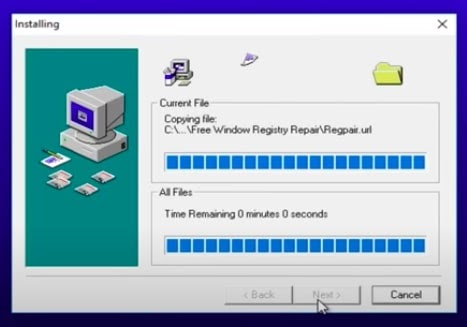
- Pressing Next will initialize the process.
- Once completed, the wizard shows a success message.
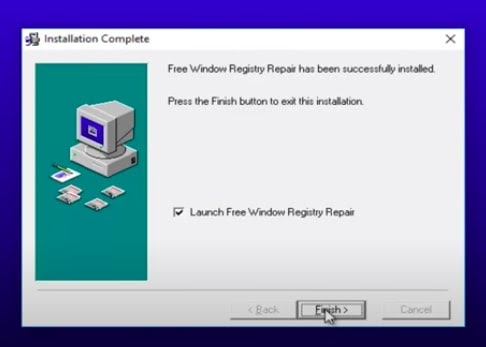
- Finish quitting the wizard. As you see the “Launch Free Windows Registry Repair” check box is ticked, it will open the software.

- Press Full Scan. The scanning process will be started.
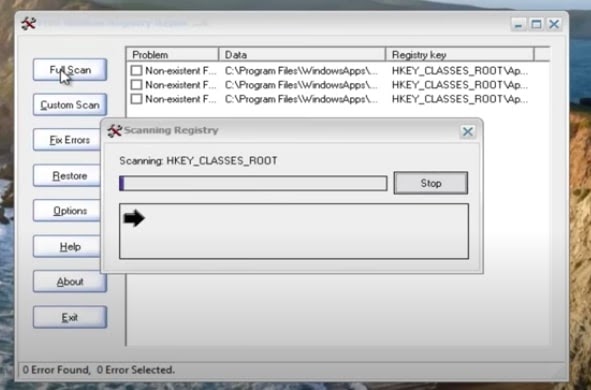
- Once the full scan is finished, you will see the registry errors.
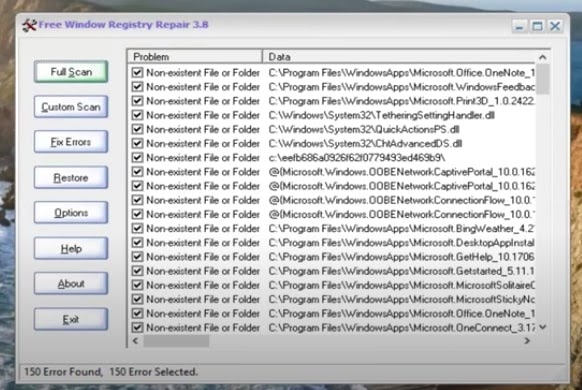
- The above image, shows 150 errors found. All the entry checkboxes are selected.
- Click Fix Errors to resolve the broken registries.
NOTE: The software has detected the registry errors by Full Scan. Now, the software will fix errors by Fix Errors.
- All the broken registry records will be removed once the errors are fixed.
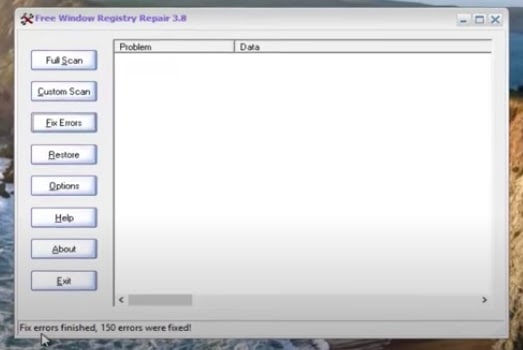
- At the bottom, you will see the message “Fix errors finished, 150 errors were fixed!”.
- You have fixed broken registry items successfully with this method.
Resolution 2 – Use the recovery settings to fix broken registry items
- Enter settings in the search bar. The settings component will open.
- Find the recovery section.
- Press the Get started button. A window with the title “Reset this PC” is shown.
- Make the selection of the first option from below. This will retain and keep your data.
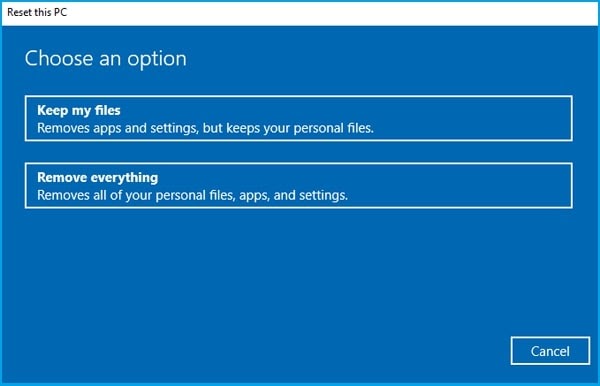
NOTE: Selecting the second option will erase all your personal data as a part of the reset process.
- A window appears that will have a Reset action button. Once clicked, the system initializes the process.
- Post completion, you will need to check the issue is resolved.
Resolution 3 – Execute SFC using the PowerShell to fix broken registry items
This method can be used if you are well versed in command-line operations. The command execution will scan the system file and then repair the broken files. It is just one line of command and you will be able to resolve it. Let us see how to do that.
- Type cmd in your search bar to open the terminal window.
NOTE: The terminal should be opened with Administrator mode.
- Go to the System32 folder using the cd command.
- Enter the below command, and press ENTER. (Pressing ENTER will execute the command.)
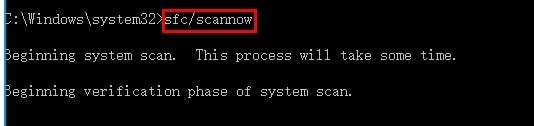
- The scanning process takes some time. Wait patiently.
- The system will be rebooted automatically post-completion of the process.
- You are sorted! Check the next resolution if you are still facing the issue.
Resolution 4 – Retrieve the restore point set up and fix broken registry items
To perform this method, you should have enabled System Restore. First, we will see how you set up the restore point and then retrieve it. While you are facing broken registry issues, this may work.
- Enable the system restore setup:
- Enter the keyword – create a restore point. You will see a match in the results.
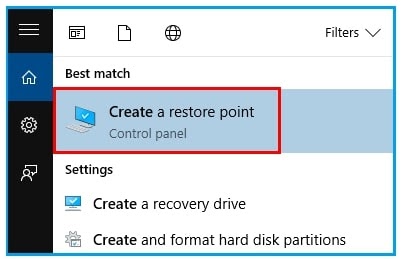
- Click to open it. A window with the system protection settings will open.
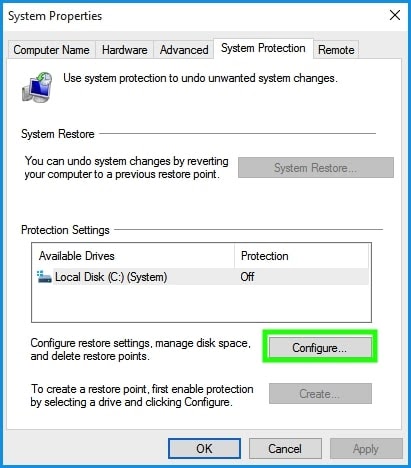
- Use the button highlighted with the green border to proceed. You will see the restore settings window.
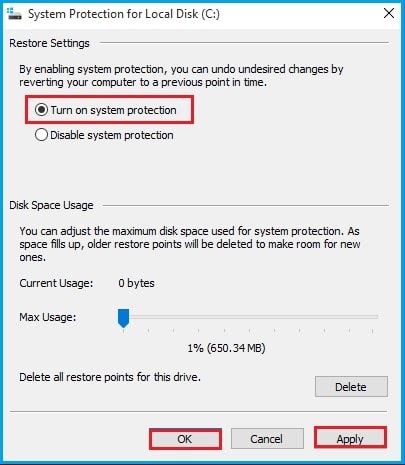
- Select the first option as highlighted under the Restore Settings section.
- Appy changes.
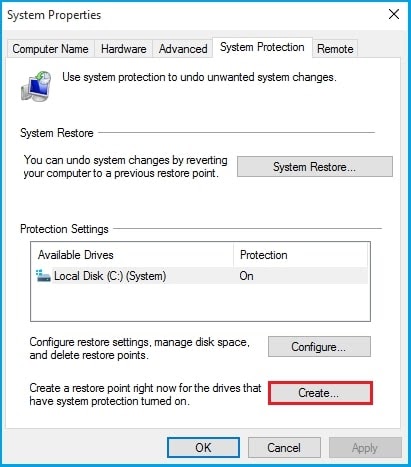
- Create a restore point:
- The Create button will be activated once the above settings are done.
- Choose to Create. The popup appears asking you to write a description of the restore point you want to create.
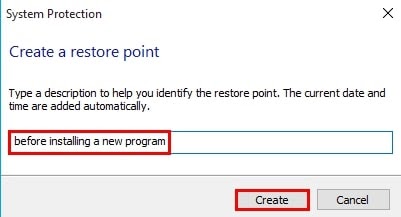
- To proceed, perform the Create action. The restore point is created. See below.
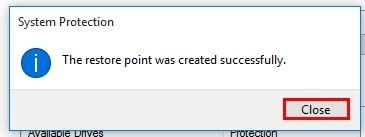
- Close to completing the creation process.
- Restore the system
- From the control panel items, choose Recovery.
- The window will be opened with recovery tools.
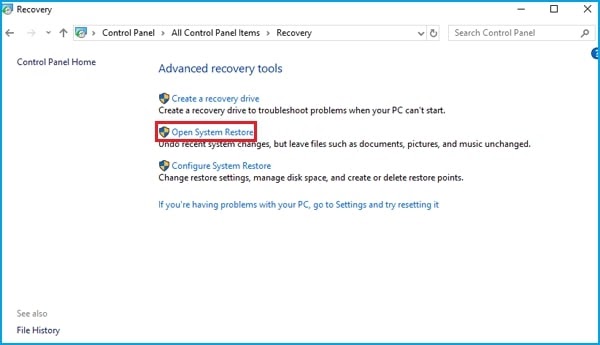
- Choose the option as highlighted with the red border. You will be redirected to the restore process.
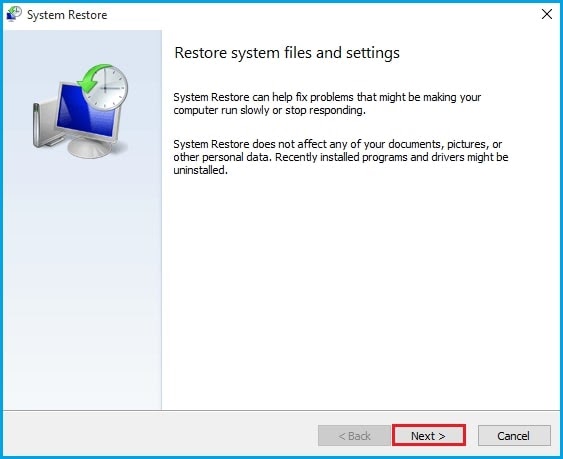
- Pressing Next will redirect you to the screen where you will see the entries or records of created points. With a description, you will be able to identify which point you want to retrieve.
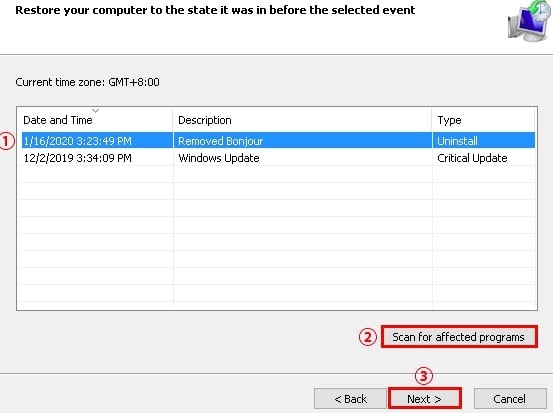
- Choose step 2 to view the list of applications that will be considered while performing the restore.
- Pressing Next will redirect you to proceed with the operation.
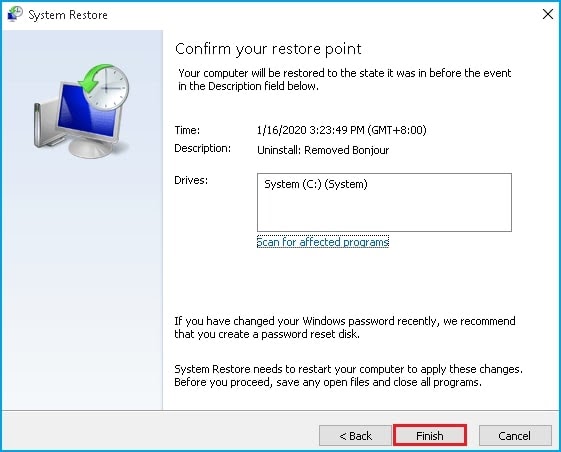
- Choose Finish to complete the operation. Success dialog will be shown.
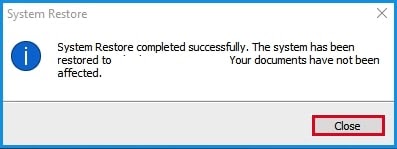
- Here you go!
Resolution 5 – Use the troubleshoot component to fix broken registry items
This method uses the in-built system (Windows) tool to fix the issue. It is a simple method. But, you will not be able to verify whether the registries are fixed or not. It will repair the damage to your system.
- Open system settings.
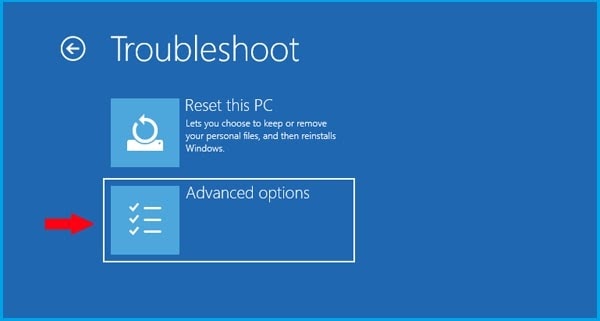
- The recovery setting has the restart now option under Advanced options.
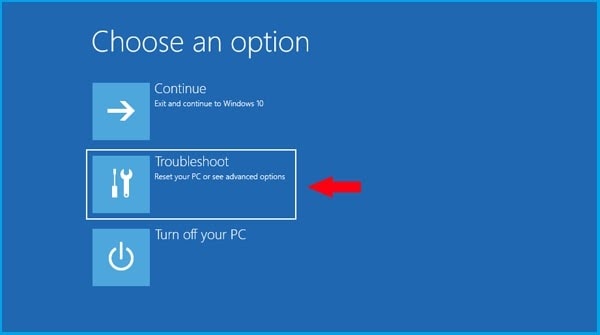
- The system will start with three options.
- Choose Troubleshoot (this is the middle option in vertical order of three).
- You will see two options. Select the “Advanced options”.
- You will see 6 options. The first option should be your choice selection.
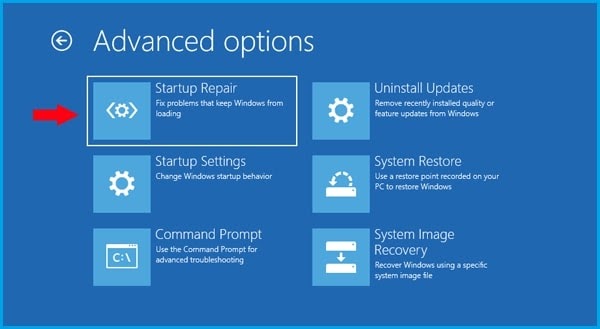
- You will be asked to enter the password of your system login.
- Continue after specifying the password.
- The repair operation will start with the system. Once the operation is complete, consider your issues are fixed.
Resolution 6 – Fix the registry issue manually (CMD)
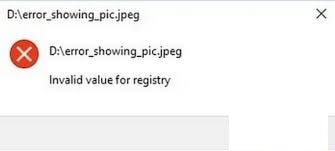
Many times, the Windows Photos app crashes and you get an invalid registry issue as below.

This error can be fixed using the command in the PowerShell window.
- Open the command line window in your system using the search bar.
- Open the window as administrator mode.
- Enter the command below:

- Press ENTER to execute the command.
- Once executed successfully, restart the system.
- You will be able to open the photos app without throwing the error. This means you have successfully fixed the issue.
If you are not comfortable using the command line terminal, use the Registry Editor interface to delete the registry.
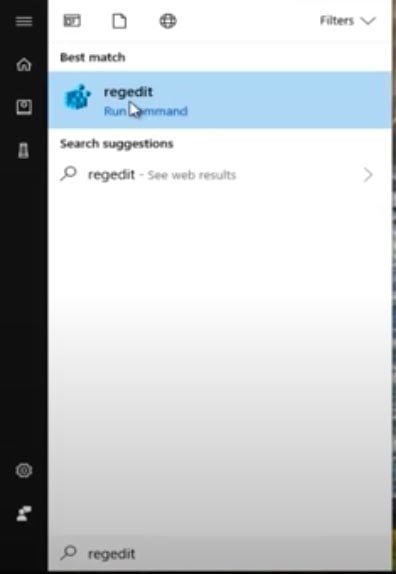
- Use the search bar to type the keyword – regedit.
- You will see the match. Click to open the registry user interface.
- Go to the below registry key by expanding the folder structure as shown.

NOTE: If you see registry keys of the photo app of the Windows 8 version. Even after upgrading to Windows 10, the Windows 8 registries are unused and still available.
- Locate the old registry entry, and open the properties. To do so:
- Open permissions from the Security tab.
- Click Advanced from the select user window.
- Make the username selection and OK.
- Perform the Delete action from the right-click menu that opens from username.
- Once deleted, restart the system.
- You will be able to successfully open the photo app.
NOTE: It is recommended to take a backup before performing the steps above. Additionally, if you are not sure about the old registry entries, please use the repair tool instead of this method.
Resolution 7 – Run cCleaner to fix broken registry items
This is a safe method to fix your issues. All you need to do is install cCleaner software to repair the registry.
- Open cCleaner tool from the shortcut icon on the desktop.
- From the left icon list, choose Registry. You will see the below.
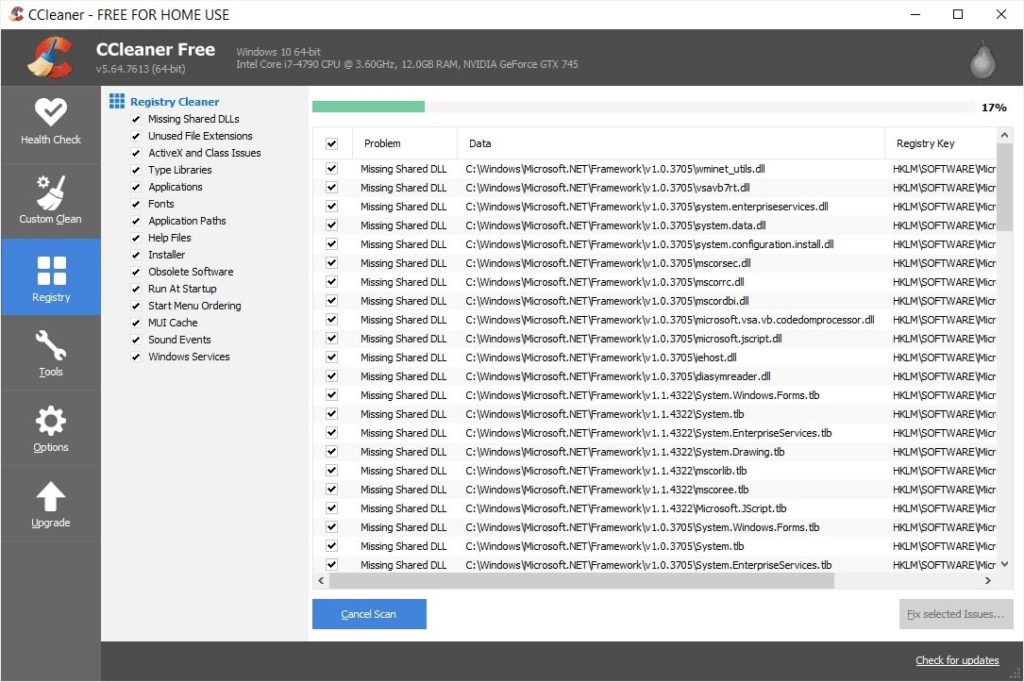
- All the entries with checkboxes selected will be shown in the tabular format.
- Choose the scan for issues action button. Let the scanning process complete.
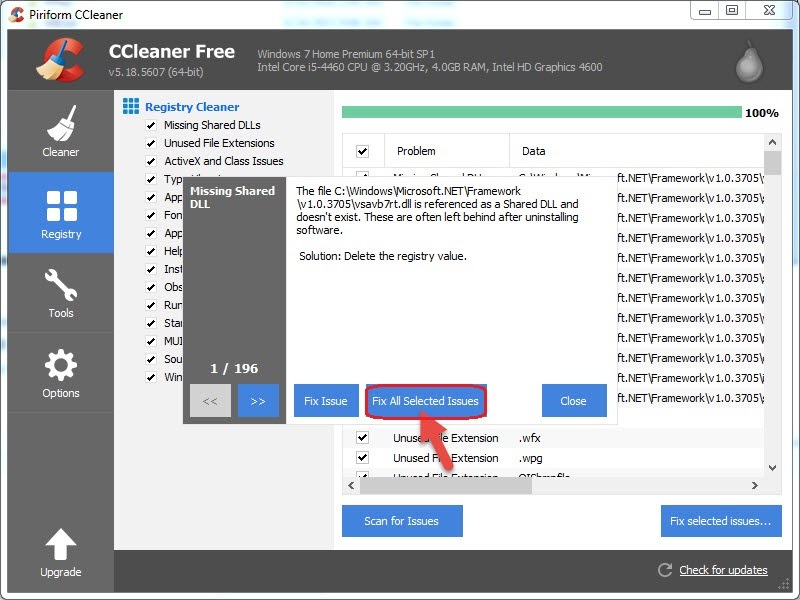
- Click the button on the right – “Fix All Selected Issues”.
- Post completion of the cleaning process, you will see no errors.
- Perform the system reboot.
- Your broken registry will be fixed by the tool.
Conclusion
The above methods are free and easily doable with your machine. If you find the issue is critical and is not resolved by performing the above method(s), it is recommended to format the system and reinstall the operating system.
If you are not aware of formatting the system, take the paid support or paid software to repair the registry. We suggest you take risk only if you are confident to either resolve it or get your operating system in workable mode. Windows Registry-related issues are critical and can be fixed only if you have admin rights of your system.
