How to Get Fallout 3 to Work on Windows 10 is a task that many struggles with while playing games on their computer. Gamers find it difficult to understand the issue of why it stopped working or what will make it work.

Why still people stick to Fallout 3 is due to the world it is providing to explore. There is fun to explore a better world than New Vegas. All up to the gamer’s choice and preferences of RPGs.
Here are the top #5 Resolutions to get Fallout 3 Work on Windows
Resolution 1: Check and update the Fallout 3 config file in Windows 10
If the gamer finds an issue in opening the Fallout 3 game, try using the steps below. Game configuration settings are the first thing that the player can check.
- Start Windows Explorer.
- Figure out the Fallout 3 folder from the search bar. NOTE: Mostly the player finds it under the My Games folder. Again, it is all up to how the folders are placed.
- The falloutprefs.ini file is the one that requires modification. It’s always placed under the Fallout 3 folder.
- In the notepad editor, open it. Verify the following property and value.
- bUseThreadedAI=0
- Update/Modify the above property value from 0 to 1.
NOTE: If the user cannot find this property under the ini file, then add in a new line like this: bUseThreadedAI=1.
- Add another property as below.
- iNumHWThreads=2
- Make sure to retain the changes that have altered the file with the ini format only. Please do not save it as text.
- Close the Windows Explorer.
- Start the game. It should work.
Resolution 2: Graphics Driver can be investigated
Video drivers and graphic drivers play a major role in games that are built on high-definition (HD) graphics. Fallout is a world that has awesome 3D graphics and makes the players’ world fun. Mostly the players face issues with Fallout 3 in case there are updates required for Video/Graphics drivers.
- A tool for the driver update comes in handy. It explores for drivers in your system and checks if it requires updates. DriverFix is the tool that needs to be installed for the resolution steps.
- Install the DriverFix tool.
- Open it. Whether the latest driver updates are required or not is determined by the tool.
- The tool scans the system to find the drivers and updates it appropriately. NOTE: A user can set the options to update automatically or manually. Choose according to preferences.
- Check if the game starts without any interruption.
- Cool if it works! There you go.
Resolution 3: Change the compatibility version in Windows 10
Released in 2008, Fallout 3 was perfectly running on the previous versions of operating systems. Post updates of Windows 8, 8.1, and 10, and the latest updates on graphic technologies, compatibility issues started popping up.
The game’s property allows the gamer to run Fallout 3 in previous versions of the operating system. Here are the steps to do it.
- Start Windows/File Explorer. (Windows key + E)
- Find the Fallout 3 executable file (with the .exe extension).
- Choose properties with the right-click action using the mouse. NOTE: All .exe files have properties. Similarly, fallout.exe has also properties.
- The dialog with various tabs associated opens up. Do the following.
- Activate the Compatibility tab.
- Tick the check box where step 1 is indicated.
- The previous versions’ list gets enabled.
- Choose/pick the option with Service Pack 3.
- Tick the Run this program as an administrator box.
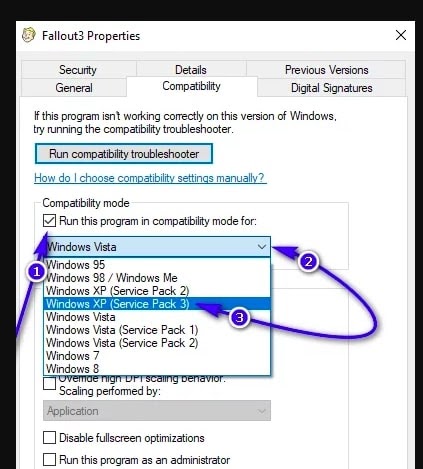
- Apply the changes.
- You may get the error below while applying changes.
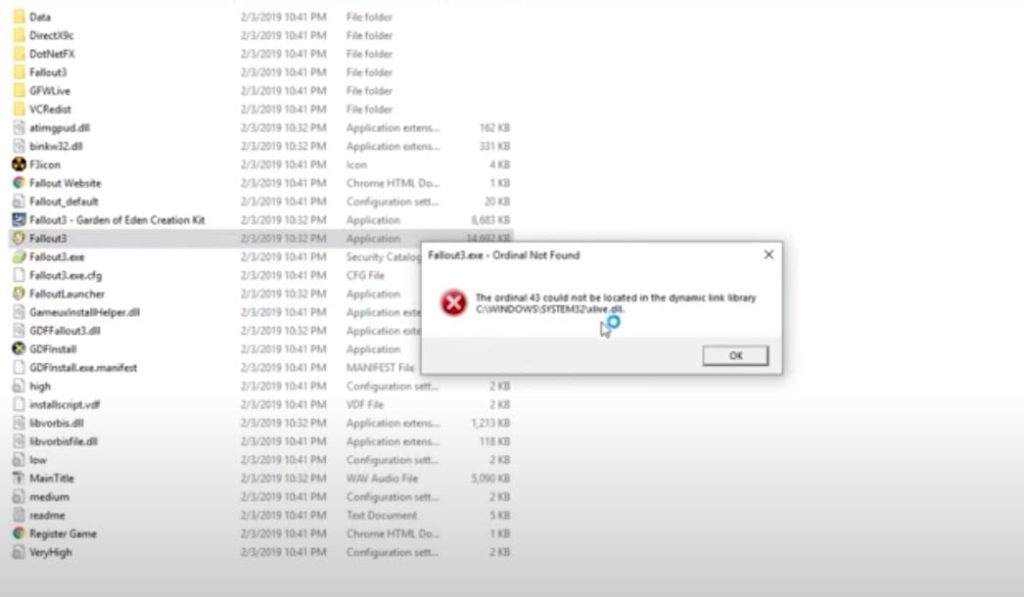
- The dll file error is encountered due to which the changes are not applied.
NOTE: The cause of the error might be due to Games for Windows Live (GFWLive) being installed and outdated and inside that, the Fallout 3 folder is available.
Move on to the next fix that might help the player to get rid of the issue.
Resolution 4: Opt for GFWLive (Games for WLive)
Visit the GFWLive page and download the executable for the dll file which was missing.
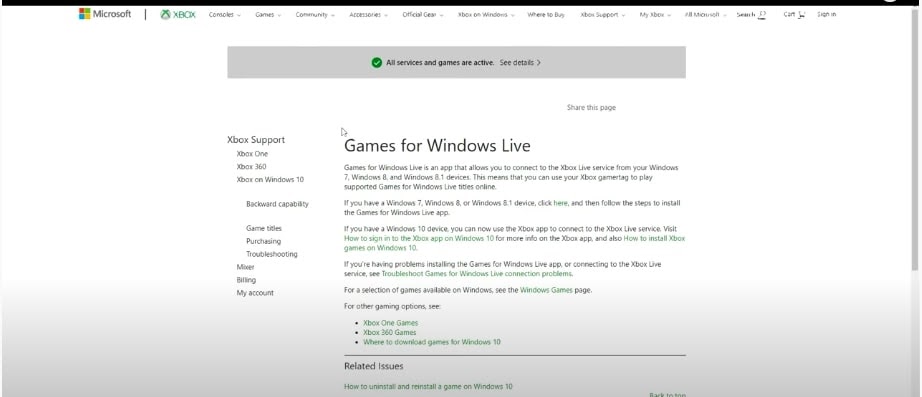
- On the above page, there is a link – click here. Open the link.
- The executable is downloaded.
- Start the installer by double-clicking.
- Once finished, you will see the below.
- Choose the Launch button. It will ask the user to sign up for a GFWLive account.
- Do not sign in and close the login pop-up.
- Start Fallout 3.
- Yo! You can start it successfully without crashing the game app.
Resolution 5: When Games for Windows Live Application doesn’t work
The player may not get support for GFWLive as Microsoft has disabled the support and is still the one who is getting the DLL file missing error. There is a workaround for this. Let us see how the player gets the resolution for this.
Issue Description: When the player tries to tap Play on Fallout 3, it doesn’t start. Below on the right side of the window in the Game console, it will ask the player to install GFWLive. When the user tries installing it, it gives the surprise below.
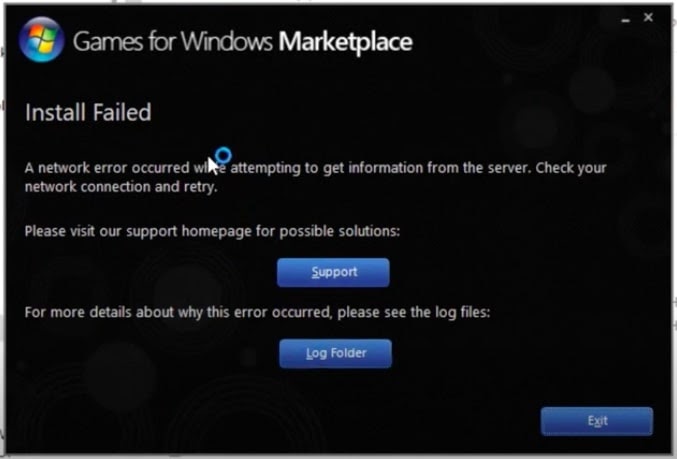
- Choose Exit to close the dialog. NOTE: This means Windows has stopped support for games.
- Go to the website called nexus mods.
- Create an account with the nexusmod.com site.
- Locate the disabler file for GFWLive.
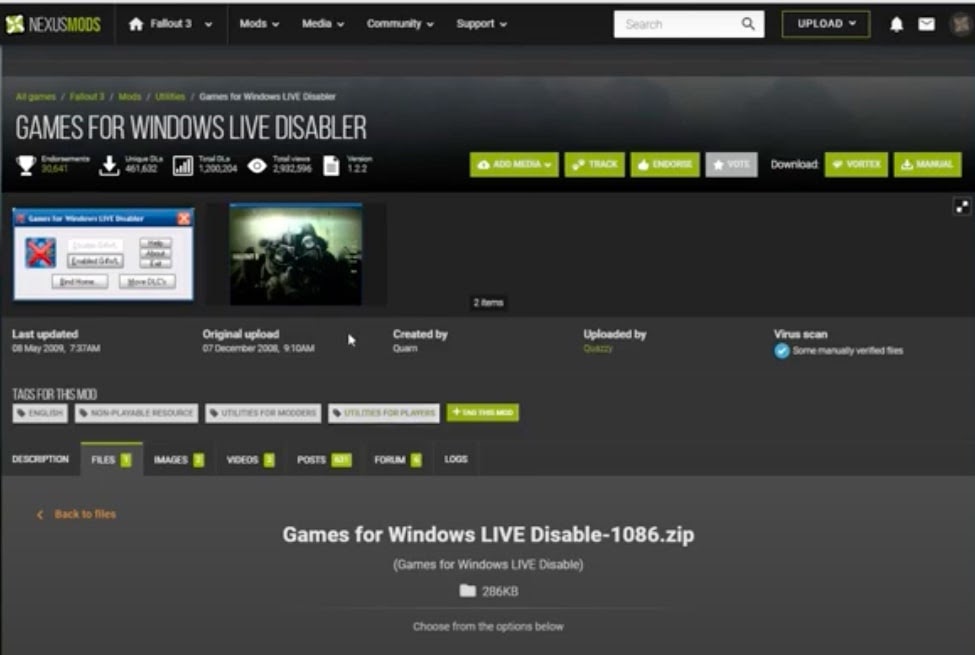
- Choose Manually located at the top right corner. (The last button from the left.)
- Choose download mode as slow.
- Once downloaded, open the zip file.
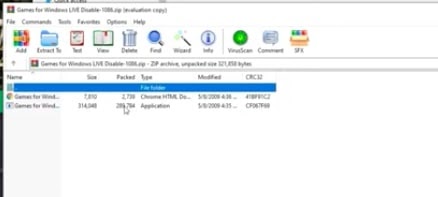
- Try to run the .exe file shown in the window above.
- You will encounter the error.
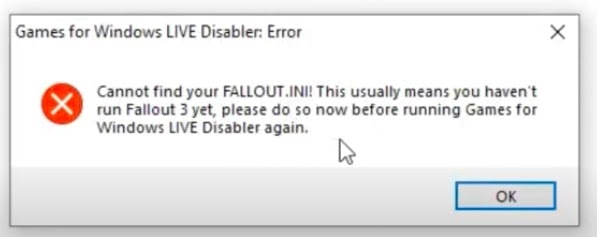
- Press OK on the error box and create an ini file in the Fallout 3 folder.
- Find the My Games folder and get to the Fallout 3 folder.
- Create a fallout.ini file. To do so:
- Initiate the notepad editor.
- Save the file with the name fallout.ini. Make sure to give the extension name as .ini.
- Try again to run the .exe file from the zip extractor. Now, you will see the below.
- Press the Disable G4WL button.
- Pick Yes on the pop-up that turns up.
- Shut all the windows and go back to Windows Explorer.
- Delete the Fallout.ini file you have just created. To do so:
- Find the Fallout 3 folder under My Games.
- Pick the file and right-click.
- From the right context menu, choose Delete.
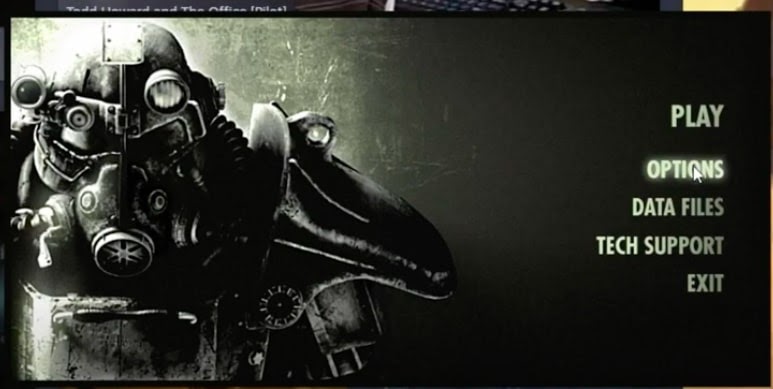
- Now, Start the Fallout 3 game and go to Options.
- Change the options for Resolution and other settings.
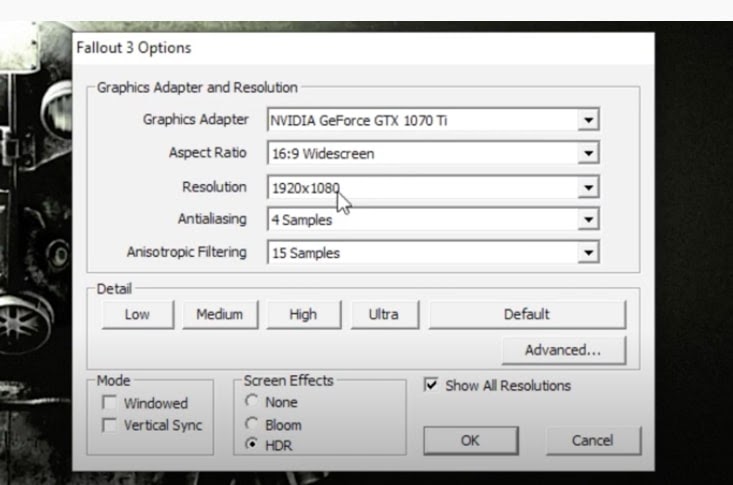
- Choose OK to apply changes.
- Now, choose the Data Files located below Options.
- The dialog below is shown.
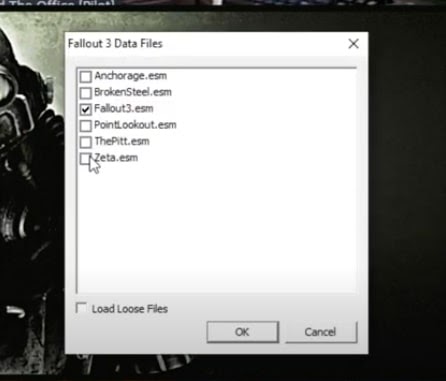
- Tick all the checkboxes. NOTE: Do not tick the Load Loose Files box.
- OK to make changes.
- Play Fallout 3. It instantly starts.
- Yo! At last, you are done.
Various resolutions are explained for Fallout 3 issues for gamers. In the next topic, we will share some interesting facts about Fallout 3.
Interesting things to know about Fallout 3
- Released in 2008, Fallout 3 won the game of the year award.
- One of the best RPGs (role-playing games), Fallout 3 is considered.
- Compared to New Vegas, Fallout 3 is a better world.
- GotY edition for download is still available
- Fallout 3 took the attention of gamers by providing the dark world with an experience of an action RPG.
Symptoms of Fallout 3 failure in Windows 10
For most gamers who are into playing RPGs, Fallout 3 comes on their list. To run smoothly in Windows 10, there are some issues found in Windows 10.
- While starting a new Fallout 3 game, the app crashes and the gamer is unable to proceed with Fallout 3. For gamers, it’s always irritating that the game application doesn’t work when they want to play. Usually, gamers are geeks and get the solutions for the games they wanna play on their systems. Here we will show another solution for them if they get stuck on Fallout 3.
- When the player clicks Play on the Fallout 3 interface, it does not go to the home page and nothing happens after that.
You may also like:
- How To Uninstall Apex Legends?
- How to Fix Edz Obelisk Not Working?
- How to Install Blade and Sorcery Mods Tutorial
